
Easy to Make Textured Artwork for a Home
The latest craze for art is textured art, and it is one that can be easily copied to make your own personal artwork for a home.
16/12/2022
@1otsofdots
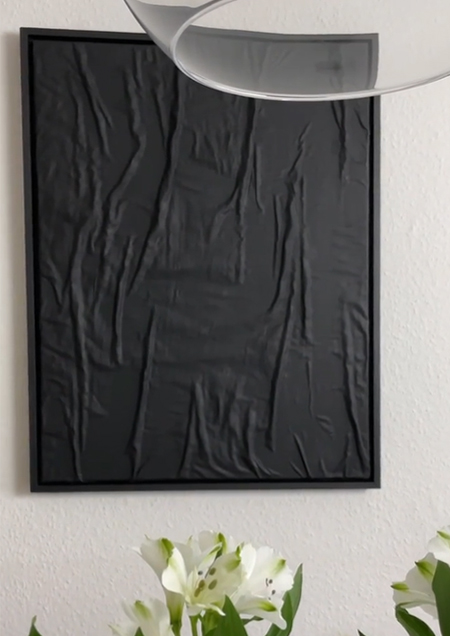
Here is a quick, easy, and affordable way to add a piece of artwork to your walls. Textured art is trending across social media platforms and is surprisingly easy to do, even for those artistically challenged. In fact, anyone with a bit of DIY savvy and a few supplies can easily make this textured art. Go big and make three frames for a triptych collection (continuous image spread over three canvasses).
@1otsofdots
YOU WILL NEED:
Canvas fabric (I use a canvas drop cloth purchased at Builders)
Wood to make the frame (found at Builders)
OR
Stretched canvas on frame
Muslin or lightweight fabric
Wood glue
Bucket or medium container and clean water
Acrylic paint, preferably matt
Paintbrushes
Heavy-duty stapler or air stapler
HERE'S HOW:
Step 1
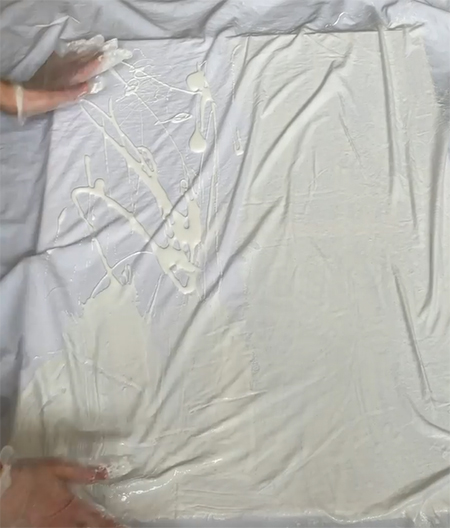
In a bucket or container, mix the wood glue and water in a 50/50 proportion. Place the muslin or lightweight fabric inside the bucket and swirl it around in the liquid until fully wet. Squeeze out any excess.
Step 2
Place your canvas fabric or framed canvas face up on a work surface covered with newspaper or a drop cloth. If you are mounting the canvas onto a frame you have made, click here for 'how to' instructions. Position the fabric over the picture frame so that it hangs over all the sides. You will need extra fabric around the edges to fasten the covering to the back of the frame once you are finished.
@1otsofdots
Step 3
Pour undiluted wood glue over the fabric. This will stiffen when dry and give the textured effect required for this piece. Use your hands to spread this over the surface of the fabric.
Step 4
Using your fingers, lift the fabric up to create the textured - raised - pattern that you want. This is where you can play around with different designs by lifting, moving the fabric around and smoothing away any unwanted wrinkles. You have about 30 minutes before the glue will start to harden. Allow the fabric to set hard overnight in a cool, dry place.
@1otsofdots
Step 5
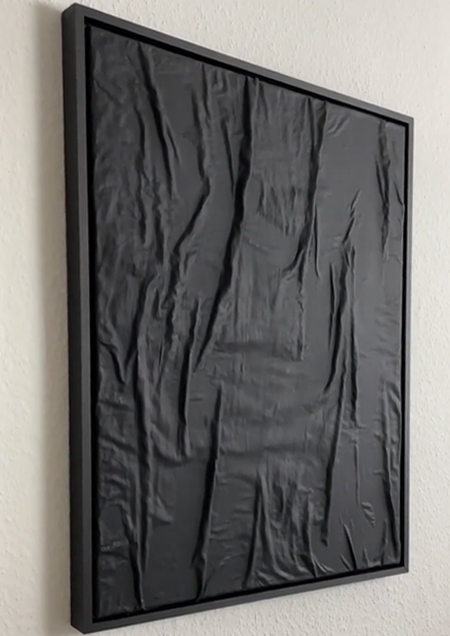
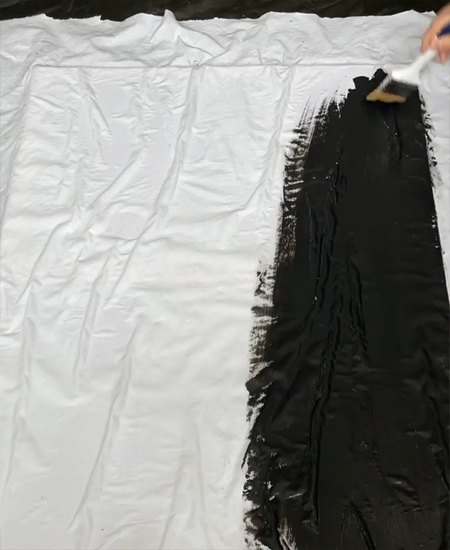
Using undiluted acrylic paint, apply a liberal layer over the surface of the fabric with a paintbrush and use light strokes, making sure to fully cover. One coat should be sufficient, but should you want to apply a second coat, let the first coat dry completely. Allow the paint to dry overnight.
Step 6
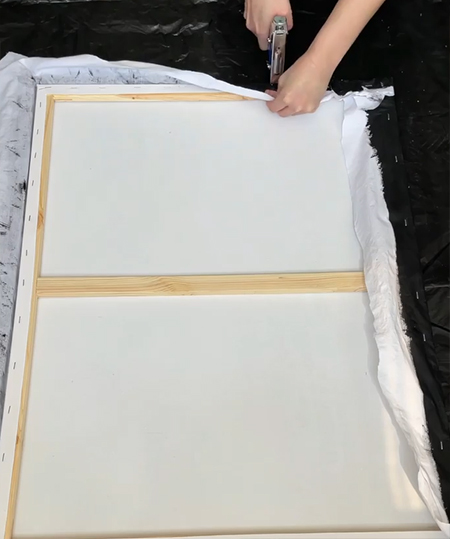
Starting on one side -and folding over the fabric along the edge - secure the fabric to the back of the frame using a heavy-duty stapler. Move to the opposite side, pulling the fabric as taut as possible and securing in the same way. Repeat this for the other two sides. If you don't fold under the ends of the fabric, trim away any excess with sharp scissors.
@1otsofdots
FRAMING: