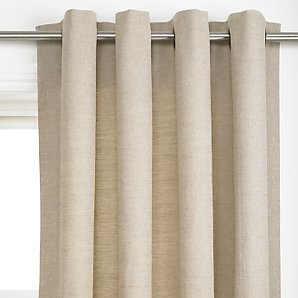
Make Eyelet Curtains
If you're thinking of investing in some new curtains, it's definitely worth considering making them yourself. Apart from saving money, you also gain greater control and choice over fabric, shape and size. You won't have to compromise on style or design features either. Eyelet curtains are easy to make.
YOU WILL NEED:
Sewing machine and sewing accessories
Eyelets
Fabric pen
Iron
Fabric for curtains, lining and border
Curtain tape
HERE'S HOW:
1. You should have two pieces of fabric, which are exactly the same size - one for the front of your curtain and one for the lining. Line them up evenly on your work surface. Run a piece of curtain tape along the top of your curtain in between the two fabrics. This will strengthen the area of the curtains that will contain the eyelets.
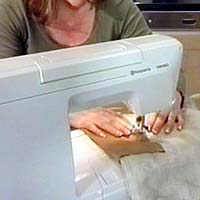
2. Next you need to sew the curtain and lining together. Do this by machine sewing along a line that is parallel to the top of your curtain but 10cm below the rough edge. This stitching will provide a guide for your top border. It will also stop the two materials from sliding around.
3. The finished width of the border is going to be 10cm on either side. However, you need to cut your border material into strips of 25cm to allow room for pinning etc.
4. Place your top border face down onto the curtain fabric. Line up the top edge of the border with your stitched line and pin to secure. Machine-sew it into place.

5. Fold your border over so that the right side is facing upwards and iron along the fold. Then turn the whole curtain on its back and fold the border material over so that it meets the line of stitching on the lining. Make a tiny fold at the bottom of the border before pinning and stitching into place.
6. Iron the full length of the border so that you have a nice straight edge at the top. Repeat this process around the other three edges of your curtain. Now you are ready to create the holes that will house your eyelets.
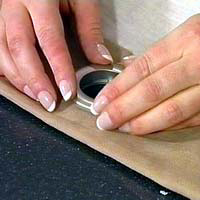
7. On the top of your curtain, measure halfway up the border and draw a small dot with your fabric pen. Most eyelets come closed with a small hole at the top, which you can prize open with a pair of scissors. One half of the eyelet has prongs on the inside and the other has a ridge. Place the ridged half of your eyelet on top of your border so that the dot is right in the centre. Draw around the inside of your eyelet. Make a small fold in the fabric so that you can make your first snip and then cut around the circle.
8. Place the larger, ridged half of the eyelet underneath your new hole and snap the smaller, pronged half on top. Repeat this at regular intervals across the top of your curtain. Your brand new eyelet curtains are now complete and ready to be hung in all their glory.