Pullout Shelf for Kitchen Cupboard
In older kitchens the cupboards don't always provide the storage you need, so why not make your own storage drawers to have easy access and store more.
17/05/2018
familyhandyman.com
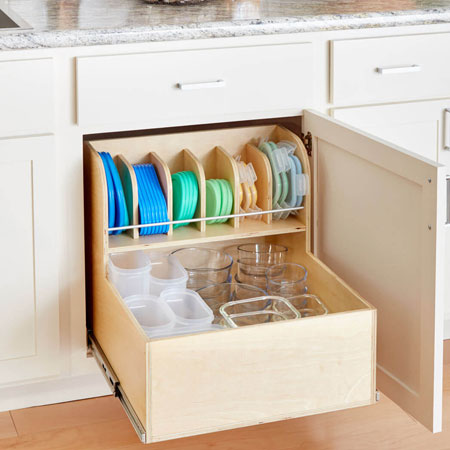
This handy pullout drawer is just the thing for kitchen storage. You can make this design to fit into any size existing kitchen cupboard and use it in so many ways to provide all the storage you need in a kitchen.
YOU WILL NEED:
16mm Pine plywood or SupaWood cut to size
2 Ballbearing drawer runners and 16mm screws - for depth of cupboard
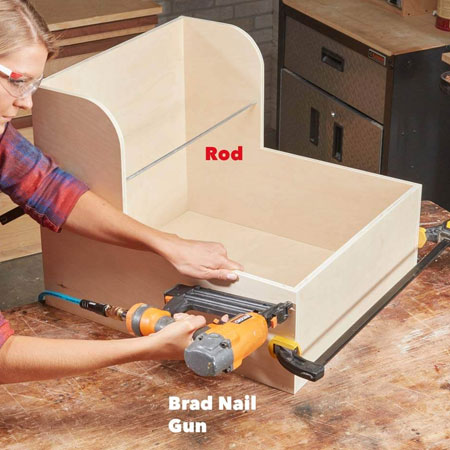
6mm Steel rod
TOOLS:
Drill / Driver plus assorted bits
Orbital Sander plus 180-grit sanding pads
Tape Measure and Pencil

Now you can buy quality at an affordable price. Check out the range of ball bearing drawer runners at www.Gelmar.co.za.
HERE'S HOW:
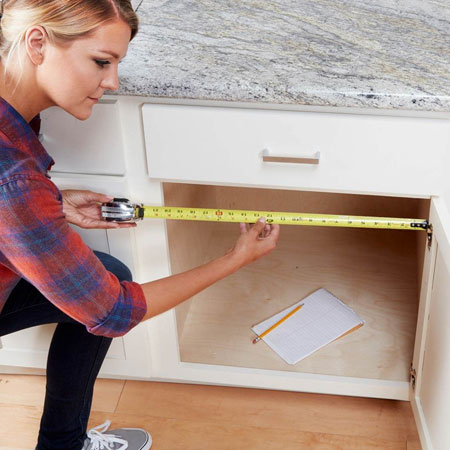
1. Measure up the cupboard. You need to measure the height, width and depth accurately - and make sure that you allow for the cupboard door if this does not open fully. In this instance you will need to mount the carrier to the base of the cupboard to allow enough space to open past the door.
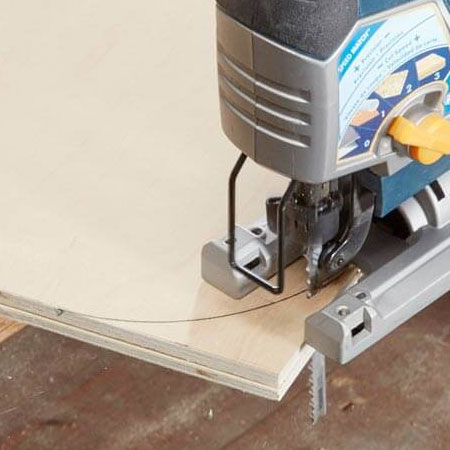
2. Have all your board cut to size for easy assembly and then all you have to do is round off the edges.
GOOD TO KNOW
When cutting plywood use a jigsaw blade with very fine teeth - a steel cutting blade works well - to prevent ripping along the cut edge.
3. Use wood glue and a pneumatic nailer to assemble all the pieces - or hammer and panel pins. Have a couple of long quick clamps handy to hold everything firmly together as you work.
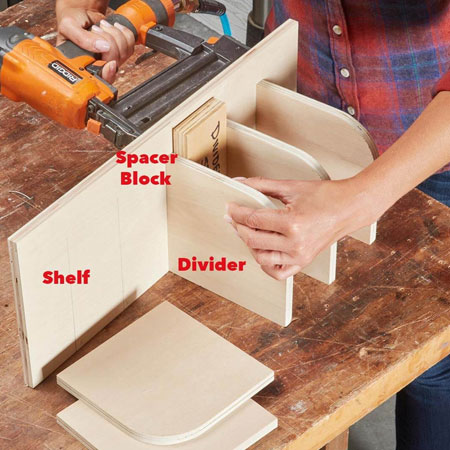
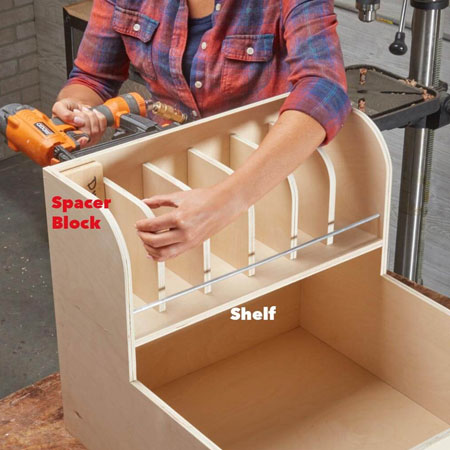
4. You want to space the top dividers equally, so after determining the size you are making the pullout drawer, cut a spacer from scrap board to ensure the dividers are fitted where they need to go.
GOOD TO KNOW
Join all sections with wood glue and use a pneumatic nail gun or hammer and panel pins to assemble.
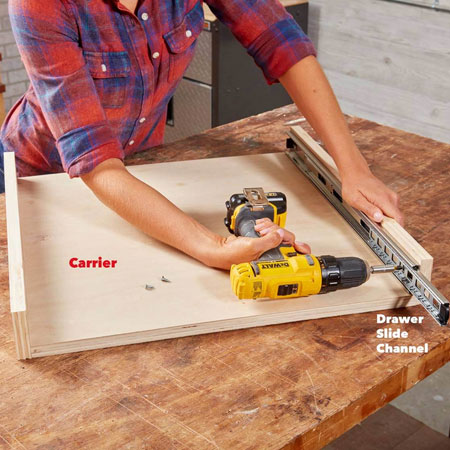
5. Once the drawer is assembled you can add the drawer runner. Split the drawer runner in half - find instructions here for separating the drawer runner - and secure onto the bottom of the shelf unit, flush with the base and lined up flush with the front edge. Make sure the drawer runner is mounted the right way round.

6. Now you can assemble the carrier frame. This frame has been added to make it easier to install the drawer runners, but if you know how to do this, leave out the carrier and modify the unit to be mounted inside the cupboard to the frame.
GOOD TO KNOW
If there are no sides within the cupboard for mounting, include the carrier frame.
7. Secure the other half of the drawer runner onto the carrier frame, making sure that the front/back are in the right position.
GOOD TO KNOW
Don't fit the drawer runner to low as the shelf unit will scrape on the bottom. Use a spacer to lift 3mm up from the base and this will ensure the shelf unit glides in and out smoothly.
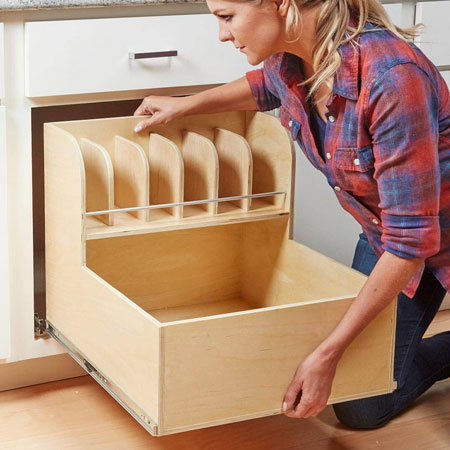
8. Fit the carrier frame inside the cabinet as shown below
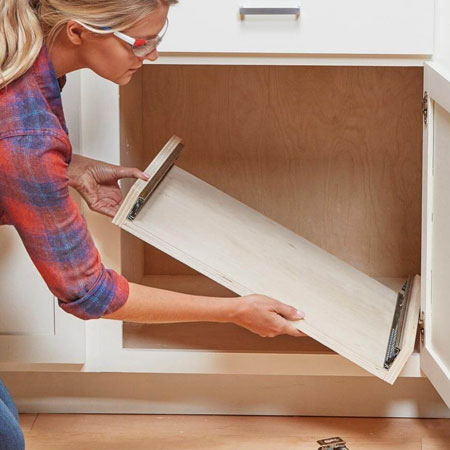
9. Now you're ready to fit the shelf unit. Have someone on hand to help you if you find it difficult to lift and position the shelf unit on your own. Line up the two halves of the runners and push in place to lock together.