
Make This Unique Cutting Board
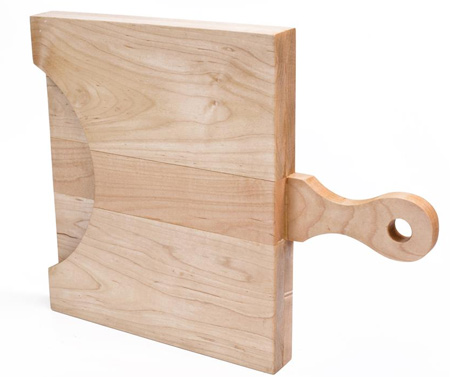
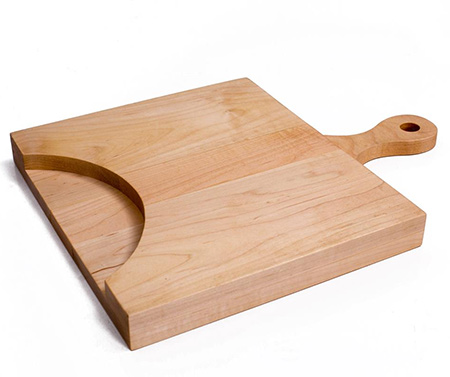
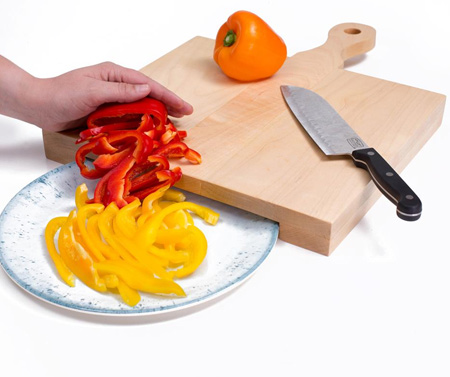
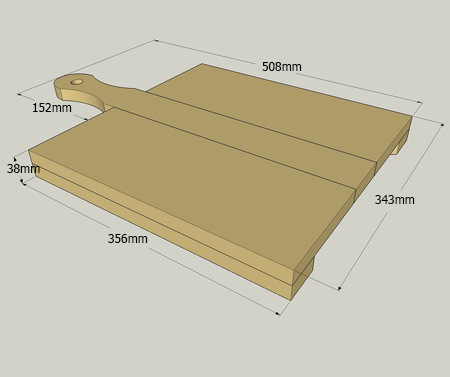
This unique cutting board has a space that allows you to fit a plate underneath the board to catch your chopped veggies, etc.
20/05/2018
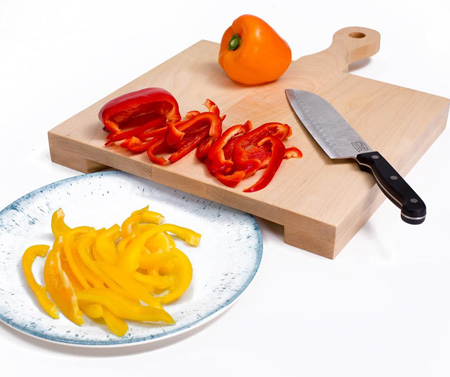
Designed by BuildSomething, this cutting board has a unique feature that allows you to slip a plate underneath the cutting board. You will need to use a Kreg Pocket Hole Jig to make the cutting board, and you will find more information on this product here.
Not something I have seen before, I think this is a nifty idea, as it allows you to transfer your chopped veggies, etc., onto a plate with ease.
If you plan on making this unique cutting board, use Meranti or a hardwood like Teak, to make the cutting board. These woods don't have large pores that trap bacteria, and are easy to work with.
YOU WILL NEED:
4 of 19 x 140 x 356mm - sides
1 of 19 x 64 x 508mm - handle
1 of 19 x 64 x 305mm - bottom centre
32mm coarse-thread pocket-hole screws
Waterproof wood glue
Howard Butcher Block Conditioner and Oil
TOOLS:
Mitre saw or table saw
Jigsaw plus clean-cut blade
19/20mm spade or MAD bit
Kreg Pocket Hole jig
Kreg Clamp
Drill / Driver plus assorted bits
Orbital Sander plus 120- and 180/240-grit sanding pads
Tape Measure and Pencil
You will find a selection of Meranti boards and planks at your local Builders Warehouse.
HERE'S HOW:
1. For the top and bottom sections, cut [4] sides as shown below. Set your jig at 19mm to drill pocket holes along one side of each side section. Sand any rough edges smooth.
GOOD TO KNOW
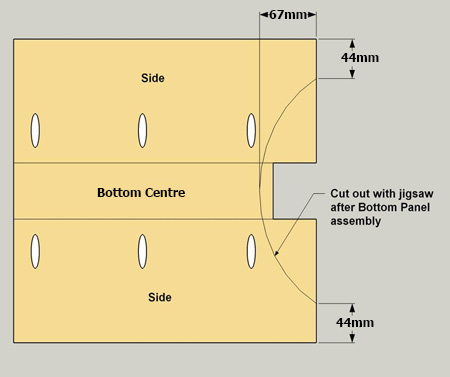
Note the location for the pocket holes on the diagram below, as this ensures the holes are not in the way of the plate cut-out section.
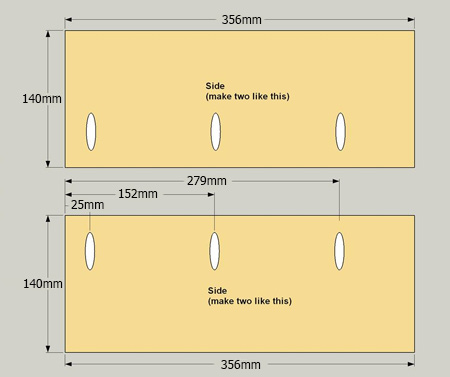
NOTE: Make [4] side pieces then drill pocket-holes to create [2] pairs that are mirror images.
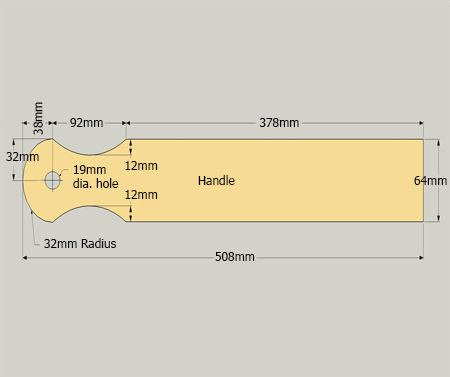
2. Cut out the handle for the top section and the bottom centre for the bottom section. Use the diagram below as a pattern for cutting out the handle with a jigsaw. Use a 19/20mm spade or MAD bit to drill out the centre hole in the handle. Sand the cut edges smooth.
3. To assemble the bottom panel, align [2] sides against the bottom centre and secure with waterproof wood glue and 32mm screws.
GOOD TO KNOW
Clamp the sections to ensure a snug fit. Sand smooth.
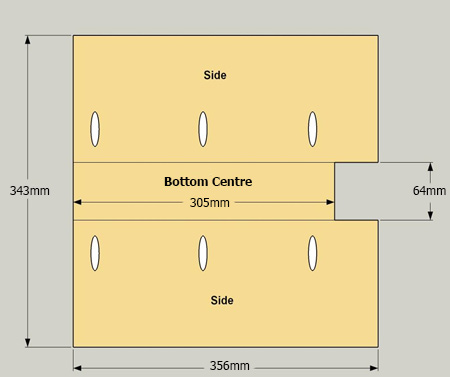
4. Using the diagram below, use a jigsaw to cut out the plate recess in the assembled bottom panel. Sand cut edges smooth.
5. Assemble the top panel by securing the [2] sides onto the handle section. Use waterproof wood glue and 32mm screws to secure. Sand any rough edges smooth.
GOOD TO KNOW
Clamp the pieces to ensure the sides and handle are flush.

6. Apply a layer of waterproof wood glue to join the top and bottom sections. Make sure the two sections are flush around the edges. Secure with clamps until the glue is dry and then sand the edges smooth.
GOOD TO KNOW
Use a sander and 180/240-grit sanding pads to round off all sharp edges.
Finishing
Because this is a cutting or chopping board intended for cutting food, apply a food-grade oil such as Howard Conditioner and Butcher Block oil.
