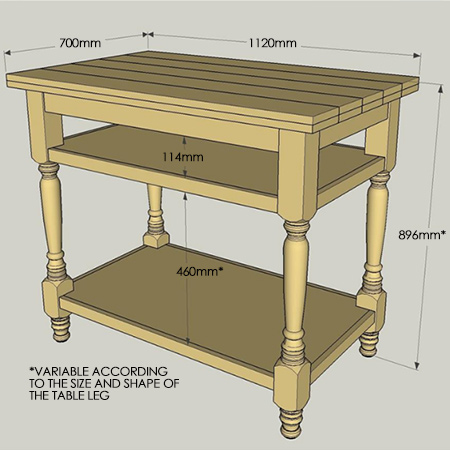
Practical kitchen storage island
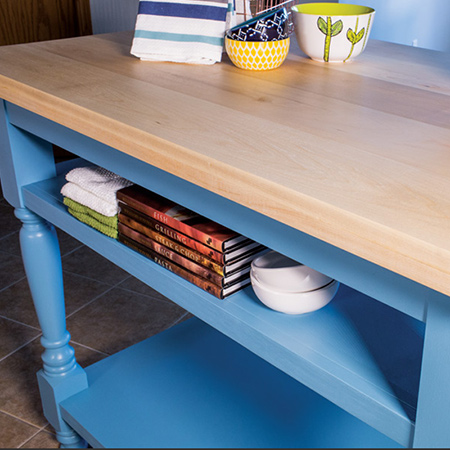
Almost every kitchen could use more countertop space and storage. This freestanding island offers both and is easy to build thanks to bought legs and a clever way to create the extra-thick top.
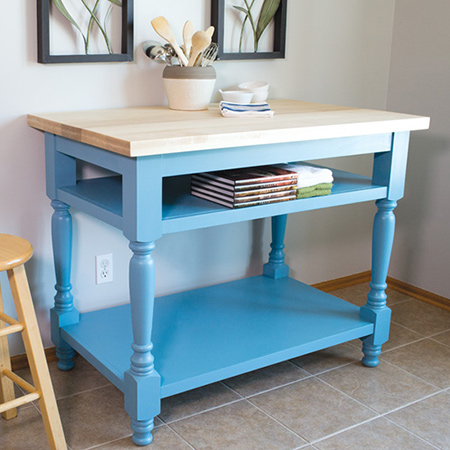
Almost every kitchen could use more countertop space and storage. This freestanding island offers both and is easy to build - thanks to bought legs - and a clever way to create the extra-thick top.
GOOD TO KNOW
Before starting this project, take a look at the leg options available at cabinetfittings.co.za. The dimensions may require some modification to accommodate the legs that you use.
buildsomething.com
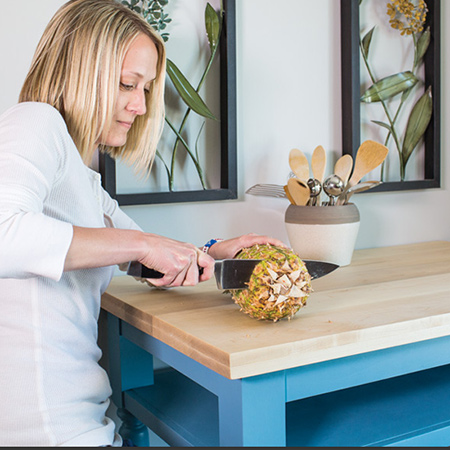
Make the top using 22mm pine that you will find at your local Builders Warehouse or timber merchant. Finish this off with food-grade Howards butchers block oil.
YOU WILL NEED:
2 of 22 x 44 x 464mm pine - end rails
2 of 22 x 44 x 882mm pine - side rails
1 of 22 x 44 x 565mm pine - centre support
2 of 22 x 565 x 984mm pine - shelf
4 of 22 x 44 x 882mm pine - shelf long edge
4 of 22 x 44 362mm pine - shelf short edge
5 of 22 x 140 x 1200mm pine - top
2 of 22 x 44 x 1200mm pine - top long edge (to make table appear thicker)
4 legs - see cabinetfittings.co.za
32mm coarse-thread pockethole screws
Wood glue
TOOLS:
Drill / Driver plus assorted bits
Kreg pockethole jig
Orbital sander plus 120- and 240-grit sanding pads
Tape measure and pencil
Note: Cut all pieces to size on site to adjust for any difference and size/shape of legs.
HERE'S HOW:
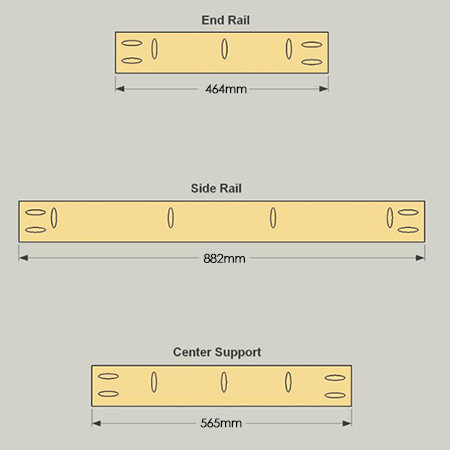
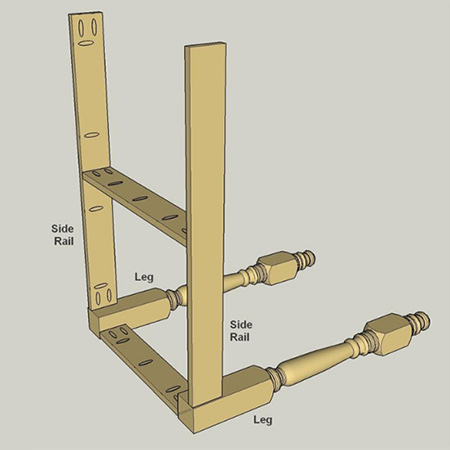
1. Cut [2] end rails, [2] side rails, and [1] centre support to length as shown in the cutting diagram. Drill pocketholes in the rails and the support, as shown.
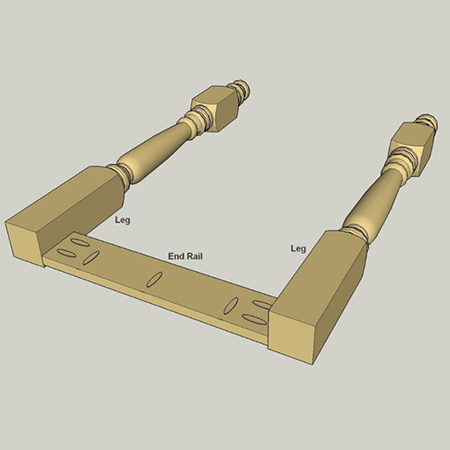
2. Secure the end rails to the legs with pocket hole screws. The end rails are inset 5mm from the outer face of the legs.
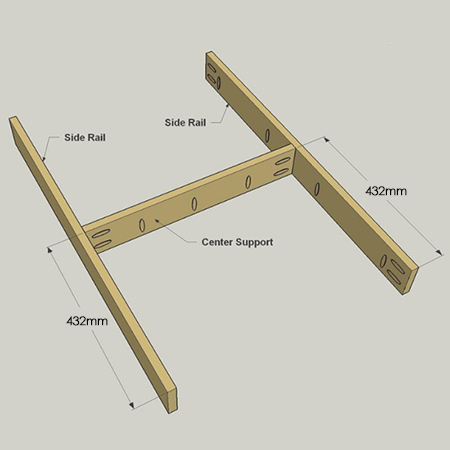
3. Attach the centre support to the side rails with fine-thread pocket hole screws. Place the pocketholes along the edges so that they are all facing in the same direction.
4. Cut [2] shelves to size. Cut rebates at each corner using a jigsaw for mounting to the legs. Drill pocketholes in the shelves as shown below.
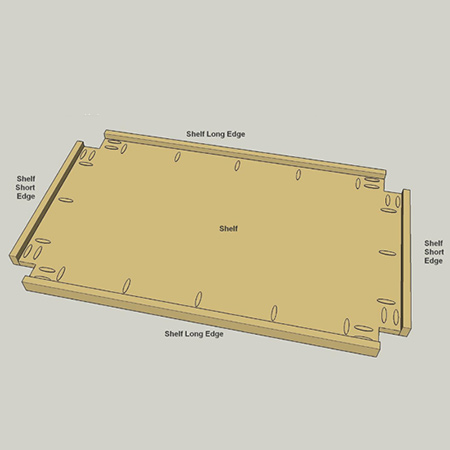
5. Cut [2] shelf long edges and [2] shelf short edges to length as shown in the cutting diagram. Attach these to the edges to each shelf using fine-thread pockethole screws.
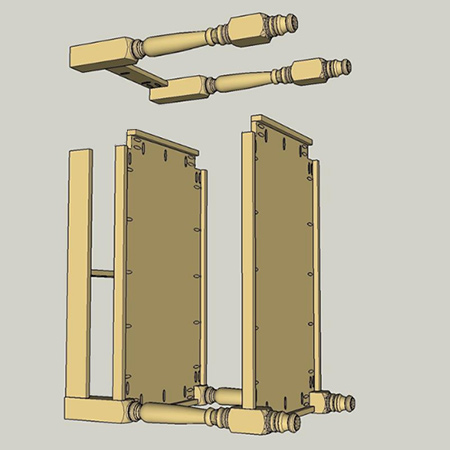
6. Secure the rail / support assembly to one set of legs using fine-thread pocket hole screws.
7. Attach the assembled shelves to the same legs using pockethole screws. Make sure the shelves are properly spaced before securing.
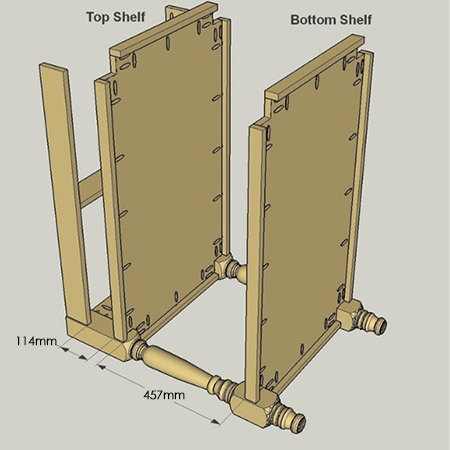
8. Repeat for the remaining legs. Double check the shelf spacing before you drive in the screws to ensure that the shelves sit level.
The island top looks like it’s made from thick boards, but it’s actually all made from 22mm pine. You’ll start by making an extra-long panel (top long edge), then cut off the ends and attaching these cut-offs underneath, in conjunction with long edge boards, to create this unique look.
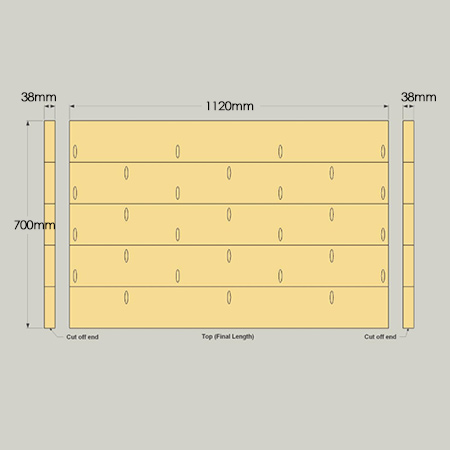
9. Cut [5] Top Boards as indicated in the cutting list. These longer than the final length of the top. Drill pocketholes in each board, as shown, allowing a gap for trimming the ends once glued together. Use wood glue and pockethole screws to secure all the boards together.
GOOD TO KNOW
Spread wood glue along the board edges all the way to the ends. After the glue sets, trim 38mm off each end. A circular saw with an edge guide works great for doing this.
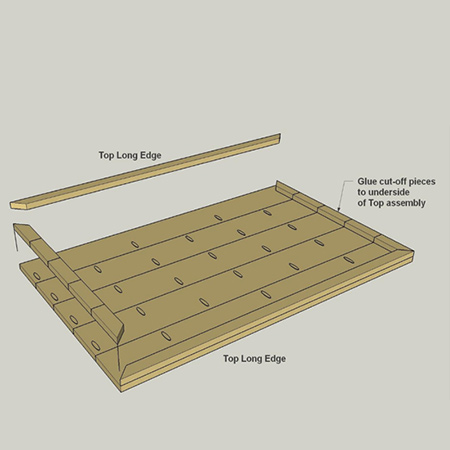
10. Add the sections to the bottom of the top panel to create a top that looks thicker. Cut [2] long strips and mitre the end of each piece at a 45-degree angle, plus the off-cuts left from cutting the top. Make sure you cut the mitre angles correctly to fit. Glue them in place, wiping away any glue that oozes out. Clamp overnight and then attach to the bottom frame.
GOOD TO KNOW
When attaching the top is helps to use a right-angle attachment for your drill / drill to use in tight spaces.
Finishing
If you plan to paint the base, do that before attaching the top. Use a wood primer to seal the wood and then apply a washable paint to finish off. Use a food-safe finish on the top. Linseed oil or butcher-block finish works great. You can buy a selection of conditioners and oils for a butcher block.
YOU MAY ALSO LIKE: