
How to give a kitchen a new look
There are plenty of ways to update or give a kitchen a new look without hiring a contractor or handyman to do the work for you.

Take a look at this 70s style kitchen with its dark-brown veneered cabinets, exposed brick and a dated vinyl floor. It's possible to inject new life into this aging hipster with minimal mess and fuss - and it won't cost that much either.
It helped that we had well-maintained tiles and grout to work with, decent cabinet hardware and a classic (and still functional) U-shaped layout that offered plenty of natural light above the sink and easy access to cabinets.
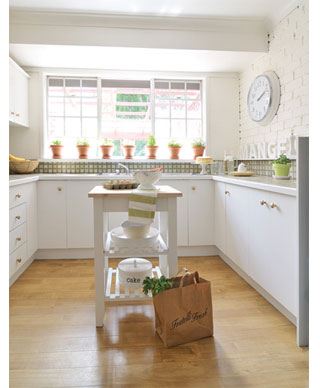
Once finished, this project shows you how easy it is to completely transform a kitchen - on a limited budget and in a couple of weekends.
In this feature you will see how to repair and paint cabinet cases and doors, as well as paint timber trim and face brick wall.
This project also includes replacing the original vinyl flooring with new vinyl with a simulated plank design.
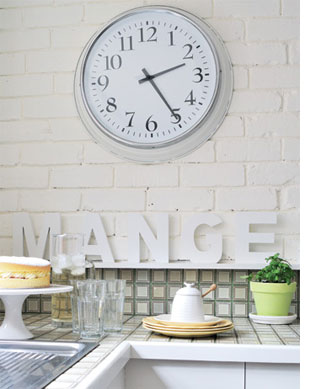
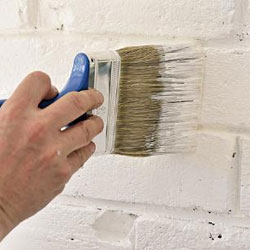
Apart from painting the kitchen cabinets, painting the face brick wall with a coat of fresh, white paint makes a big difference in the dated kitchen.
Before starting to paint we needed to think about steps to keep the tiles and windows clean. The floor was covered with a canvas drop cloth and masking tape applied around all edges that were not being painted.
LEFT: The wood shelf was removed so the dark brick wall could be painted in a white acrylic sheen/gloss paint.
Preparation
Proper preparation before you start actually makes painting easier and ensures a professional project. Wash the surfaces with sugar soap, rinse and then let them dry.
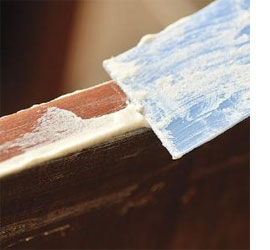
After removing all the hardware, we patched up damaged areas with wood filler and, once dry, sanded out imperfections on the doors and cabinet sides with 180-grit sandpaper.
Wall dings and dents were fixed with interior Polyfilla. Universal primer was used to seal the porous unglazed brick. After it dried, we applied acrylic paint.
Painting
We painted the edges of the cabinet doors, drawer surfaces and existing countertop edge with two coats of water-based enamel, lightly sanding between coats with 180-grit sandpaper.
The walls were painted with satin or low sheen acrylic paint for a finish that is washable and practical for a kitchen.
Lay the New Floor
As a cost-effectively solution for the floor we chose flexible, vinyl flooring printed with a faux wood design. If the existing vinyl is still in good condition and adhered to the floor, you can simply apply the new vinyl over the top using contact adhesive.
This easy-to-find flooring comes in a wide range of colours, patterns and sizes and can be found at your local Builders Warehouse. When we calculated how much flooring we needed and added 10 percent to account for any waste.
It's a good idea to let the vinyl flooring acclimatise for 48 hours before installing and always follow the manufacturer's instructions for how long you should stay off the floor before installing appliances or furniture.
Installing vinyl flooring is quick and easy. In this method we use double-sided carpet tape rather than contact adhesive.
You will need:
Craft knife
Putty knife or round edged knife
Hammer
Tape measure
Steel straightedge
Carpet tape
Here’s how:
1. Affix carpet tape on edge of flooring on all walls.
2. Position the vinyl flooring in the area and align the
patterns with the wall, identifying the location of the
seam. Any seams should be located as far away as
possible from door openings or high traffic areas.
3. Remove excess material, leaving a 5cm edge all around.
Make small cuts at the corners and projections to allow
the material to lay flat before the final cuts are made.
4. After any patterns are aligned, cut in with a utility knife
leaving a 5mm gap for expansion or contraction.
5. Starting on the wall furthest from any opening, fold the
vinyl back and remove the paper covering from the top
of the tape. Press the vinyl onto the tape.
6. Work backwards from this wall, folding and fixing vinyl to
tape as you move along.
7. Where there are any seams, lay one section of the vinyl
flooring on top of the other, align the patterns and place
a steel straightedge at the designated match point. Hold
the straightedge secure and cut through both thicknesses
at the same time with a utility knife. Take care to keep the
knife upright so that the edges may be seamed correctly.
8. Position carpet tape on the underside of the second
section but do not remove the covering from tape. Ensure
that the pattern is lined up before removing the tape and
affixing to the floor.
9. Before replacing trim or skirtings, apply a thin bead of
silicone sealer to any exposed edges, particularly next
to bathtubs, showers or wash basin areas. Apply a thin
bead of silicone sealant to seams. Excess sealant can be
removed with a cloth dampened with mineral spirits.