
3 Day kitchen revamp
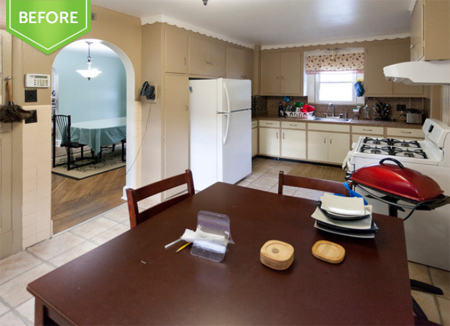
Hard to believe that this kitchen renovation only took three days from start to finish. With clever planning and a clear idea of what you want to do, any kitchen renovation can be done painlessly and without too much disruption.
Here's how this 3-day kitchen transformation turned an average kitchen into a dream kitchen...
While you might not be able to achieve your dream kitchen in 3 days, this amazing renovation shows that it can be done, and that included knocking down walls!
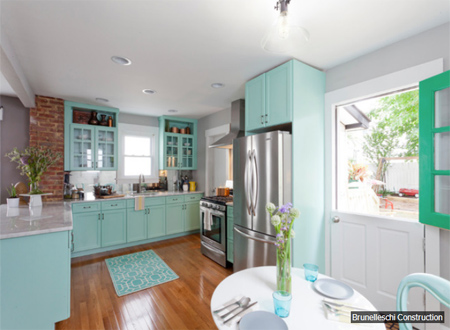
It isn't always necessary to replace existing cabinets that are still in good condition. You can buy - or make - kitchen cabinet doors and then paint them in your choice of colour. This kitchen remodel is done in shades of light teal and white for a look that is both modern and fresh. You will find plenty of tips, tricks and techniques for painting kitchen cabinets in our Kitchen section.


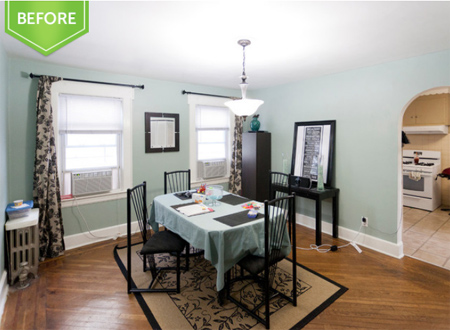
The wall* between the kitchen and the dining room was demolished and replaced with a kitchen island to open up the space and provide more countertop area.
*Note: The wall in this kitchen was a drywall installation. If you plan to knock down a brick wall, check first to ensure that it's not a load-bearing wall. Where a load-bearing wall needs to be removed, a concrete, steel or laminated beam needs to be installed, and this is best left to a professional contractor unless you have previous experience in this type of construction.
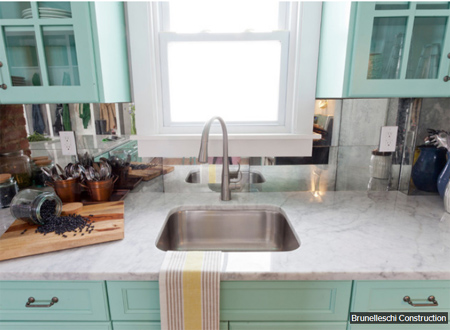
A mirrored-backsplash blends together modern and traditional finishes in the kitchen. You will find mirrored mosaic tiles at your local Builders Warehouse and applying mosaic tiles is as easy as 1... 2... 3...
1. Apply a layer of tile adhesive to the wall using a notched trowel. The adhesive doesn't need to be applied too thickly - just enough to bed the mosaic tiles sheets without squishing out all over the place!
2. Remove the backing sheet from the mosaic tiles and place the tiles onto the tile adhesive. If the tiles have a protective sheet on the front - leave this on, as it prevents the tiles from scratching during the installation. You will only remove this just before grouting.
3. Let the adhesive dry for the specified amount of time and then apply grout over the top using a grout float or high-density foam sponge. Leave for an hour and then use a damp soft sponge to wipe away excess grout.
If you need to replace old kitchen countertops there are plenty of options to consider, and you will find ideas and inspiration in our Kitchen Improvements section.
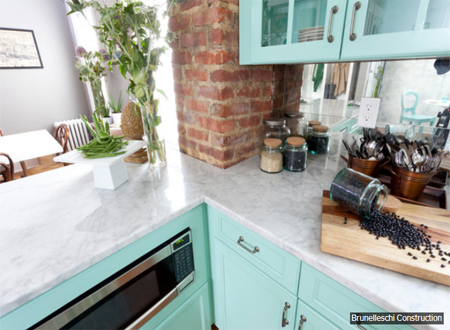
An interesting feature that was added to the new kitchen was to expose some of the brickwork. Not only does this save on re-plastering, it adds to the modern-traditional look of the finished kitchen.

As part of the remodel, the wall between the dining room and kitchen was removed. This creates a large, open plan design that is filled with light and opens up the previously small kitchen area.
houzz.com
Not all kitchen remodels have to take weeks or months if you plan well before you start. Draw up a plan of action of what needs to be done first to last, and what tools, materials and supplies you will need along the way.