
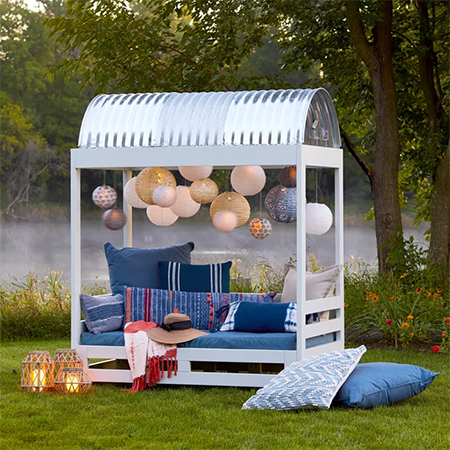
Weekend Project: Easy DIY Cabana with Seating
If you have some spare time over the weekend, pop into your nearest Builders store to grab supplies to make this easy DIY cabana and seating for your garden.
19/11/2022
blaine moats
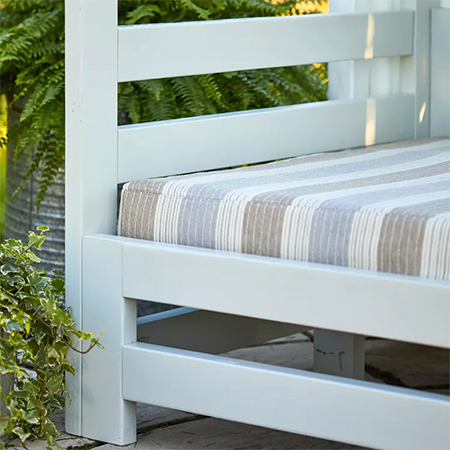
In this weekend project, you can make an easy DIY cabana solution with built-in seating. It is perfect for a shady seating spot in the garden, and you can add as many cushions as you like in your favourite patterns or colours. Everything you need to assemble this DIY cabana can be found at your nearest Builders store and you can even have all the timber cut to size for easy assembly.
Gather your tools, materials and supplies and set aside a weekend to make the perfect relaxation spot in a quiet corner of the garden.
YOU WILL NEED:
2 of 22 x 144 x 1372 - Front panel top/bottom [A]
1 of 22 x 144 x 100 - Front centre support [B]
2 of 50 x 72 x 432 -
Front panel support [C]
8 of 22 x 144 x 780mm - Side rail [D]
2 of 22 x 220 x 780mm - Side rail top [E]
4 of 50 x 76 x 1800mm - Upright [F]
8 of 22 x 144 x 648 - Back rails [G]
3 of 50 x 76 x 864mm - Back uprights [H]
2 of 22 x 220 x 1525mm - Long back rail, top [I]
2 of 32 x 69 x 1525mm - Long roof support [J]
2 x 32 x 69 x 780mm - Short roof support [Ja] - optional for flat roof option
5 of 22 x 144 x 832mm - Seat slats (K) - cut onsite to fit
5 of 50 x 76 x 292mm - Slat supports [L] - adjust this height for seat cushion
2 of 50 x 76 x 1442mm - seat slat support
Exterior wood glue
Wood filler
63mm pocket hole screws, coarse thread
65mm cut screws
75mm cut screws
100mm cut screws
Wooden plugs - or cut your own using a Kreg Plug Cutter
Nylon strapping
Roof material and galvanised or steel fastenings
TOOLS:
Drill plus assorted bits
Countersink bit
Kreg pocket hole jig
OPTIONAL: Kreg Plug Cutter
Clamps
Orbital sander plus assorted sanding pads
Heavy-duty stapler
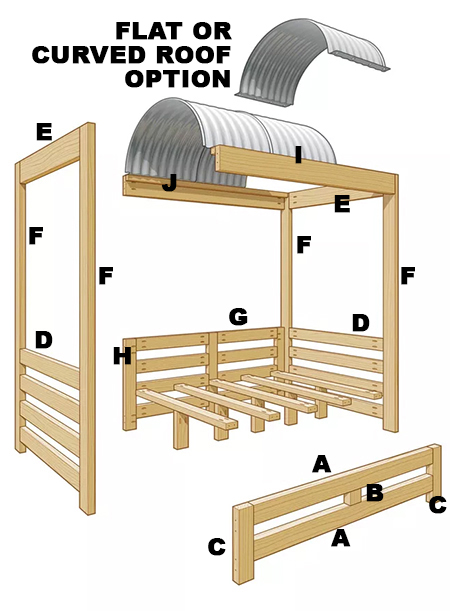
NOTE: The diagram differs slightly from the finished design shown at the top of this page due to availability of substituted materials. I have modified the plan to allow for standard PAR pine that can be purchased at Builders or timber merchants.
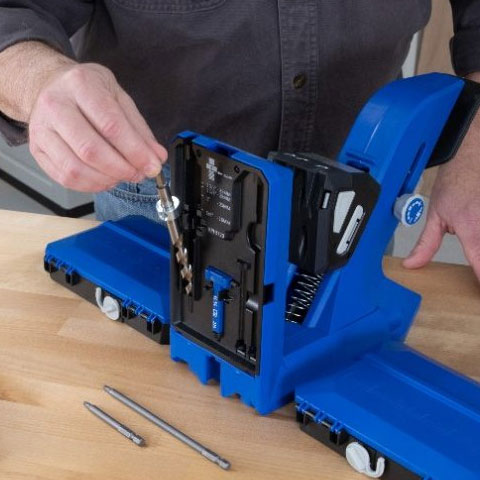
For those who haven't yet invested in a Kreg Pocket-Hole Jig, Kreg introduce the 520PRO, 720 and 720PRO models with all-new design and features.
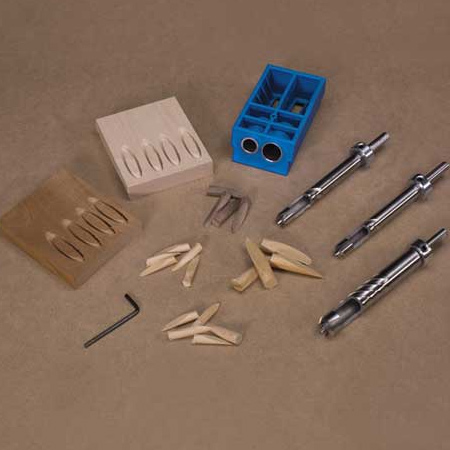
The Kreg Plug Cutter allows you to create face grain plugs that blend in amazingly well, whether the plugs are in line with the grain, or run across the grain. These face grain plugs are easier to hide than conventional plugs that have visible end-grain.
HERE'S HOW:
Preparation
This project is specifically designed for using a Kreg Pocket Hole Jig for all the assembly. Have all the timber cut to size at your local Builders or cut it yourself using the cut list above. Drill [2] sets of pocket holes at the end of all the slats for sections [A] [B] [D] [E],and [I]. All the pocket holes should be drilled on the sides that will face the interior of the finished cabana. If you wish, you can fill these with plugs later on for a professional finish.
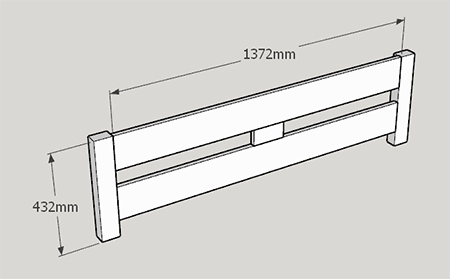
Assemble Front Panel - [A] [B] [C]
As per the diagram above, used wood glue and pocket hole screws to secure the rails [A] to the uprights [C]. Before securing the top rail in place, insert the spacer [B] and secure to the bottom rail and then to the top rail once installed.
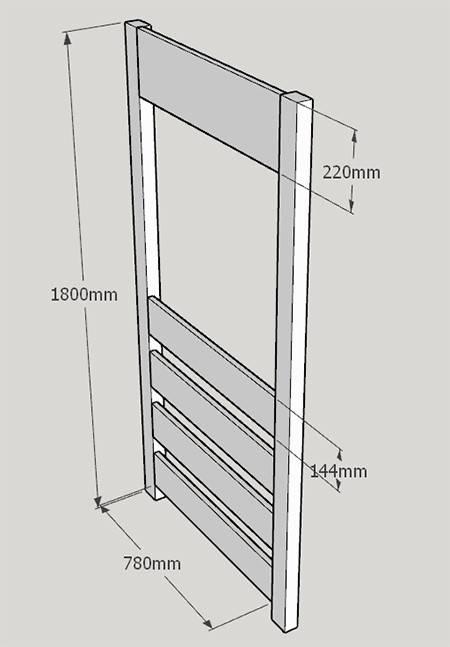
Assemble Side Panels - [D] [E] [F]
On all [4] uprights [F], measure and mark a line 72mm up from the bottom. This mark indicates where to secure the first lower side rail [D]. Secure this using exterior wood glue and pocket hole screws. Continue adding the remaining lower side rails in the same way, with a spacing of 72mm between each slat.
Secure the side rail top [E] apron between the uprights, checking that all edges are flush. Repeat the process to assemble the second side panel.
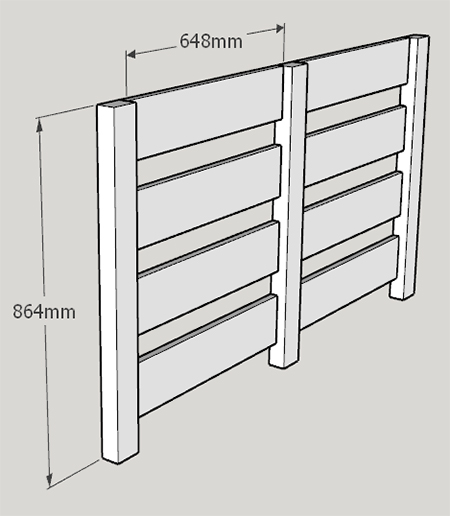
Assemble Back Panel - [G] [H]
On all [3] uprights [H], measure and mark a line 72mm up from the bottom. This mark indicates where to secure the first back rail. Secure this using exterior wood glue and pocket hole screws. Continue adding the remaining rails in the same way, with a spacing of 72mm between each slat. Make sure the rails are flush at the back and that pocket holes are on the outside.
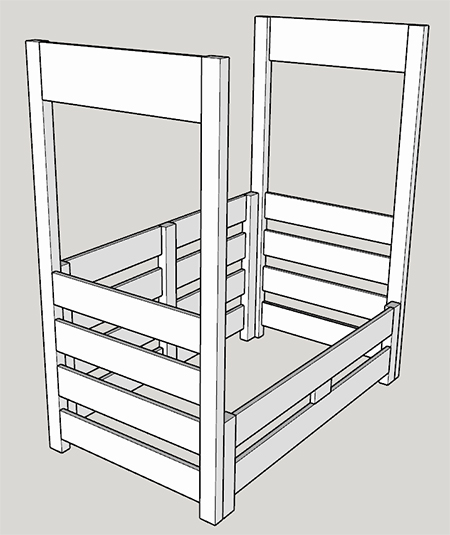
Assemble the Cabana Frame
With all four panels completed, you can assemble these to complete the frame. For this step, you will not be using a pocket hole jig since all the uprights are secured against each other. Pre-dill countersunk pilot holes through from the outside and use exterior wood glue and 75mm cut screws to secure.
You should now have four completed cabana panels. To begin assembling them into one unit, clamp the front panel to your work surface, and then clamp one of the side panels to the front panel, making sure the bottom of the assembly is flush. Using the existing pocket holes from Step 1, glue and screw them together. Repeat the process on the opposite side with the remaining side panel.
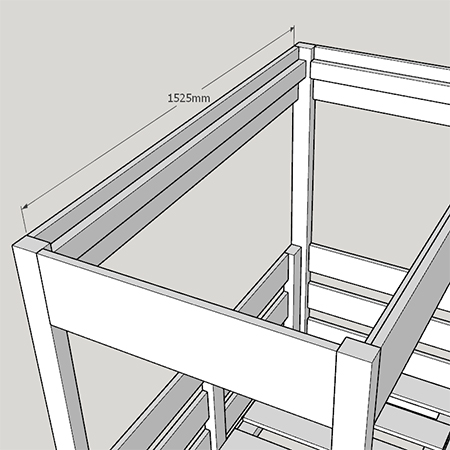
Attach Back Rails to Top - [I]
Use wood glue and pocket hole screws to attach the front and back top rails onto the frame sides. Ensure that the edges are flush on the outside.
NOTE: For a curved roof as shown for this project, secure the roof supports [J] 50mm down from the top on both long rails. If you are adding a flat roof, add [2] shorter roof supports [Ja] for additional support. The supports are glued and screwed directly onto the inside of the long rails.
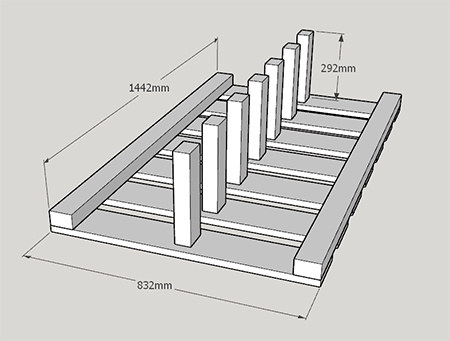
Assemble The Seat
Drill [1] pocket hole on both sides of the seat support at the top. Mark the centre location on each seat slat and then secure the seat supports on this mark using wood glue and pocket hole screws. NOTE: While not shown here, you can add extra support to the structure with [2] seat supports along the length of each seat slat.
With the assembly face down, secure the seat slat supports down both edges using wood glue and 65mm cut screws.
To secure the seat assembly to the cabana frame, drill through the seat slat support into the uprights in the frame using 100mm screws.
Sand and Finishing
To disguise pocket holes, you can use pre-bought wood plugs or use a Kreg Plug Cutter to make your own plugs. Use wood glue to secure the plugs.
Sand the entire assembly with 120-grit sanding pads to remove any uneven edges or loose splinters and then finish with 180 or 220-grit sanding pads to prepare for finishing with stain /sealer, varnish, or paint.

Secure Seat Strapping
Once the finish has dried, you can start attaching the strapping along the seat slats. Fold underneath the edges and staple to the underside before pulling taut from one end to the other and, once again, stapling underneath. Repeat this to complete [10] straps.
Make Seat Cushion
Using outdoor fabric, sew a box cushion cover for the foam cushion. Add a zipper if desired so you can remove and launder the cover.
Secure the roofing material
Whatever your choice of roofing material, whether IBR or polycarbonate, ensure this is well fastened down with roofing screws or steel brackets.