
Make a Net Frame to Protect Fruit Trees
When fruit trees start to bloom the birds can't wait to attack the fruit and this net frame will protect the fruit from harm and from fruit thieves!
15/09/2022

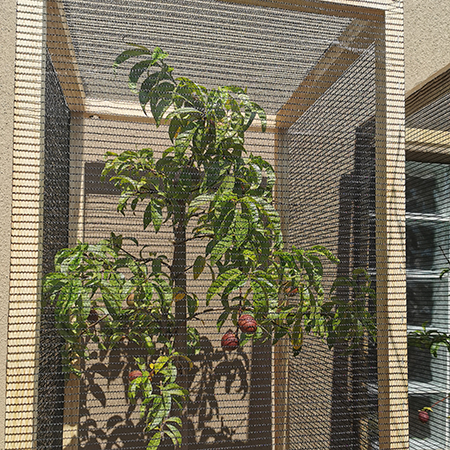
Three years back, I did a post on how you can grow fruit trees in a garden and even a small garden and how the project was successful. My nectarine trees have been filled with fruit for the past 3 years, but I have had a problem with birds pecking at the fruit until all that is left is the pip! I don't plan to let the fruit trees get too big and will keep them pruned to a reasonably small shape but need something to keep the birds away. Last year, I tried wrapping sheet net fabric over the trees, but the wind kept blowing it away so this year I decided to have a frame made that would fit around the trees to protect the fruit.
To make the frame we used PAR pine 38 x 38mm x 3.6 metres. You can pick this up for around R40 per length, so not that expensive. We also used some scrap pine for the support cross pieces, or you can also buy what you need to make the frames. After that, all you need is some 40% shade net to fasten around the frames. Here's how to make a net frame for your fruit trees.
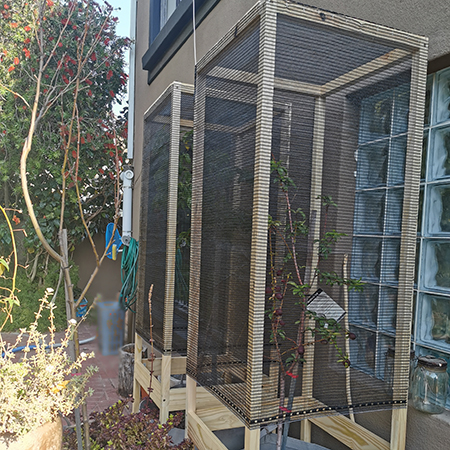
Before you go shopping for the items that you need, determine the size of the frames that you want to make. You can make these frames for larger fruit trees with a simple modification. If birds or wildlife are damaging other crops, you can also make a smaller frame to fit over these and protect them.
YOU WILL NEED:
38 x 38mm PAR pine
21 x 67mm PAR pine or scrap wood
5 x 60mm cut screws
Wood glue, waterproof
Shade net, ours is 40% shade
TOOLS:
Drill plus assorted bits
Heavy-duty stapler or pneumatic air stapler
Scissors
Tape measure and pencil
HERE'S HOW:
Making the frame is probably one of the easiest projects you can do. You need cross pieces at the top of the frame and then about three-quarters of the way down. I designed the frame so that it can be freestanding or placed into soil, although, if you do place the legs in soil, make sure to protect them or they will just rot.
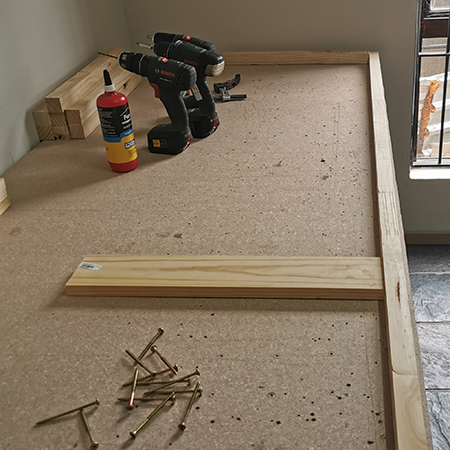
Step 1
Assemble the frame by securing the top cross pieces first. These are glued and screwed at the top of each leg. If you make each section separately, you can join all the sections together to complete the frame assembly.
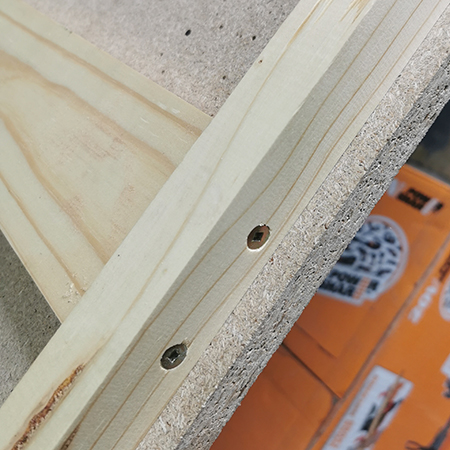
Step 2
Use wood glue and 2 screws to secure the lower cross pieces in place. It is better to have a wider piece of wood for this as it will give the frame much-needed support.
Step 3
With the wood frame complete, you can start wrapping the shade cloth around. On my frames, we only wrapped three sides and left the back open since it would be almost against the wall. We also didn't take the shade cloth down to the bottom of the frame as birds will not go underneath. A separate piece of shade net was secured on top of the frame. DO fold the ends of the shade cloth over when stapling the ends.
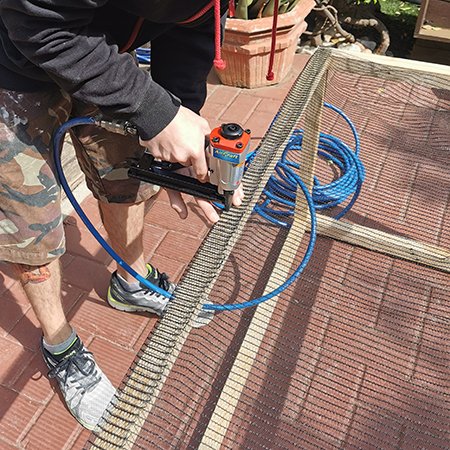
After securing the shade net in place with staples, the frame is good to go.
