
How to Make Custom Solar Lights for a Garden
The selection is pretty limited in choice for outdoor solar lights but you can easily make your own custom solar lights for a garden with the instructions below.
05/08/2023
allaboutdiy.com
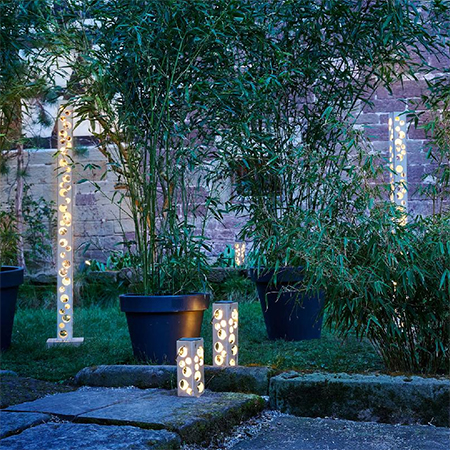
Solar lights are wonderful for adding a touch of magic to light up the garden, Most are not very practical and shed only a small amount of light on an equally small area, but they do let you create something visual in the garden when evening starts to fall. The only problem here is that our supply of solar light designs offers very little in the way of aesthetics. But there is hope. An inexpensive set of fairy lights - of a quality brand preferably - can be used to add a touch of magic to your outdoor space.
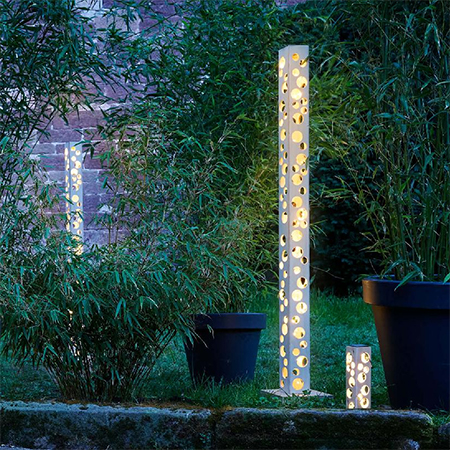
Home-Dzine has previously featured a DIY battery-operated set of standing lights, but we haven't done one that is as easy as this one. This custom solar light fitting can be installed outdoors in the garden, on a deck or patio, or be used to create a decorative feature for the garden at night. For a long-lasting option, you should use marine plywood and apply an exterior sealer but you could also use a cheaper pine plywood but would have to apply the exterior sealer more frequently as standard plywood cannot be left outdoors.
YOU WILL NEED:
1 of 6 x 600 x 1200 sheet of marine plywood
- Cut to 71 x 1200mm for the tall panels and for the bottom of the lamp
1 of 38 x 150 x 150 wooden block for the base
1 of M6 nut and bolt
Wood glue, waterproof
Sandpaper, 120-grit
Solar-powered LED light - a decent set of solar fairy lights will work
Masking tape
TOOLS:
Drill plus assorted drill and driver bits
Spade or MAD bits 25mm and 40mm
Jigsaw plus clean-cut jigsaw blade and circular saw
Multi sander plus 120-grit sanding pads
Clamps
Tape measure and pencil
Safety gear
HERE'S HOW:
Preparation
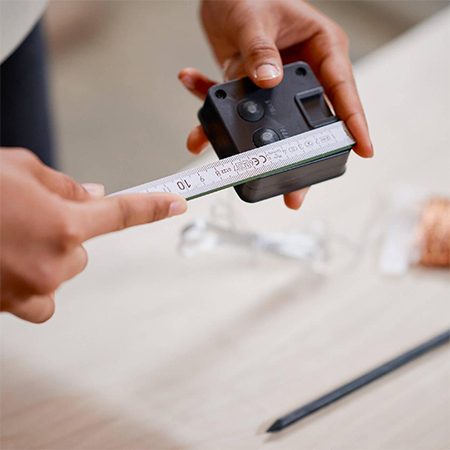
In order to determine the width of the wood panels that make up the light feature, you need to measure the solar panel and accommodate this in the calculations. Once you have the size, you can have all the panels cut at Builders for the tall or short solar lamp.
Step 1 - Cut the panels
If you prefer to cut the panels yourself rather than have them cut at Builders, DO invest in a Kreg Circular Saw Rip Cut Guide to make the process easy and smooth. The Kreg Circular Saw Rip Cut Guide is available at Builders and is an excellent addition to any DIY, woodworking, or workshop where you need to cut or rip large boards into smaller sizes. Watch the video below to see for yourself how easy it is to use this tool.
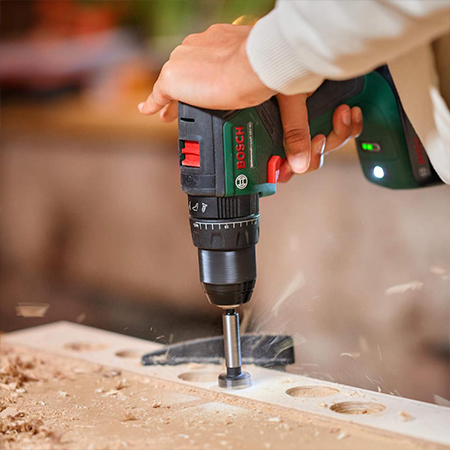
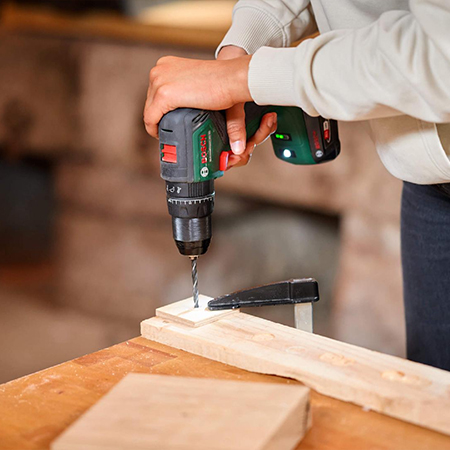
Step 2 - Drill the holes in the panels
To drill the decorative holes in the panels, you will need a 25mm and 40mm spade, MAD bit, or Forstner bit. Have a piece of scrap wood on hand that you can place underneath the individual panels as you drill the holes, as this will prevent any ripping around the exit hole. DO clamp each panel firmly at both ends when drilling the holes.
Always have a piece of scrap wood under the panels before drilling the holes. This will prevent the veneer from breaking free and damaging your project.
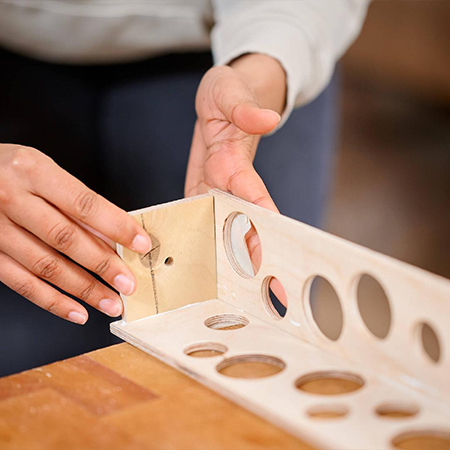
Step 3 - Bottom of the lamp
Cut a piece of wood to fit under the inside bottom of the lamp. This should be the same size as the solar light panel plus 1mm to make sure that it is a tight fit in the base of the lamp. Drill a 6mm hole through the centre of the wooden block
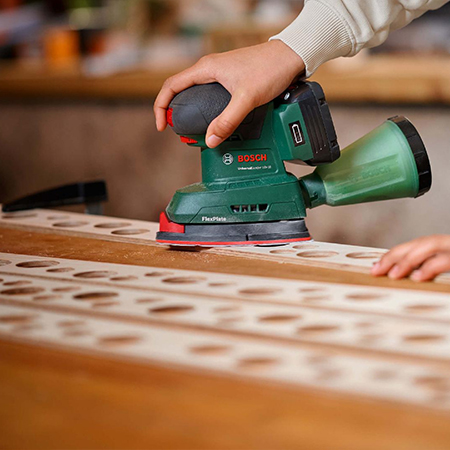
Step 4 - Sand all the pieces
Use 120-grit sandpaper to smooth all the cut holes and then sand with your sander to smooth any rough edges.
Step 5 - Assemble the lamp
Glue together [2] of the panels and then place the bottom in position as you continue to glue the remaining [2] panels to create the shape.
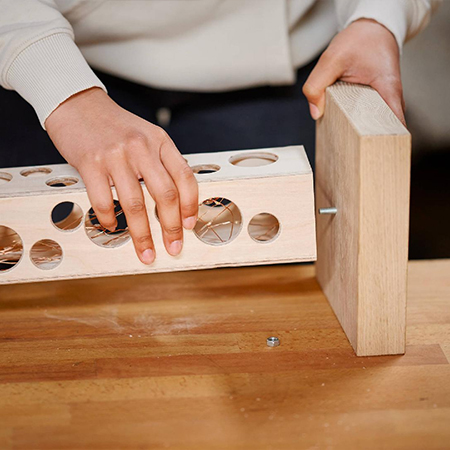
Once glued and in place, hold everything together with clamps and leave overnight. If there are any uneven edges or dried wood glue, remove these with your sander.

Step 6 - Add the base
Drill a 6mm hole through the wooden block that serves as the base and thread the M6 bolt through the hole and through the hole in the bottom of the lamp.
Finishing
Place the solar fairy lights into the lamp frame, making sure that the solar panel is face up so that it can fully charge during the day.
These solar lights are for decoration only and should be put under cover when not in use.