
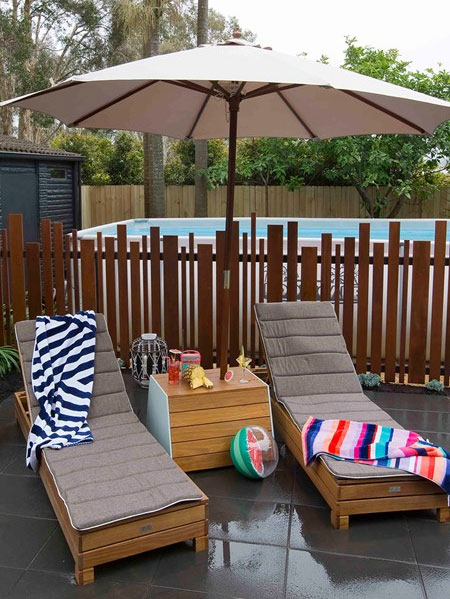
Umbrella Stand Table
Stay cool in the shade in easy reach of cold refreshments with this umbrella stand table.
30/11/2017
YOU WILL NEED:
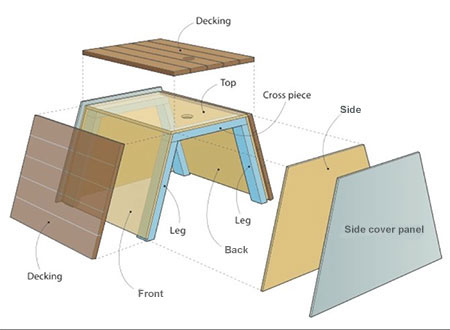
1 of 2440 x 1220 - 12mm marine plywood, cut to size:
- 2 of 443 x 650 - front/back
- 2 of 425 x 715 - sides
- 1 of 414 x 650 - top
- 2 of 444 x 756 - side cover panels
1 of 32 x 69 x 2.4m pine, cut to size:
2 of 414mm - cross pieces
4 of 412mm - legs
3 of 19 x 86mm x 3.6mm decking, cut to fit
15 of 674mm - cladding
50mm decking screws
20 and 45mm wood screws
Spacers
Exterior wood glue
Hole saw, 56mm
Choice of finishing
TOOLS:
Drill / Driver plus assorted bits
Countersink bit
Mitre saw
Tape measure and pencil
Not responsible for errors and omissions
HERE'S HOW:
Preparation
Cut the bottom edge of the front and back sections at a 20-degree angle. Note that these angles are opposite and allow the front and back to be fitted on the angled sides.
1. Cut the sides in shape of a trapezium (20-degree angle) - with the sides going in opposite directions. See diagram above.
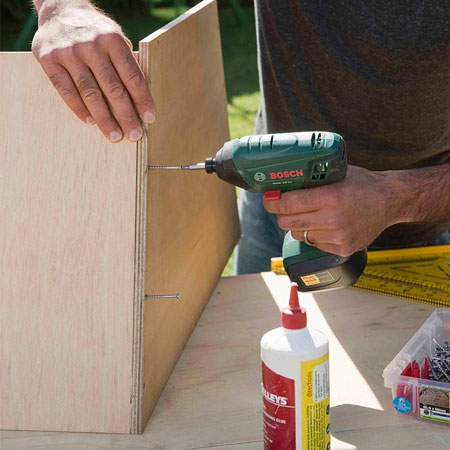
2. Secure the back onto one side, following the angle of the cut edge. Ensure the angled edge of the back is flush with bottom edge of side. Drill 3mm countersunk pilot holes and secure with 50mm decking screws. Repeat to attach front in the same way, and other side section.
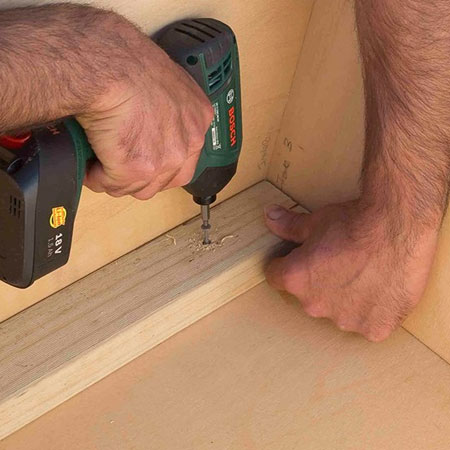
3. The cross pieces are cut at a 20-degree angle at the ends - with the angles in opposite directions through timber. Flip the assembled frame upside down and then glue and screw the cross piece into corner with 45mm wood screws. Repeat this for the cross piece on the other side of the box.
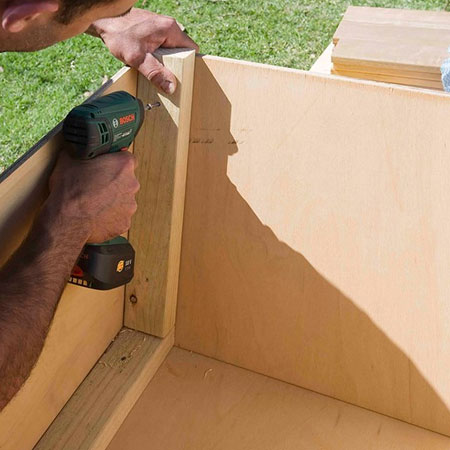
4. Cut each leg with a 20-degree angle at each end - mirror angles for the top and bottom of the legs. Place on top of the cross piece and against the front / back of the frame and screw in place. The leg will sit slightly proud of bottom of box. Repeat for the other corners.
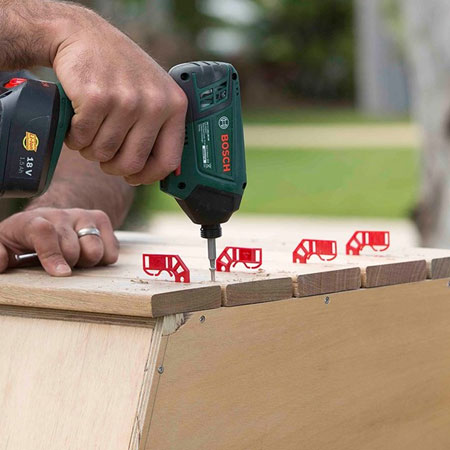
5. Working out from the centre, lay decking planks on top of box. Use 4mm spacers to create a gap between the planks. Attach these to the top with 50mm decking screws approx. 30mm in from the edge. Attach all the decking boards in the same way.
GOOD TO KNOW: Decking will overhang sides of box by 20mm to allow for thickness of decking on sides.
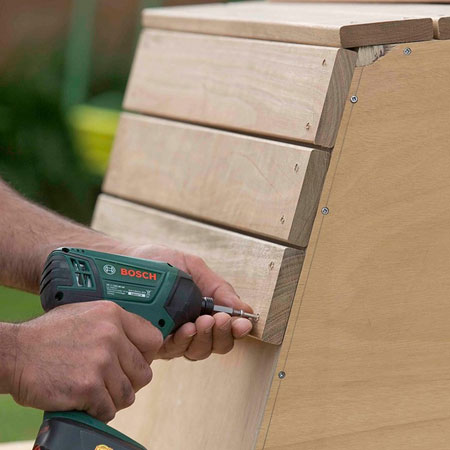
6. To clad the front and back, drill pilot holes and screw individual boards to the front and back sections, with screws approx. 30mm in from each end. Use the plastic spacers to maintain an even gap.
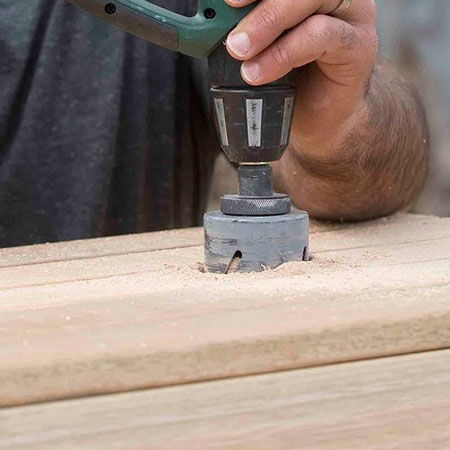
7. Mark the preferred location to drill a hole for inserting your umbrella - the one here is 220mm in from the end. Use a 56mm hole saw to drill hole.
GOOD TO KNOW: Check the thickness of your umbrella support before drilling the hole, as not all created equal!
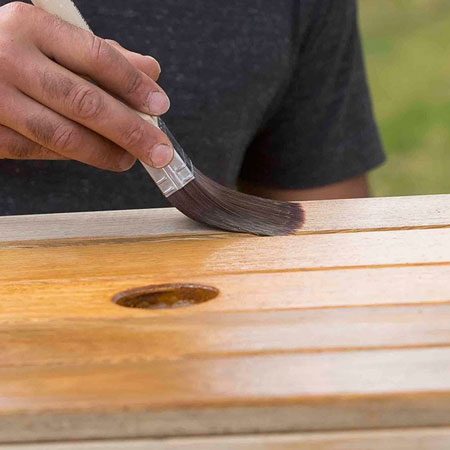
8. Apply your choice of finishing to the completed table. Follow the manufacturers instructions for proper application'.
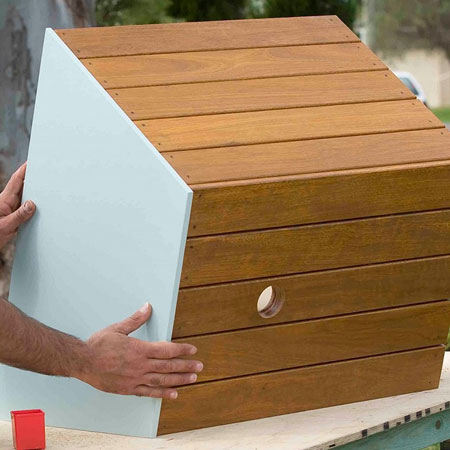
9. To finish off, cut two end cover panels in the shape of a trapezium ( 20-degree angle.) Apply primer before painting in your choice of paint, or stain and seal to your preference. Place against the sides with the edges flush with the decking and screw from inside using 20mm screws.
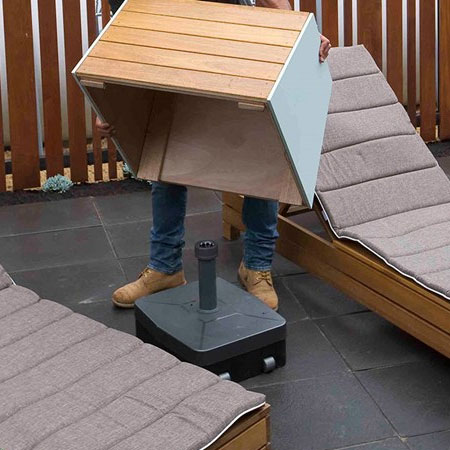
Place the assembled table over your umbrella stand and line up the hole in top with the umbrella stand. Insert the umbrella through hole in the table and into stand.
bhg.com.au