Make metal plant tags for garden beds and borders
The weather lately has been simply gorgeous and so I'm spending a lot of time outside in the garden. I like to label my beds to identify the various varieties, so that I know what I'm separating out in the spring before everything is in bloom. Labelling plants, particular herbs, can be tricky.
Most tags are pretty useless for long-term. I've spent a little time experimenting with other options and have come up with an inexpensive and easy to make tag for the garden. Its design also adds movement to the garden as the wind catches it.
YOU WILL NEED:
[2] aluminium cans
Tin snips
Pliers
Wire cutters
Drill/driver and 3mm HSS bit
Wire coat hanger
Rubber mallet
Scrap piece of wood
Safety gloves
HERE'S HOW:
Before you start, clean out the plastic bottle and can before you start. Give them a good rinse and let them dry.
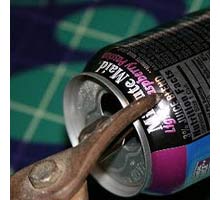
1. Wearing safety gloves, use tin-snips to cut off the top and bottom of the can and cut down the cylinder to leave a sheet of flat metal. Once the aluminum has been cut by scissors, it doesn't have as sharp an edge but it's still better to have gloves on just in case!
2. Lay the metal flat on a flat surface and gently beat flat with a rubber mallet.
3. Trace the shape onto the metal and use a pair of scissors to cut out the shapes. You'll want to cut just outside of the traced shape. Using scissors makes the edge not quite so razor sharp, but you'll still want to be careful.
4. Use the drill/driver and 3mm HSS bit to drill a hole in the centre top of the tag.
5. Place the tag on a firm but flexible surface and add the name of the plant. This is done by hand using a sharp-pointed pen. The ink may or may not write on the tag (it looks good either way.) The real intention is to impress the name into the metal. That way, the name won't wear off in the weather.
6. Use the wire cutter to cut the hanger apart. I can usually get 3 holders out of one hanger, or just 2 if I need really tall hangers. Then use the pliers to straighten the cut pieces.
7. Use the pliers to twist a small loop at the very end. Some hangers are definitely tougher than others, so you might want to experiment with various kinds. Feed the straight end of the hanger through the backside of the tag, and slide the tag up and over the hook. Loading the tag from the backside will result in the tag flipping over and facing outward. Place the stick the end of the hanger in the ground or flower pot.
designsponge


