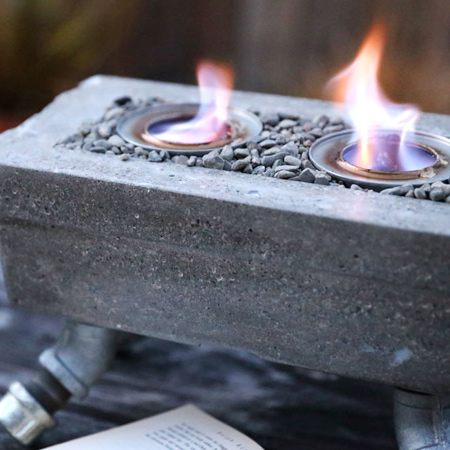
Conversation-piece Tabletop Firepit
Understand working with concrete a little better by making your own unique tabletop firepit.
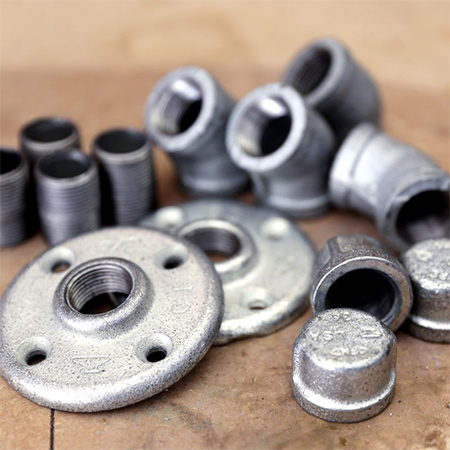
Source all the materials you will need for this tabletop firepit project at Builders and suppliers of galvanised pipe and fittings. As a substitute for galvanised fittings you could use copper fittings, or even PVC pipe.
YOU WILL NEED:
Plastic containers, large and small*
Galvanised fittings and flanges for the legs
- 4 of flanges
- 4 of 45-degree elbows
- 4 of threads
- 4 of end caps
Hot glue gun
Cement, sand and gravel
Steel mesh reinforcing (trimmed to fit larger container)
Spray 'n Cook or similar
Cling wrap or plastic
Cooking fuel, cooking gel or Bio Ethanol
OPTIONAL: Angle grinder or Dremel DSM20
Safety gloves and dust mask
*Buy a large container for the basic shape of the firepit and a smaller container for the void that will contain the actual firepit part.
Note: You will find the original version of this project on Instructables. However, some of the items mentioned are not available locally, and you need to convert to metric measurements.
HERE'S HOW:
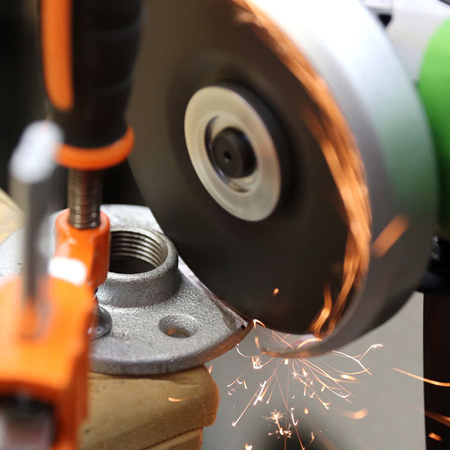
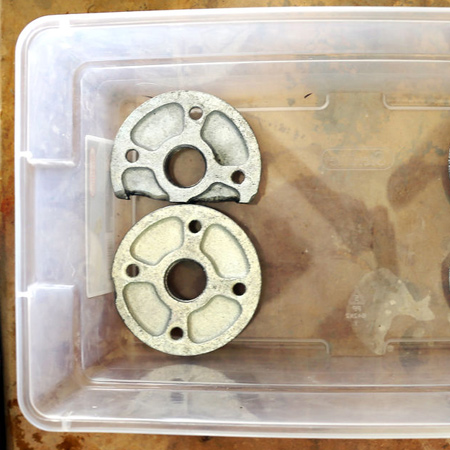
1. Try to source flanges that fit the container - or a container that will fit the flanges - if not, you will need to cut the flanges to fit into the container. Securely clamp the flanges before cutting with an angle grinder or Dremel DSM20.
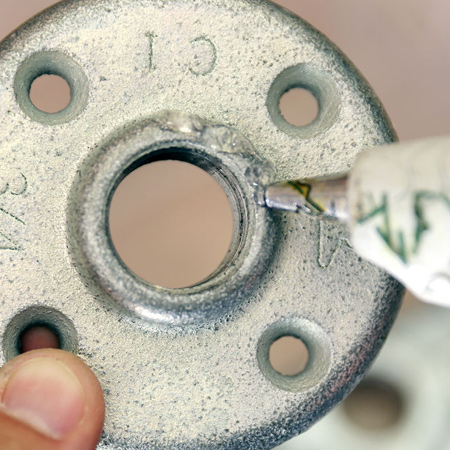
2. Apply hot glue around the thread of the flanges to ensure concrete doesn't seep underneath and gum up the thread. Place the flanges face down in the large container.
3. Before pouring concrete, pack all four thread holes with paper and cover the holes with duct tape.

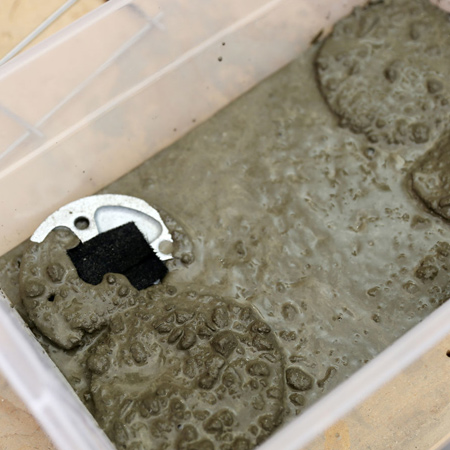
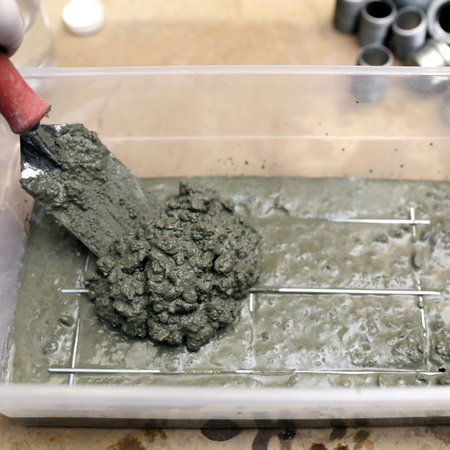
4. Combine enough cement, sand and stone for the first pour. This should completely cover the flanges. With your gloved hand, make sure the mix fills all the gaps in and around the flanges. Pour additional concrete so that there is a 10mm thickness on top of each flange.
GOOD TO KNOW: The standard mix for concrete is 1:2:3 ratio = 1 part cement : 2 part sand : 3 part gravel measured by volume.
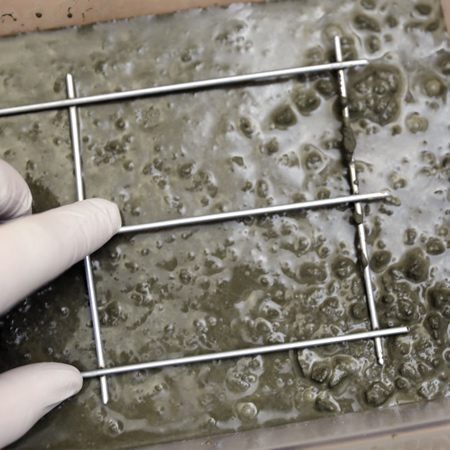
5. Now you need to add reinforcing. Place the cut steel mesh over the poured concrete and gently press into the cement so that it is covered. You don't want the steel mesh to sit on top of the flanges - just above this is perfect.
6. Continue adding concrete mix over this - about another 10mm thick.
GOOD TO KNOW: Before you continue you'll want to remove trapped air bubbles. Gently tapping the container will remove some of the air bubbles, or place the container on a workbench and place a sander (switched on) on the surface to vibrate.
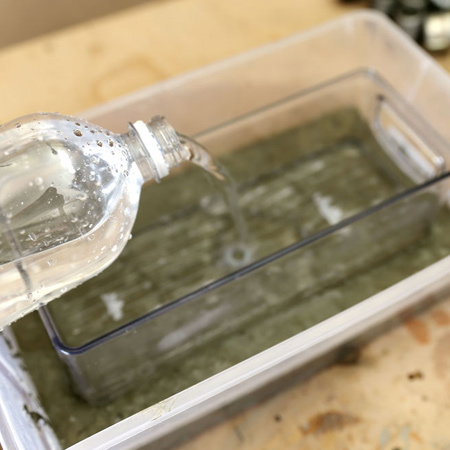
7. Spray the outside of the smaller container with Spray 'n Cook and then carefully place on top of the poured concrete, evenly spaced all round. This container is used to create the void for the actual fire pit. Fill this container with water to weight down.
8. Add concrete around the outside of the small container and then vibrate to release trapped air bubbles.
9. Cover the trays with cling wrap, or wrap with plastic, and leave to cure for 48 hours.
10. You may need to destroy the containers to remove them, so bear this in mind when buying containers - look for cheap ones! Carefully flex and pry the containers off to avoid damaging the cast concrete.

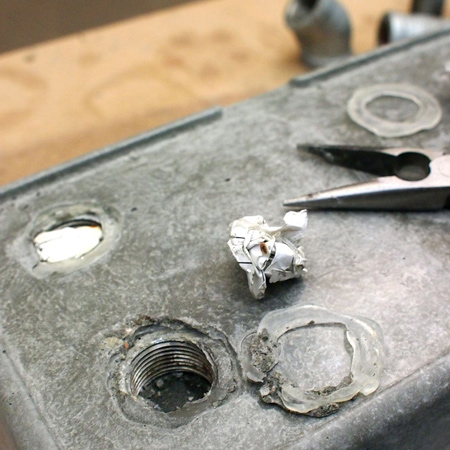
11. Use pliers to remove the packed paper and hot glue from the threads.
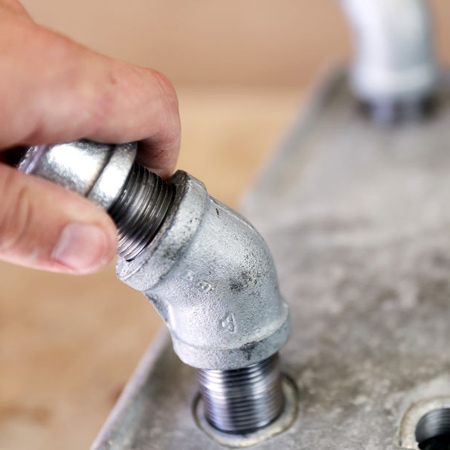
12. Assemble and attach the legs to the base.
13. For finishes you will find information here. All the ones mentioned in the article are not available locally, but you will find various substitutes at Builders, specifically the concrete stain by TFC.
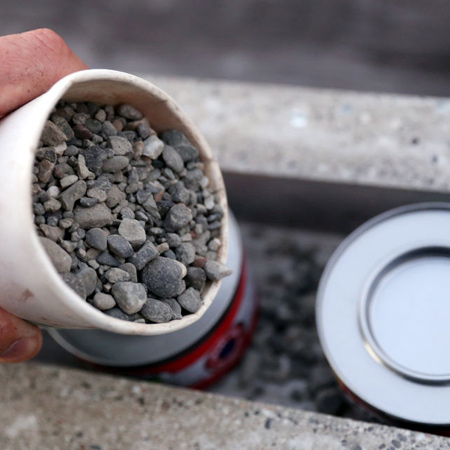
14. Place your fuel cans inside the firepit and fill up with gravel.
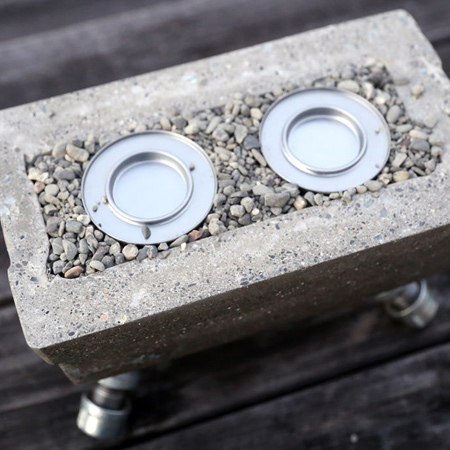
Now sit back and enjoy the ambiance!