
Make a Lazy Susan turntable for a garden table
A lazy susan - or spinning turntable - is perfect for an outdoor garden table. All your condiments, sauces and jams can be placed on the turntable for easy access to everyone sitting at the table. And making a lazy susan is easy if you use a lazy susan bearing.

YOU WILL NEED:
20 x 44mm x 1800mm PAR pine (lengths according to size of turntable)
3mm masonite (according to size of turntable)
Sheets of paper large enough to serve as 2 x templates
180-grit sandpaper
No More Nails adhesive
Plascon Woodcare exterior preservative
Varnish brush
TOOLS:
Jigsaw and clean-cut jigsaw blade
Drill/Driver plus assorted bits
Tape measure and pencil
Scissors
Buy everything you need for this project at your local Builders Warehouse.
HERE'S HOW:
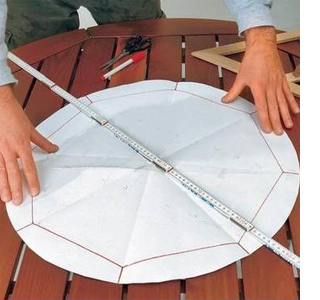
To make a lazy susan turntable, make up a circular paper template for the size that you want the turntable to be. You will need two templates. By doing this you can ensure the perfect size for your particular table. Within the circle, draw out an octagon shape - with the points of the octagon about 40mm in from the edge of the circle. You will use this as a template for cutting out the wood.
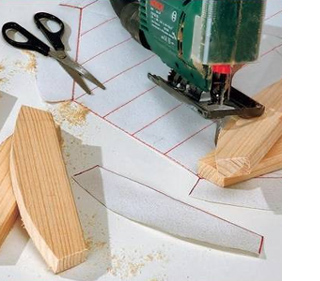
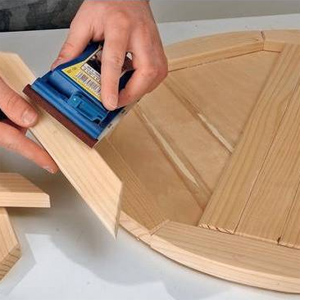
Cut out one of the edge pieces with a pair of scissors and use this as a template to cut out the individual sections for the outside detail on the lazy susan turntable. Use a jigsaw and clean-cut blade for cutting out and lightly sand the edges with 180-grit sandpaper to remove rough edges.
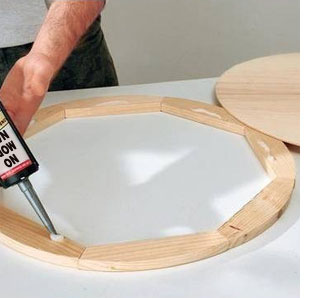
Align all the individual cut sections and apply a small bead of No More Nails adhesive to each end to join together. Don't touch for about 10-minutes until the glue has dried.
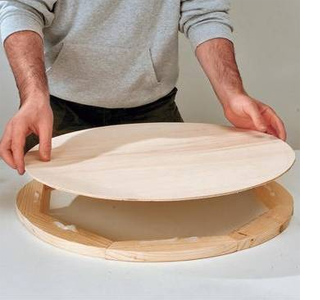
Using the second, complete template, cut the centre part out of a piece of 3mm Masonite using a jigsaw and clean-cut blade. Lightly sand the edges with 180-grit sandpaper. Apply a bead of No More Nails adhesive to the edge blocks and press the cut circle firmly in place.
Returning to the first template that you used - the one where you cut off the edge sections - you can now use this to cut the centre pieces for the table top. Remember to sand each piece to remove any rough edges. Use No More Nails adhesive to glue these pieces in position.
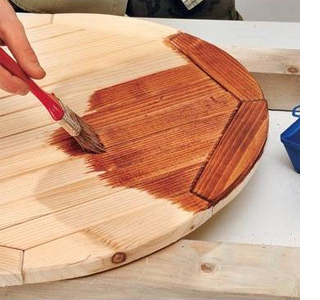
Let the adhesive dry for about an hour before applying Woodoc exterior sealer.
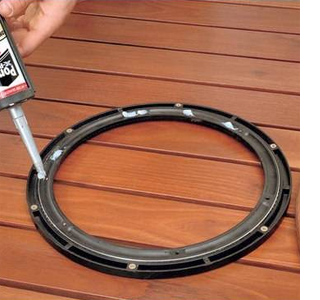
Screw the bottom section of the bearing to your tabletop. Apply a bead of No More Nails adhesive to the top ring of the lazy susan turntable bearing. Don't apply too much - you don't want adhesive oozing out all over the place!
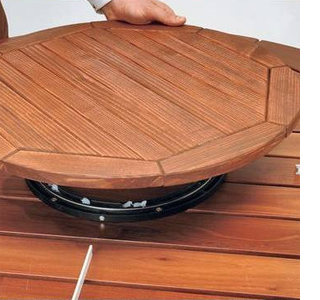
Carefully place the turntable on top of the bearing. To help you centrally position, have four scraps of timber of equal length as guides. Allow the adhesive to dry overnight before using your new lazy susan turntable.