Do-It-Yourself Courtyard Garden Makeover
With a little outlay, you can transform a boring walled courtyard into a private garden retreat.
30/08/2023
Finding space to relax in the garden isn't easy if you only have a small bricked-in courtyard outside the door. With our lifestyles being so hectic having a space to kick back and relax helps us to unwind at the end of a long day or even be able to invite a couple of friends around for drinks around the fire. There are plenty of houses out there that have a similar set-up to this 2-bedroom ground floor property with a small bricked area surrounded by high plastered walls but having the luxury of a fitted outdoor fire / braai that can be used for either purpose.
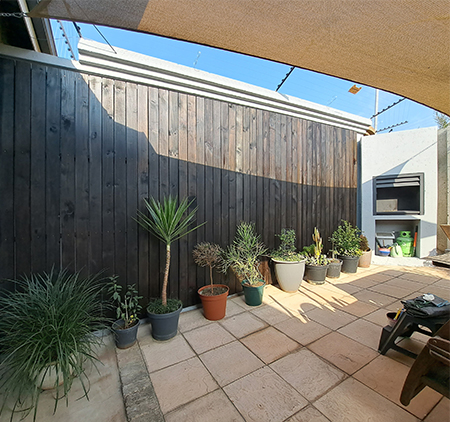
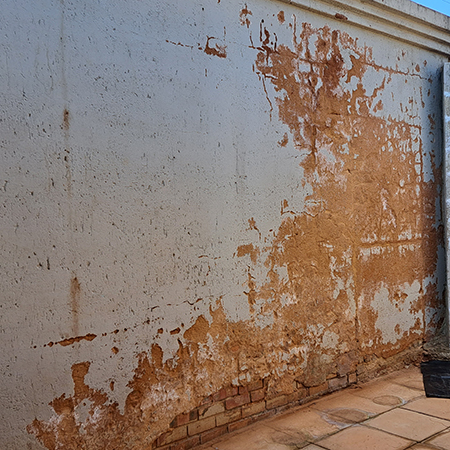
While it is a nice to have a space where you can spend time outdoors, it isn't that nice staring at high blank walls. Wanting to do something to spruce up the space, this clever renter asked the landlord for permission to do a bit of creative landscaping and the result speaks for itself.
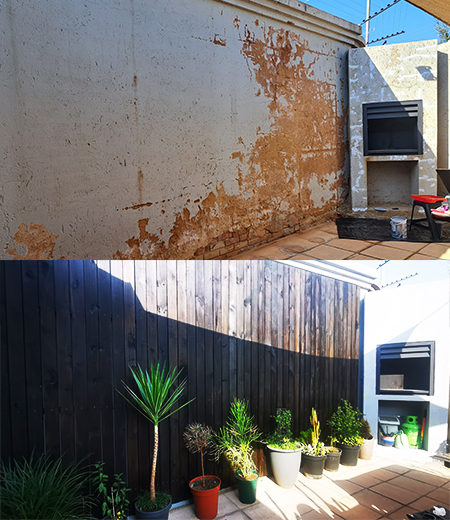
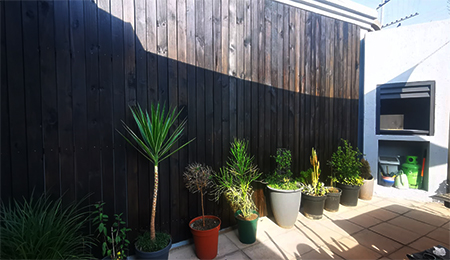
The before and after above shows how a little bit of creative inspiration turned a boring bricked courtyard garden into a more intimate space and the timber-clad wall also provides some soundproofing in addition to looking good. The idea behind cladding the wall was that it was an easier solution than having to fix the damaged walls around the area. The plaster walls were chipped and cracked and the plaster had fallen off in some places, leaving an eyesore behind.
DIY Timber Cladding on Brick Walls
Not wanting to be surrounded by plastered brick walls, he came up with the solution to add untreated, unplaned timber planks to one wall in the courtyard garden to introduce a natural element into the space. After sourcing pine battens and planks from a nearby timber merchant, which is the most cost-effective way to do this or you could end up spending a fortune on the timber, he mounted 4 rows of battens to the wall using screws and wall plugs. To ensure a lasting lifespan on the installation do yourself a favour and use Nylon Wall Plugs (available at Builders stores) and not the cheap plastic kind.

With the support battens in place, all the planks were measured to fit onto the wall. The planks were stained and sealed with an exterior sealer and then installed using wood screws. Use at least 5 x 50mm cut screws to secure the planks in place to all 4 battens. This installation should last around 7 to 10 years if you regularly re-apply the exterior sealer and you may only need to replace a few of the planks over the years.
DIY TIP
Creosote or Carbolineum are an inexpensive way to treat outdoor timber but do wear safety gear when applying and stay out of the area for 24 hours after application. Tar-based products are classed as carcinogenic. Creosote is toxic and flammable.
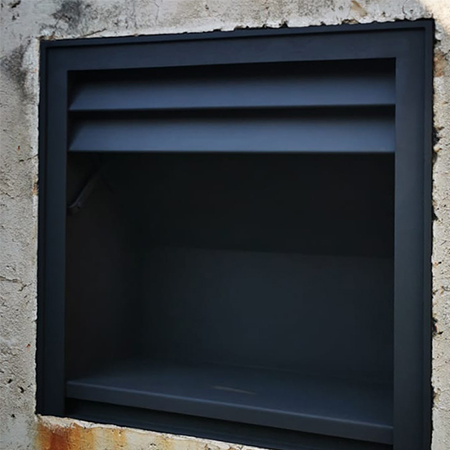
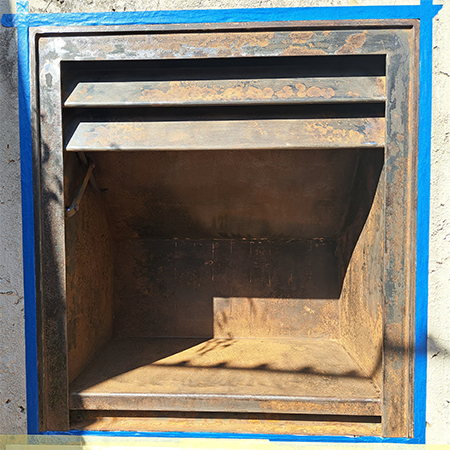
Restore Steel Fireplace or Braai
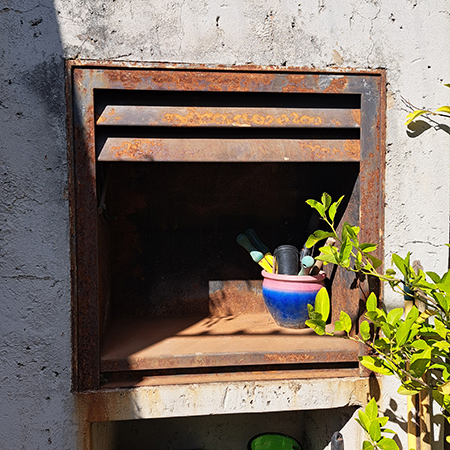
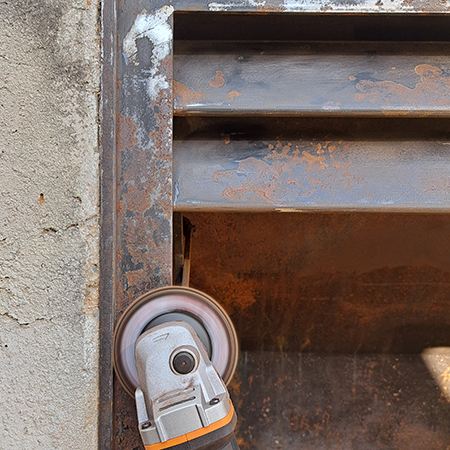
With the wall no longer an eyesore, it was time to remedy the rusty fireplace / braai which was completely covered in rust after being left uncared for for so long. Make this job easier by transforming an angle grinder into a sander using a Flap Disc (available at Builders stores). Flat discs are sanding discs that fit onto the head of an angle grinder and do a quick job of any intensive sanding project. Use a 120-grit flap disc to remove as much rust as you can. If there are areas where the rust has eaten the metal away, you can't really do much about this other than replace the entire assembly.
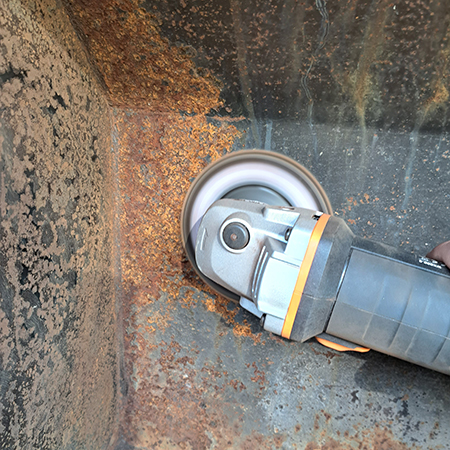
Use the angle grinder to sand away as much of the surface rust as possible and then apply a Rust Converter (available at Builders stores). This will inhibit future rust and preserve the steel. If you do not apply a rust converter, the rust will continue to eat away the metal and you would be wasting your time with any restoration.
DIY TIP
Place a strip of painter's tape around the outer edge of the fireplace / braai to protect the surrounding wall.
To paint the interior and exterior of a fireplace or braai, you need a paint that can take high heat such as Rust-Oleum High Heat Protective Enamel paint (available at Builders stores). You can apply the product easily with a paintbrush and clean brushes with warm water and dishwashing liquid. DO follow the guideline instructions on the tin for proper application. The first coat should be dry in about an hour and you will need to apply a further coat to finish off. Do not use the fireplace / braai for at least 48 hours for the paint to cure.