
Build a Concrete Paver Patio on Your Own
It is easy to make mistakes when pouring concrete for a single slab but with this concrete paver patio, you can get excellent results, a long-life patio and a mistake-free installation.
15/11/2023
familyhandyman.com
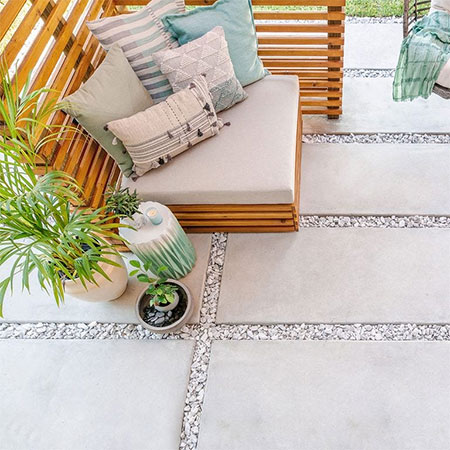
Installing a stylish patio is an option even for someone with limited experience in working with concrete and far more forgiveable than pouring a single slab. It is easier to get the level right and prevent pooling around depressions, it is easier to work around and the chances are cracks is reduced. Filling the gaps between the concrete pavers with rocks, gravel, pebbles or plants creates a decorative finish that add a custom look to the design.
YOU WILL NEED:
Untreated and unplaned timber
Scrap wood for stakes
Drill, screws and assorted bits
Circular saw, jigsaw, handsaw or other saw
Rebar and steel wire
Straightedge
Magnesium float
Trowel for rounding off edges
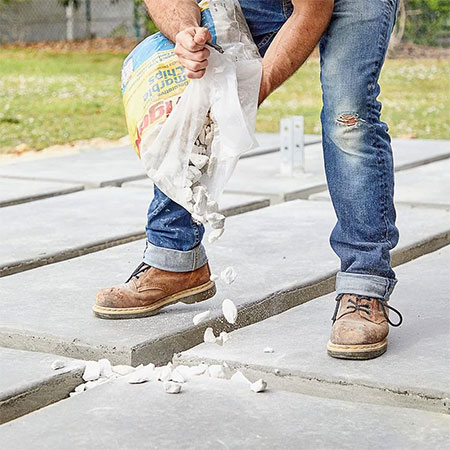
Cement mixer or ready-mixed concrete
Garden spade and shovel
Garden rake
Wheelbarrow
Hammer and prybar
Pebbles, rocks, gravel or plants for filling gaps
Sand for levelling
Tarp or plastic sheet
Tape measure
HERE'S HOW:
Step 1 - Prepare the site for the pavers
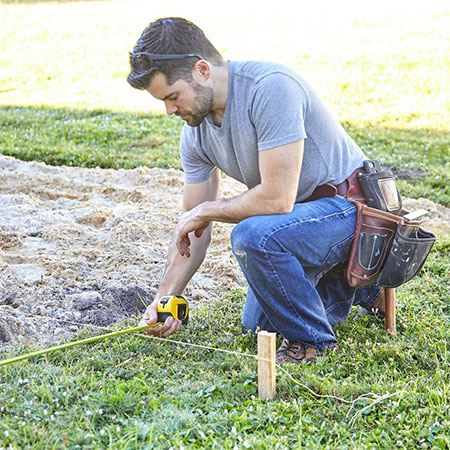
Clean up the area for the paving slabs by removing turf and raking the area level. Remove any stones or pebbles that may affect the level of the wooden form. Check with a spirit level and use sand to fill any dips and level out the area.
GOOD TO KNOW
Use wood stakes and string to mark the area where the paving slabs will be poured. This will ensure you pour enough to fill the footprint for the patio.
Step 2 - Assemble the wood forms
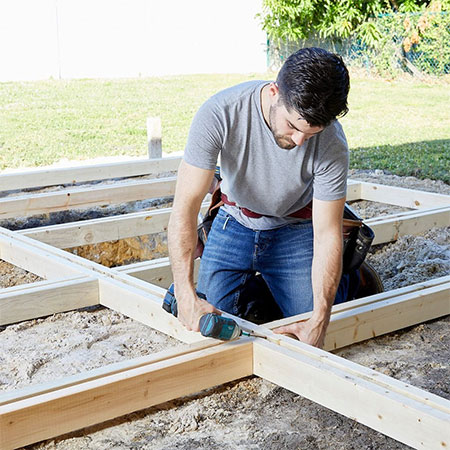
The form for pouring the concrete can be untreated, unplaned timber which is more affordable. The thickness and length of the planks will be determined by the size of the patio but you can have everything you need delivered by Builders. A width of 69mm or 94mm will give you nice deep concrete slabs and a gap between the slabs of around 30mm to 50mm is best but again, you can modify this. Screw all the planks together to form the frames making sure that the screws are close to the top for easy removal once the concrete is poured and cured.
GOOD TO KNOW
Select a timber thickness that will form the gap between the concrete pavers. If you leave a gap, this will fill with concrete and it will be hard to remove the form frames,
Step 3 - Insert rebar
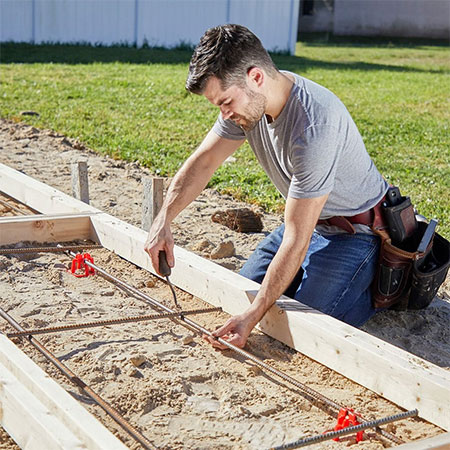
Rebar gives each concrete paver strength and prevents any cracking later on. Cut the rebar to length using an angle grinder and slip these into position within the wood forms. Tie the individual rebar together with steel wire.
GOOD TO KNOW
Although not absolutely essential, applying oil on the inside of the frames will make them easier to remove later on.
Step 4 - Pour concrete into the forms
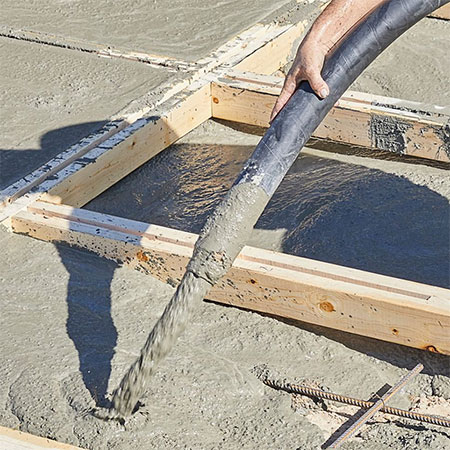
For this project, the forms were filled with ready-mix concrete. You can easily arrange this service yourself and can pour the entire form in a day. Alternatively, hire a portable cement mixer and pour each form individually. It might take longer but you may also find this more convenient for your project.
Step 5 - Screed and float the surface
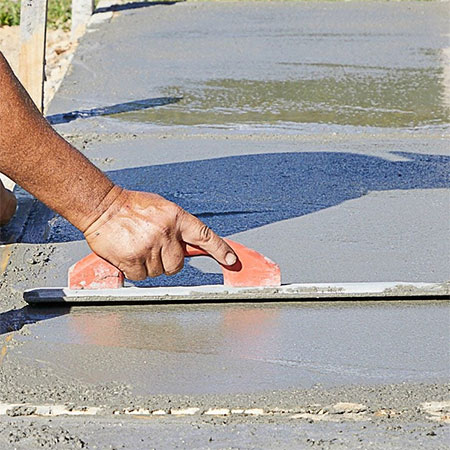
Once the pour is complete, use a straightedge or long piece of timber to screed the finish. It's a good idea to have someone to help with this process so that it goes faster before the concrete starts to cure. Run the straightedge over the surface to remove excess and help trapped air bubbles to release.
GOOD TO KNOW
Using a magnesium float helps to smooth out any aggregate on the surface and provides a smooth surface, which is what you want.
Step 6 - Round off all the edges
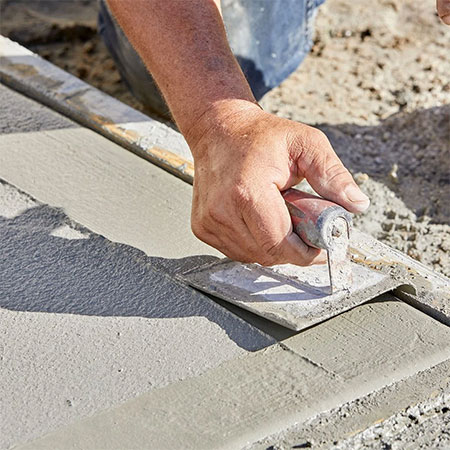
As soon as the concrete starts to cure, use a trowel for rounding over the edges. Move quickly so that you can get the job done before the concrete is too hard to work.
Step 7 - Allow curing time for the concrete to harden
The concrete doesn't take long to cure but it can happen too quickly, especially if the weather is hot. Place a tarp or sheet of plastic over the poured forms and mist daily with a spray nozzle on your hose pipe. You do not want the concrete to dry too fast as this will result in cracks. Allow a 7 to 10-day curing time. It will not be fully cured by this time but will continue this process for a few more days.
Step 8 - Lift and remove the form frames
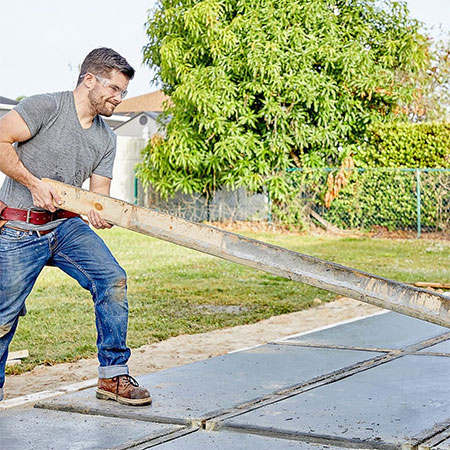
Remove the screws that hold the forms together so that you can lift the forms out of the way. Having a hammer and crowbar on hand will assist with any stubborn frames.
Finishing - Fill the gaps with stones or gravel
Use rocks, pebbles, gravel or plants to fill the gaps between the pavers unless you are planning on staining the concrete and, if this is the case, do this beforehand.