
Repairing a Leaky Outdoor Tap
A leaky outdoor tap is something we all experience at one time or another. As they age the components fail and an occasional servicing ensures that they work according to their intended purpose.
30/09/2022
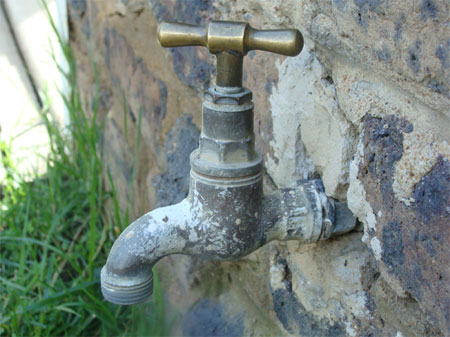
Outdoor taps have various types, including hose bibs. What is a hose bib? A hose bib, also called spigot, cock, or outdoor faucet, is a small tap attachment to the garden hose for easy water access outdoors. However, a leaky hose bib can be a problem because of the water it wastes over time. So, how do you repair a leaky outdoor tap?
Before you start, remember to turn off the main water supply into the property, which is located on your property - normally close to or in line with your water meter. Open a tap on the lowest end of the property, as it sometimes happens that hot water starts flowing out of the tap as a result of incorrect geyser installation or because the vacuum breaker fitted at the geyser doesn’t function properly. In the event that this happens, close the stop tap next to the geyser to prevent water from syphoning back through the system.
New geyser installations are supposed to have non-return valves fitted to prevent this phenomenon from occurring - but you never know!
When you are planning to do maintenance on your taps, buy an additional tap or even just a head part that will act as a spare. Basically there are just two sizes you would have to worry about namely 1/2” tap part should fit all 1/2” bodies. In some cases you might have a 1/2 inch light pattern head part. This would not be a good thing as they generally don’t last very long in gardening environments. 3/4” taps are used in heavy duty applications.
Cleaning old taps
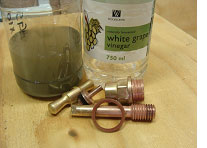
When servicing these types of taps, a useful hint is to soak the parts of the tap in vinegar. The vinegar will remove all the paint and lime build-up from the years of service. If I say soak, what I really mean is leave it in the vinegar for a couple of hours, a day, a week or even longer. The period submerged in the vinegar would depend on the level and severity of the lime and paint build-up.
Vinegar would in some cases even remove the chrome plating, so leaving it in for long periods of time would only be advisable if it is solid brass in its barest form. If you have brass plated taps (like the old star type cobra taps in the kitchen or laundry) and you want to keep the plating on, just don’t leave it in the vinegar that long.
Worst case scenario!!
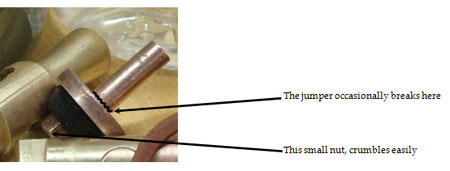
- If your taps are very old, the spindle or jumper can bring an end to your smooth running day. Usually if you try to remove the very small brass semi-biodegraded nut on the jumper after 10 years of non-stop service, it breaks into pieces. Yip if you grip it with the pliers it just disintegrates under the pressure.
- At this stage you have two options, one is to fit the tap washer on the washer plate without the nut holding it down as a temporary measure for the weekend; the other is to remove the jumper and replace the complete jumper with a new one as the screws from different jumpers aren’t always interchangeable.
Worst worst case scenario!!
In some cases you do find that (as indicated in the photo below) the jumper breaks above the brass pressure plate. The part of the jumper could be stuck inside the body housing. After years of service the steady pressure on the housing has curled the brass around the jumper neck and you can't remove the neck when it has broken off inside. You can however take a drill bit, secure the housing in a vice and S-L-O-W-L-Y cut the curled section with a 10mm drill bit. Take caution not to drill too deep as this will render your housing useless.
- Strip the head part completely, take the main bar and drill a recess, the focus is on the recess. The little neck that has broken off should now be easily removable.
Taps that just never stop dripping!!!
Once you’ve replaced the washer and the tap continues dripping, you have a different problem. If the taps are not regularly maintained or has been left to drip for years on end, The washer seat (after years of service) could develop a small crevasse as the water eventually cuts a small groove through the brass.
This is where we get serious, you can buy a tool called a “tap re-seater”. That is exactly just what it does, it re-seats the area or section where the tap washer sits when the tap is in the “closed” position. The tap re-seater has small very sharp blades that cuts a thin layer of brass away, to make it as good as new. This is a very nice tool to use, but don't get carried away as you could easily cut the seat away completely, in which case you would have no option but to replace the complete tap.
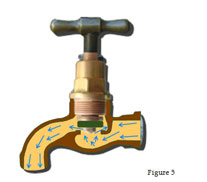
Okay so you’ve re-seated the tap, replaced the washer, re-assembled the tap and when the water is turned on you plug in the garden hose and water squirts out the top of the tap around the neck as indicated in the figure 6.
Hint! As a quick fix you can remove the handle, remove the graphite compression nut and slide one or two rubber “o” rings to sit on top of the graphite washer. It will temporarily solve the leaking problem.
Hire A Plumber To Repair A Leaky Outdoor Tap
Many businesses and homeowners prefer to hire a plumber to repair a leaky outdoor tap. They usually include this task in their annual maintenance plumbing system checks. While you can resolve this plumbing issue using available tools at home, you might hurt yourself if you don’t have experience fixing it.
So, it’s good to hire a licensed plumber in your area to repair a leaky outdoor tap and other plumbing problems. In that way, you can gain assurance that an expert will check other adjacent plumbing issues and prevent them from causing a major disaster, such as a burst pipe, flooding, and water damage.
Conclusion
Repair your leaky hose bib or outdoor tap by following the tips above. Prepare everything you need and learn the proper techniques to tackle the job right. If you’re unsure of the correct plumbing technique to use or you’re busy, hiring an experienced plumber is recommended.