
How to restore parquet floors
You either love or hate parquet floors but when cared for and maintained, parquet floors are a valuable investment in a home. If you have parquet floor buried under layers of carpet, perhaps consider the option of restoring the floor to its original condition.

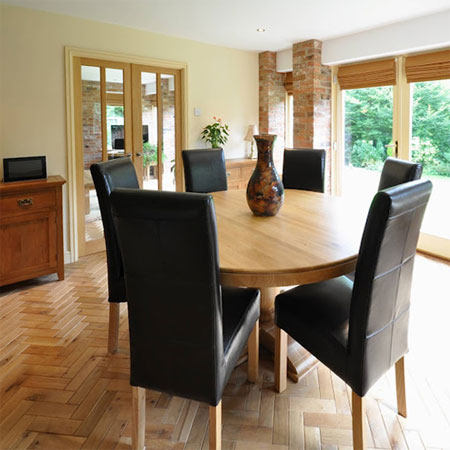
Installed using small blocks or slats of wood in varying patterns and designs, Parquet floors are common in many older homes in South Africa, being installed when hardwoods were more easily come by. Patterns for parquet floors may be herringbone or basket-weave, or more complex designs incorporating squares, triangles and lozenges of differing wood species.
As with any wood floor, Parquet needs regular maintenance to ensure that it stays looking good.
Replace missing or damaged parquet blocks
You will need:
Bitumen glue remover
Contact adhesive
Clean cloths
Rubber gloves
Paint scraper
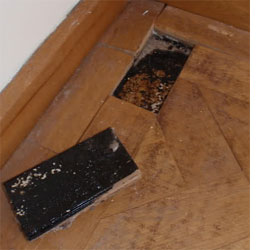
The main problem experienced with Parquet floors is that the blocks tend to come loose over time. Replacement blocks, commonly referred to as plugs, can be cut from the same type of timber and sanded to blend with the existing floor design.
While genuine Parquet floors are nailed or pinned down, many installations performed in South Africa have been done over a concrete screed floor using bitumen glue – a petroleum derivative that is thick, sticky and dries to a hard, black layer, gripping and holding the blocks in place. The problem with this type of installation is that, over time, the bitumen becomes brittle and the blocks break loose.
When replacing blocks it is necessary to scrape away the bitumen glue, from both the floor and the loose block, before applying a suitable contact adhesive to both surfaces to glue in place. You will find professional bitumen and glue removers at your local hardware store.
Restore a scratched parquet floor
You will need:
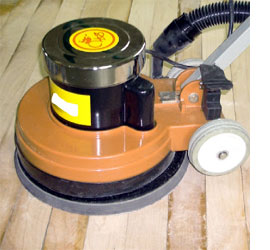
Orbital floor sander
80/120- and 220/240-grit sanding pads
Dust mask
Plastic sheets
Masking tape
Vacuum cleaner
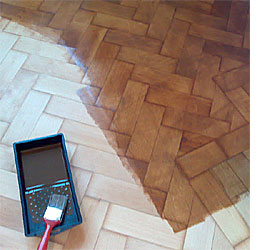
It is far easier to regularly maintain a Parquet wood floor than to have to sand and re-seal the floor. Unfortunately this isn’t always easy. Move into a new home and you may find yourself the owner of a Parquet floor in desperate need of attention. Or perhaps you are restoring an older home and the floors are in a terrible state.
A floor is badly scratched will need to hire an orbital floor sander for the day in order to sand down. If possible, hire a sander that has a dust collection bag. Although this will cut down on the amount of dust, you will still need to wear a dust mask, open windows and close off any openings with a sheet of plastic stuck down with masking tape.
GOOD TO KNOW
An orbital floor sander will be gentler on Parquet floor, which doesn’t run in one direction but rather in several directions as a result of the patterned design.
1. Before starting to sand, make sure that any loose blocks are removed and placed out of the way for the time being.
2. With a medium grit sanding pad (80- or 120-grit), start at one end, at the far side of the room and guide the floor sander over the area to be sanded. As you complete one strip, turn around and repeat until you have completed the entire floor.
3. Repeat this process with a 220- or 240-grit sanding pad; this step reduces the roughness left by the medium grit sandpaper and leave a smooth surface reading for sealing.
4. Clean up all the remaining dust with a water filtration vacuum cleaner. This is by far the best option, as it doesn’t re-circulate dust back into the air. Another alternative is to use a mop lightly dampened with mineral turpentine to wipe away the dust.
Stain and seal parquet flooring
You can purchase a ready-tinted sealer in various colours, or purchase a clear sealer and mix in your own stain. Whatever option you choose, you will need a quality indoor sealer that is specifically designed for wood floors. We recommend Woodoc 25 satin floor sealer, which is wear resistant for floors and is designed to protect and enhance the beauty of the wood grain, providing a deep, natural polished finish.
1. Whilst using a roller is not recommended, if you apply the sealer liberally it makes the job far easier, especially when covering a large area. You will, however, need a paintbrush for around the perimeter. If you find that the sealer is immediately absorbed into the wood after no more than five minutes, apply additional sealer for the first coat. This coat needs to dry before you move on to the next step.
2. Use ultra fine steel wool to lightly rub over the sealed surface to remove excess sealer remaining on the top. This allows the next coat to penetrate deeper into the wood to provide the utmost protection. Wipe clean once you have rubbed down.
3. Apply a second and third coat of sealer to the floor, allowing each coat to dry thoroughly. The floor will be touch dry after 24 hours, but refrain from replacing furniture into the room for at least 2 days to ensure proper curing of the product.
To extend the finish of your new floor and keep it looking good for longer, simply wipe with a soft, dry mop regularly.