
DIY pull-out trouser rack
When you have a small built-in cupboard for storing all your clothes, finding space can be a mission. Adding a pull-out trouser rack or two allows you to easily sort your clothes and frees up hanging space.
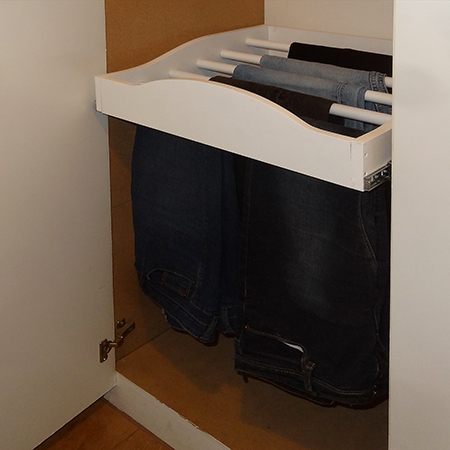
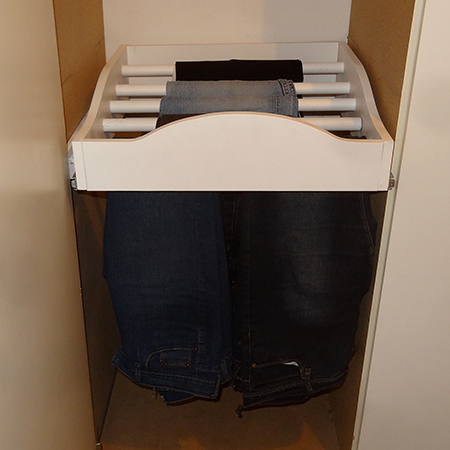
This trouser rack is sturdy enough to hold 10 pairs of heavy jeans. Using this design you can make a 'his' and 'hers' pull-out trouser rack to replace two shelves in a small cupboard.
YOU WILL NEED:
2 of 35 x 450mm drawer runners (@ Gelmar) + 16mm screws
3 of 24mm diameter x 1800mm pine or meranti dowels
2 pieces of 16mm MDF - sides cut to fit
2 pieces of 16mm MDF - front and back cut to fit
Pattex No More Nails adhesive
TOOLS:
Drill / Driver plus assorted bits
25mm MAD bit* - *A MAD (multi-angle directional) has a tip
that is not as long and will not go through to the other side of the
board.
Jigsaw, circular saw or mitre saw to cut sections to length
Tape measure and pencil
You can have all your 16mm MDF cut to size at your local Builders Warehouse.
HERE'S HOW:

Measure up
Measure the dimensions of the space where you will fit the trouser rack. Be sure to measure from side-to-side and the depth. Measure twice to ensure your measurements are accurate. Allow for any door openings or hinges – we will show you how to work around this below.
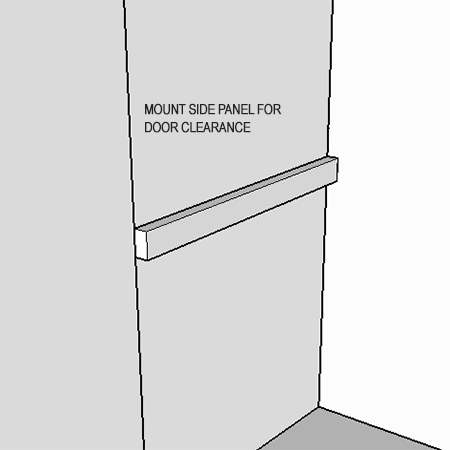
If you cupboard door will not allow the trouser rack to pull out fully you can fit a side panel to create enough clearance. I used two pieces of 16mm MDF glued together.
Assemble the drawer
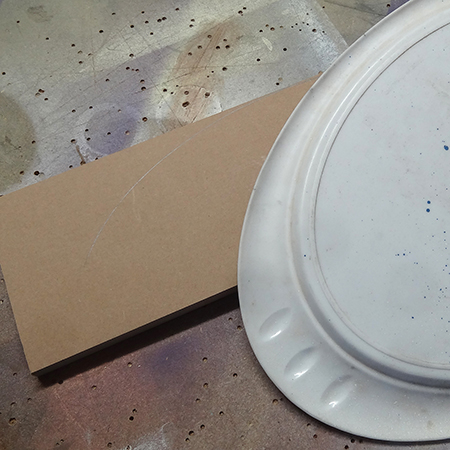
1. To make the sides, take the depth of the cabinet and subtract 10mm and cut sections to length. For example: If the cabinet is 550mm deep deduct 10mm and cut the sides 540mm long. Use a template to cut a curved shape as shown in this project.
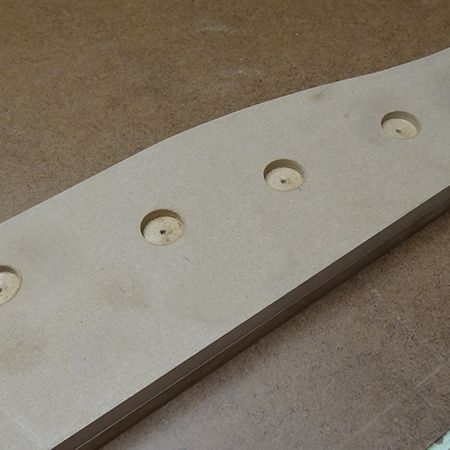
2. Divide the side panels into 6 sections so that you can use a 25mm MAD bit to drill five holes 5mm deep on both the sides. These holes are for mounting the dowels that will hold your trousers.
GOOD TO KNOW
The holes for the dowels are not drilled in a straight line, but rather at a slight angle so that each hole is higher than the previous hole. This just makes it easier to see at a glance what is one each rack.
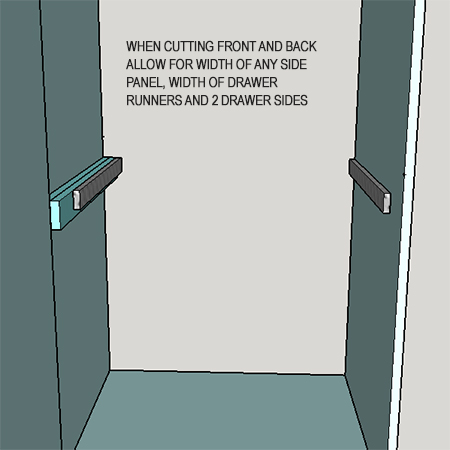
3. The front and back panels need to be the width less any side panel less the two sides (2 x 16mm = 32mm) and less the width of the drawer runners (2 x 12mm = 24mm). As with the side panels, use a template to draw a curved shape for the front of the rack. Make sure that the sides of the pull-out drawer and the front are the same width at the corners. Use a jigsaw to cut out the shape.
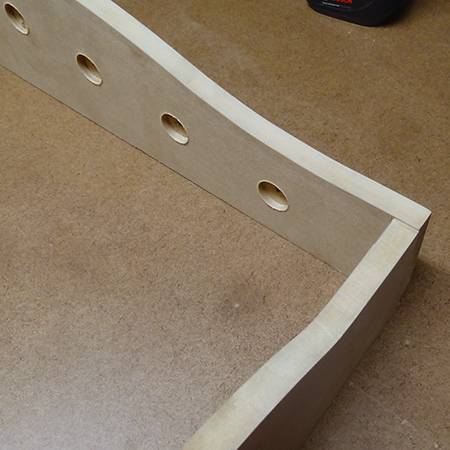
4. Attach one side to the front and back panels.
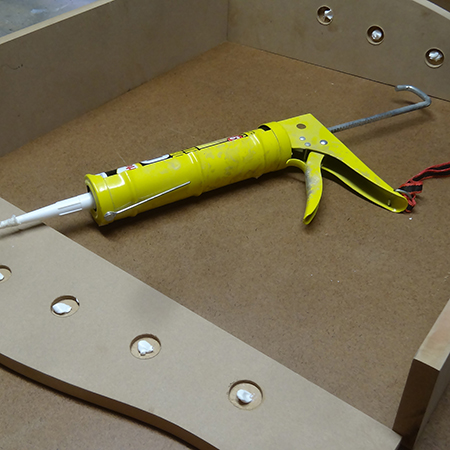
5. For added strength apply a blob of Pattex No More nails to each drilled hole. Attach only the front edge of the side panel to the front. This will allow you leeway for fitting the dowels in place one by one, starting at the front holes.
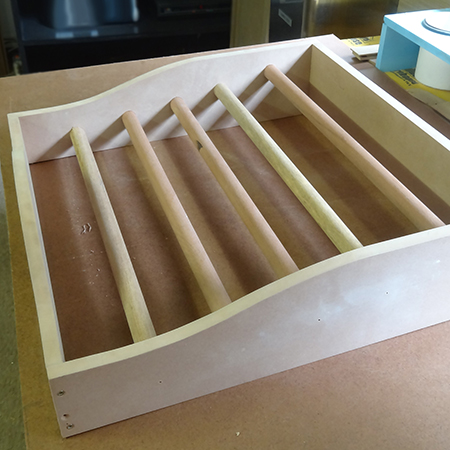
Completed pull-out drawer. You can paint to finish. Paint the drawer using a Bosch PFS spray system, or to use Rust-Oleum 2X spray paint.
GOOD TO KNOW
Use 240-grit sandpaper to sand the cut edges and then seal with a thin layer of Ponal wood glue to reduce absorbency of the MDF and use less paint.
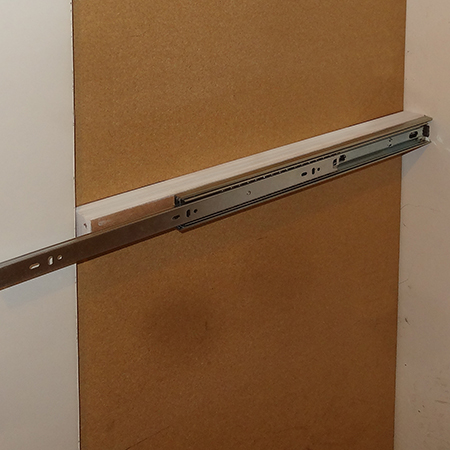
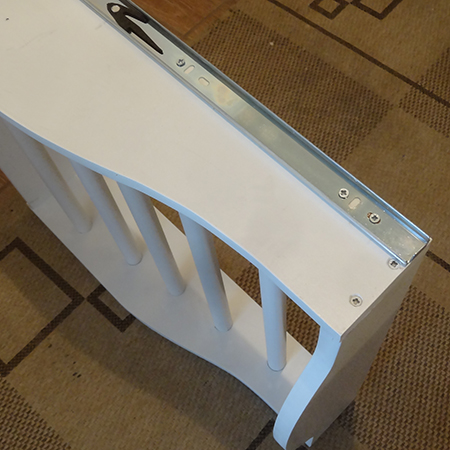
6. Measure and mark where you want to drawer to be mounted on the inside of the cabinet. Secure any side panel and then attach the drawer runner using 16mm screws, ensuring the runner is aligned with the top of the side panel.
7. Attach the drawer runner to the opposite side using 16mm screws.
GOOD TO KNOW
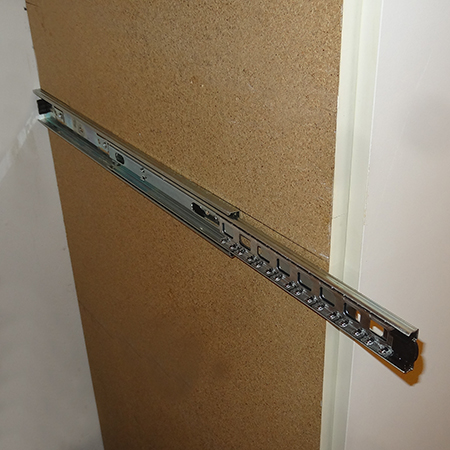
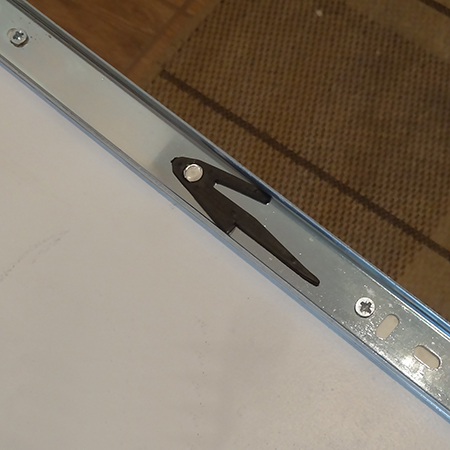
When fully extended the drawer runners have plastic release clips that allow the top section of the slider to be removed.
8. Pull out the top section of the slider and attach to the bottom of both drawer sliders and then slide the drawer into the main drawer slide assembly.
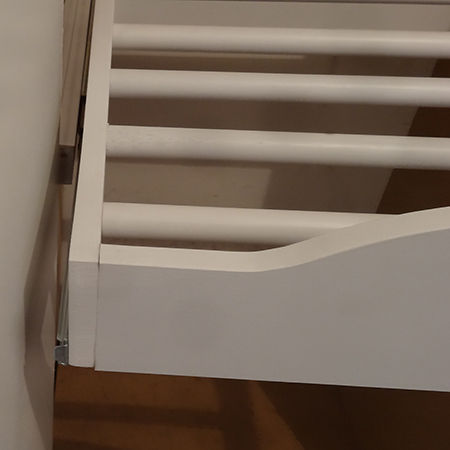
You can see how the side panel allows the drawer to easily slide in and out without snagging on the door.