
Replace interior hollow-core door
With two grown-up teenagers I know how easy it can be to damage a door, especially if you have boisterous boys in the house. Patching up the door isn't a good idea and it is fairly easy and affordable to replace a hollow core door.
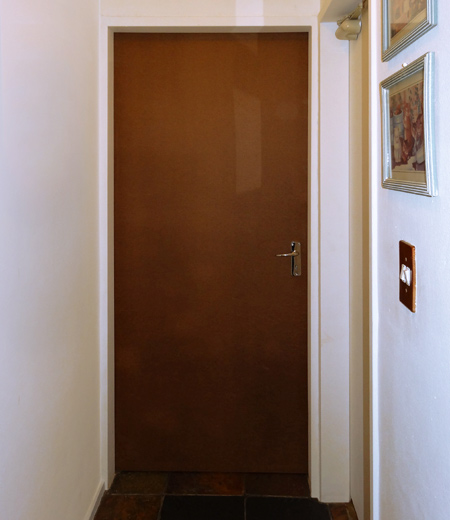
Hollow core doors that you buy at Builders Warehouse cost around R350 and come in ‘one size fits all’, but unfortunately that is not the case. Door heights will differ depending on the flooring installed and you will invariably have to cut the door to fit.
YOU WILL NEED:
New hollow core door
New lock and handle mechanism
Jigsaw and rough-cut blade
Planer (optional)
120- + 180-grit sandpaper
Drill/driver or corded drill plus assorted bits
20mm spade bit
Wood chisel
2 workbenches or saw horses
Tape measure and pencil
HERE'S HOW:
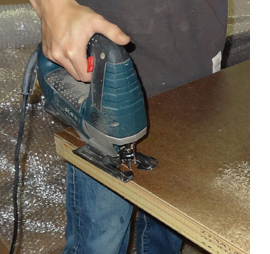
Step 1
Remove the old door by unscrewing the hinges at the side. Once removed you can take measurements from this door for cutting the new door to the correct height. Place the new door on a couple of workbenches or sawhorses and use a jigsaw with rough-cut blade to remove excess at the bottom of the new door; sand smooth with 120- and then 180-grit sandpaper.
GOOD TO KNOW
If you need to cut off more than 30cm for the new door to fit, cut off excess from both the bottom and the top. Hollow core doors only have a timber frame covered with a masonite board and you don’t want to cut too much off one end and weaken the frame.
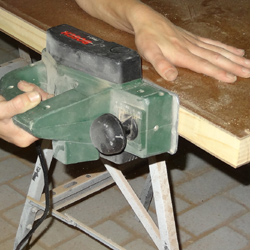
Step 2
If you only need to make minor adjustments for the new door to fit, make use of a planer. You can set a planer from 0.5mm up to 2mm to shave off small amounts of excess timber. You can hire a planer for a morning if you don't already own one.
Step 3
Using the old door as a guide, measure from the top of the door to mark the position for mounting the lock and handle mechanism. Remember to allow for any difference if you have removed timber from the top of the door.
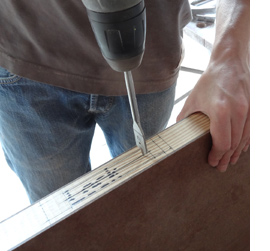
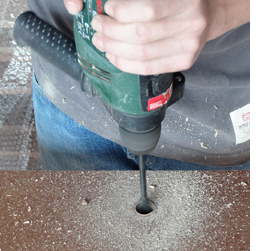
Step 4
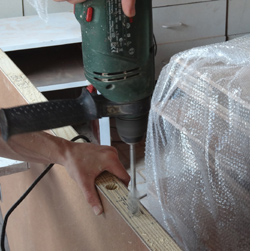
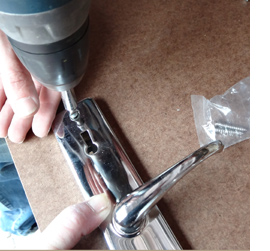
The easiest way to remove timber for drilling out is to use a mortise jig or a spade bit. Using a 20mm spade bit in your drill or drill/driver, drill out holes along the length of the marked guide. Use the new lock and handle mechanism as a guide for the correct drilling depth and for marking the holes on the door sides for the handle and keyhole.
GOOD TO KNOW
Drill spade holes through the side timber frame. Spread the holes along the length of the area to be removed to make it easier to remove what’s left.
Step 5
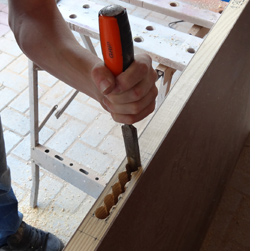
Use a sharp wood chisel and hammer to remove the remaining timber. Place the wood chisel along the edge of your drawn guide and hit the chisel into the wood.
GOOD TO KNOW
The side frames are normally about 100mm wide, so you probably won’t be able to go right down to the bottom, but remove as much top layer as you can on the first run and then repeat this to get down to the bottom.
Step 6
Regularly test-fit the lock and handle mechanism as you work. The mechanism should slide in and out easily.
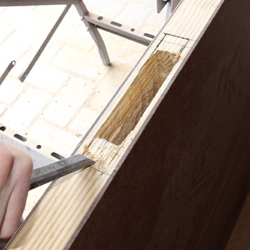
Step 7
You will also need to use the wood chisel to chip out a small amount of timber at the top and bottom of the slot, so that the lock mechanism sits flush with the surface of the timber once in place.
Step 8
In Step 4 you marked the holes for drilling out for the handle and keyholes on the door sides, use a spade bit to drill out these holes.
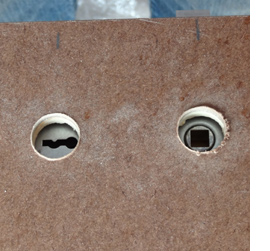
GOOD TO KNOW
Check that the handle and keyholes are perfectly aligned, or make any necessary adjustments before fastening the hardware in place.
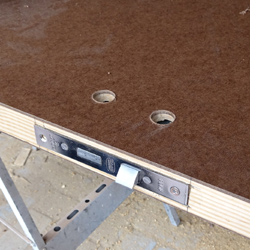
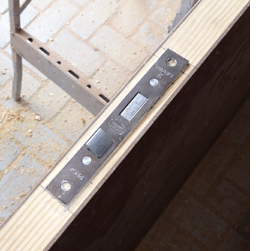
Step 9
Screw the new lock mechanism firmly in place.
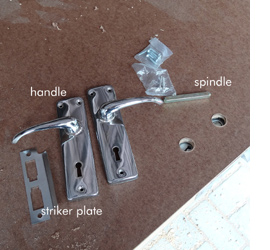
Step 10
When buying a door lock mechanism you will see that these kits come with everything you need. If you are not sure how everything fits together, take apart the lock from the old door as a guide.

Step 11
Insert the spindle, position the handle on top of this and secure in place with supplied screws.
Step 12
After attaching the handle on one side of the door, turn the door over to attach the other side.

Step 13
To mark the positioning for the door brackets, place the door against the frame. You will need an extra pair of hands here to lift the door slightly – or place a couple of shims under the door – while you mark where to mount the hinges. Use a wood chisel to remove a 3mm deep rebate for the hinges.
GOOD TO KNOW
Before you mount the door you will find it easier to paint before mounting.
Let the paint dry and then have a helper hold the door in place – or use shims – while you attach the door to the frame hinges. You can use the old screws, or attach the hinge with new screws of 5 x 50mm.