
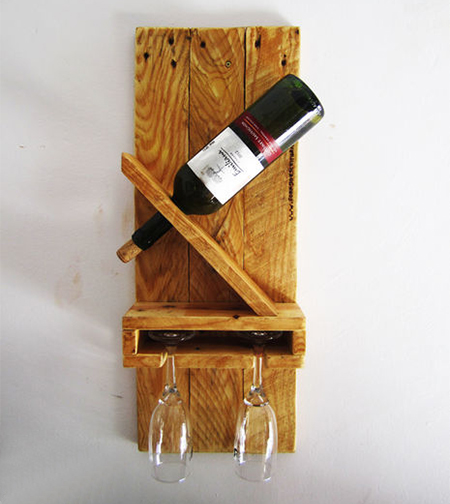
Wine rack for two!
This wine rack for two is perfect for those that only drink the occasional bottle of wine. It's also a great project to make if you are looking for gift ideas. Made using reclaimed wood, the wine rack accommodates one bottle of wine and two glasses, and takes up very little space.
instructables.com
YOU WILL NEED:
Reclaimed wood
80/120- and 240-grit sanding pads
Wood glue
2 picture hangers and small screws
TOOLS:
Orbital sander
Clamps
Drill / Driver + assorted bits
20mm spade bit
Jigsaw
40mm hole saw
Tape measure and pencil
HERE'S HOW:
1. Select the best boards to use for this project. It doesn't matter if the boards have a couple of nail holes in them - it adds to the charm, but the boards do need to be straight.
GOOD TO KNOW
Sand all the pieces before you assemble the wine rack. Start
off with 80- or 120-grit sandpaper and then finish off with 240-grit
sandpaper.
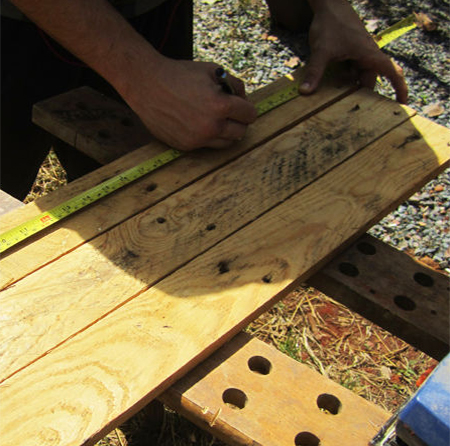
2. Measure and mark for three boards 600mm in length. These three boards are glued together to form the backing board for the wine rack. Make sure the edges of the boards are straight and fit tightly together before gluing and clamping. Leave overnight so that the glue has time to set.
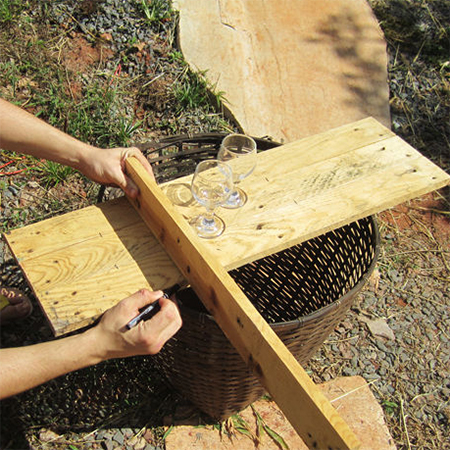
3. Measure and mark for the shelf that is mounted on the front of the backing board. You need to cut two pieces exactly the same size. You also need to cut two shelf supports that are the same width and about 50mm in height.
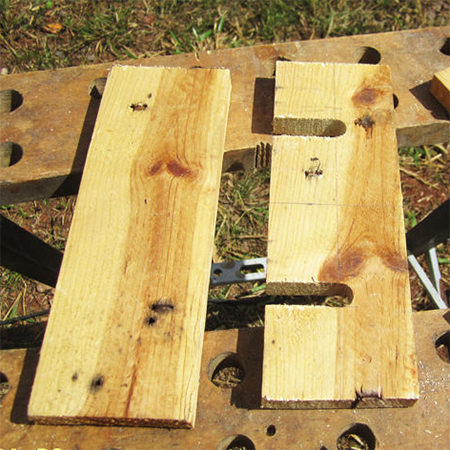
4. On one board, measure and mark the centre along the length and width. Use a 20mm spade bit to drill two holes. Draw a line from the drilled hole to the edge and cut this out with a jigsaw. These are the slots for hanging glasses on the completed shelf unit.
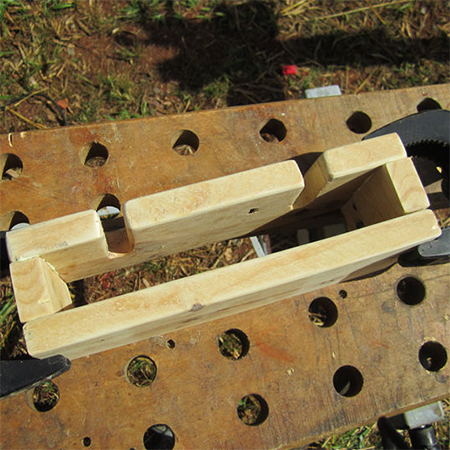
5. Sand and then glue and clamp the cut sections together to make the shelf unit.
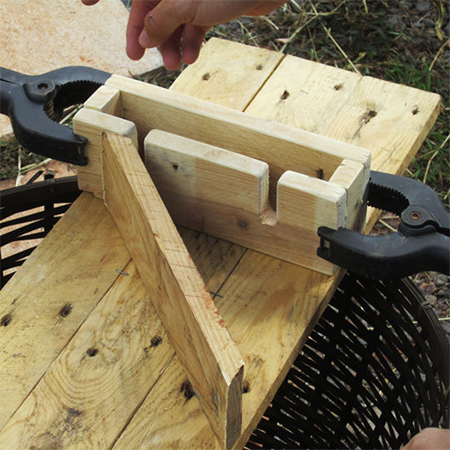
6. Using a strip of wood, cut a 45-degree angle at one end - as shown above. Place this against the backing board and mark for cutting the opposite end, also at a 45-degree angle.
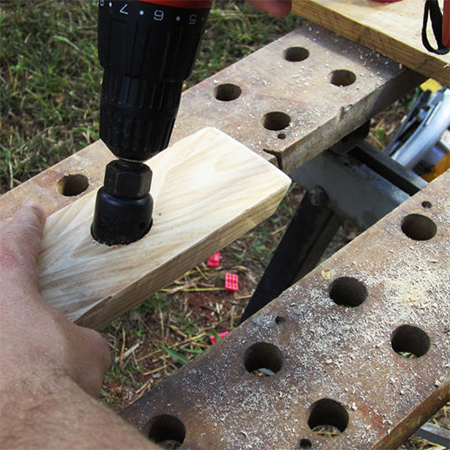
7. Use a 40mm hole saw to drill a hole in the centre of the board. Hold the drill at an angle so that the hole for holding the wine bottle is also at an angle. Sand once finished.
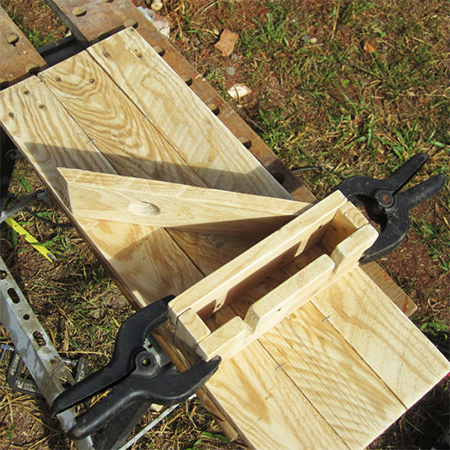
8. Making sure that the panel that hold the wine bottle is facing in the correct direction, glue all the completed sections onto the backing board and leave overnight.
Finishing
You can choose to leave as is, stain in your choice of colour, or
apply two coats of varnish to finish off your reclaimed wood wine rack. Add a couple of picture hangers at the back for hanging onto a wall.