
DIY wood patio furniture
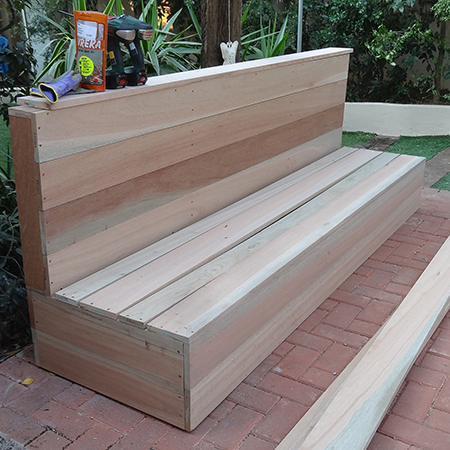
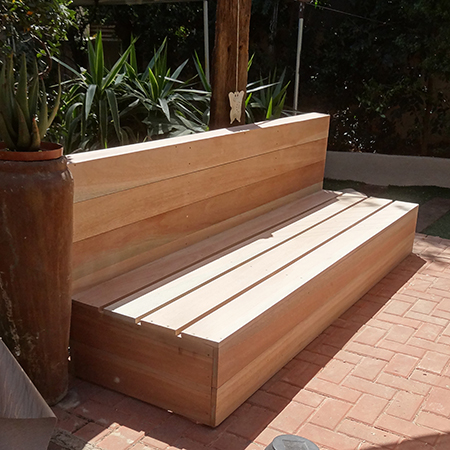
A few months back I featured an article on making your own designer patio furniture. I did mention that this was my dream patio suite and that I would be making my own patio furniture when time allowed and I have now completed the sofa part of the suite. Having priced a similar design at anywhere from R10 000 upwards it will only cost about R2 600 to make my own.
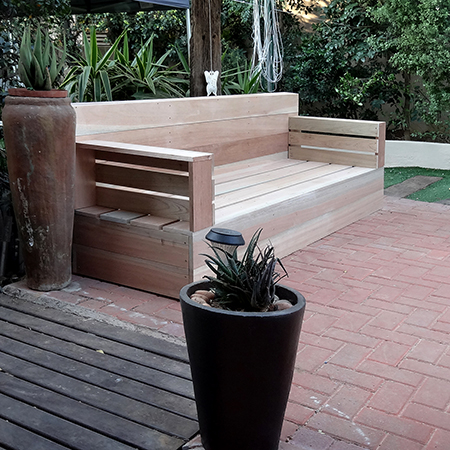
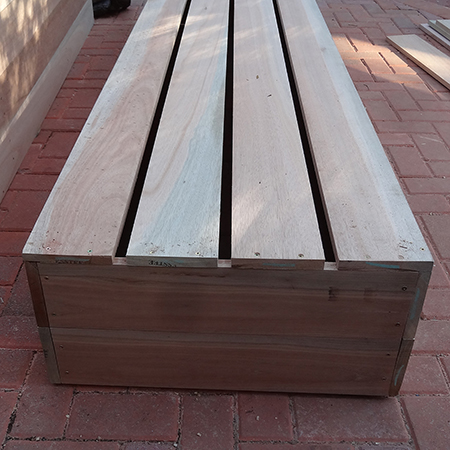
I had to make some modifications to the original design, as the timber merchants didn't have stock of some of the boards needed and, after waiting two months I thought it would be better to modify and use what stock they had rather than wait any longer. The sofa is made using meranti boards. I want the furniture to last a long time, so pine was out of the question. Meranti is much stronger than pine and comes in cream and pinkish hues, which will look nice after the clear varnish is applied.
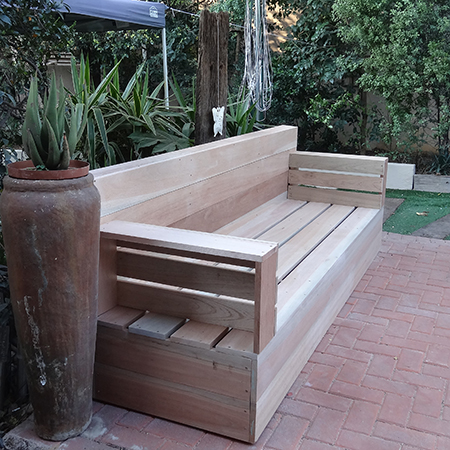
The foam for the cushions and backrest is on order an I plan to upholster these in a dark blue bull denim. Still also need to apply Plascon Sunproof exterior varnish in a clear to finish off and I will show the finished sofa once everything has been added.
YOU WILL NEED:
15 of 20 x 144 x 2400mm meranti
Cut into:
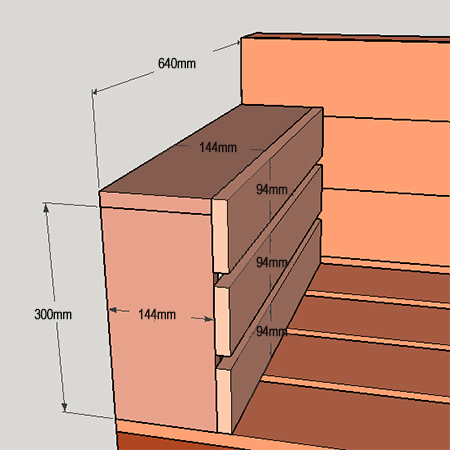
- 7 of 600mm lengths / 2 of 640mm lengths / 4 of 300mm lengths
- 5 of 20 x 94 x 2400mm meranti
Cut into:
- 5 of 536mm lengths / 6 of 640mm lengths
- 1 of 32 x 69 x 1800mm PAR pine or meranti
Cut to: 6 of 188mm lengths
- 1 of 69 x 69 x 1800mm PAR pine or meranti
Cut to: 4 of 180mm lengths
4 x 30mm cut screws
4 x 50mm cut screws
Plascon Sunproof exterior varnish
Paintbrushes
TOOLS:
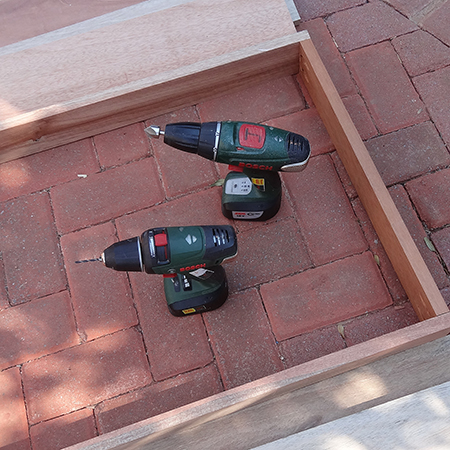
Drill / Driver plus assorted bits
Countersink bit
Mitre saw, jigsaw or circula saw
Orbital or Random Orbit Sander plus 60-, 120- and 240-grit sanding
pads
OPTIONAL: Pockethole jig and accessories
HERE'S HOW:
Making the wood patio sofa took a day - this week Monday to be exact - and it was so hot I even have sunburn to prove it !
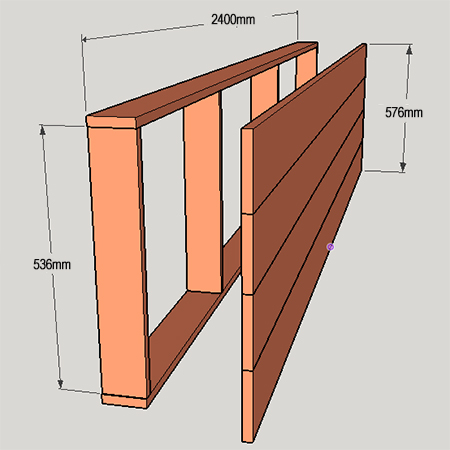
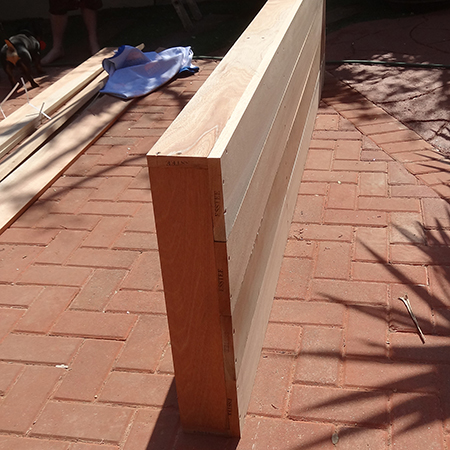
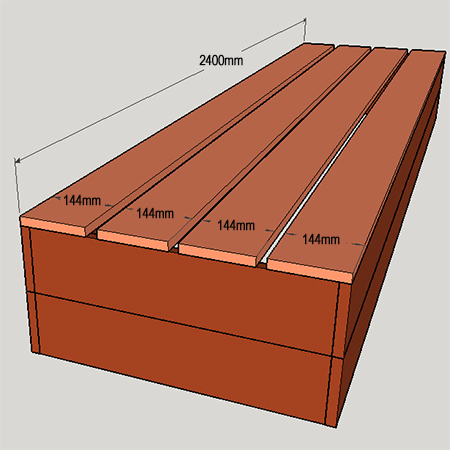
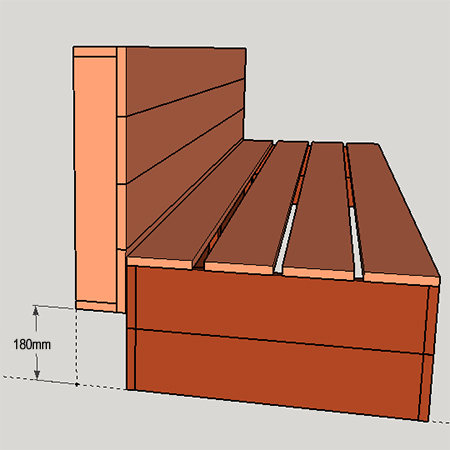
1. Start by assembling the back frame. I want a long outdoor sofa for the patio, so decided to work with the standard 2400mm length, which drastically reduced the amount of cutting that needed to be done. Cut the section as shown in the cutting list and diagram above.
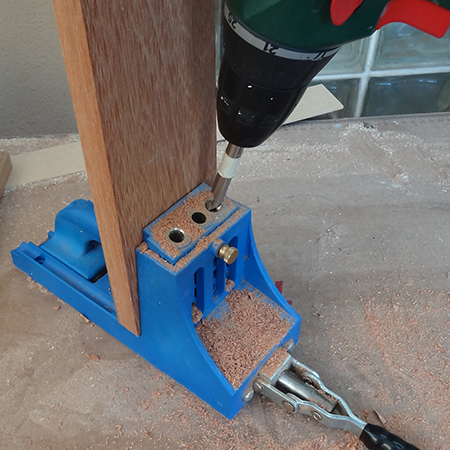
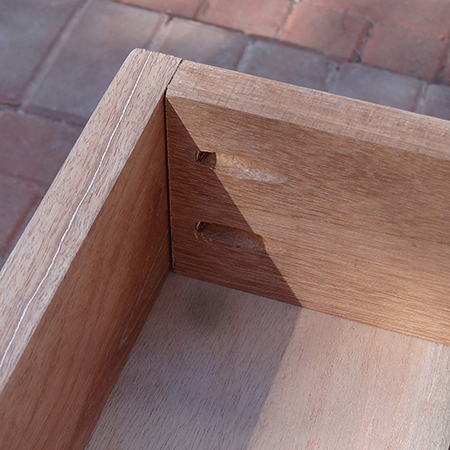
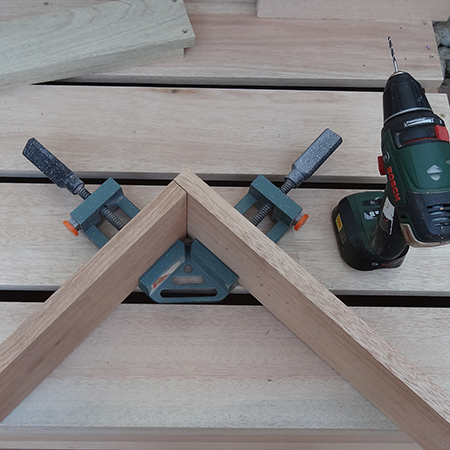
2. To join the frame together I used my pockethole jig. This isn't absolutely necessary, in fact, most of the other screws are visible, so if you don't have a pockethole jig simply do butt joints.
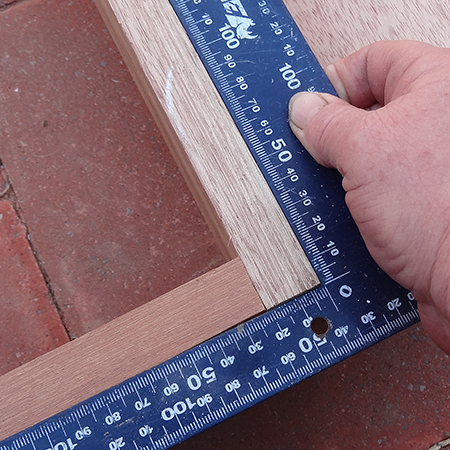
3. Use a corner or carpenter's square as you assemble the sections. I was so sure that meranti would be perfectly straight, but it isn't and I had a couple of slightly warped boards to work with and tried to use these where it would be as noticeable.
5. Once the frame is complete you can start adding the lengths to cover the front of the frame. This is where getting your corners 100% accurate is important. If you don't have square corners the planks on the front will be uneven at the edges. So, check twice before you fasten everything together.


6. Now it's time to make the base. Make sure to leave all the best planks for the top and front of the base, as these will be most visible. Cut the sides and supports as per the cutting list and diagram below.
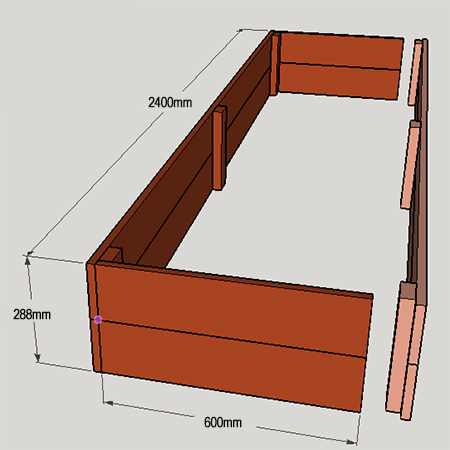
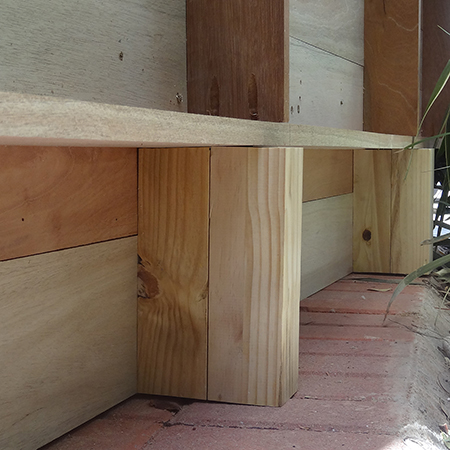
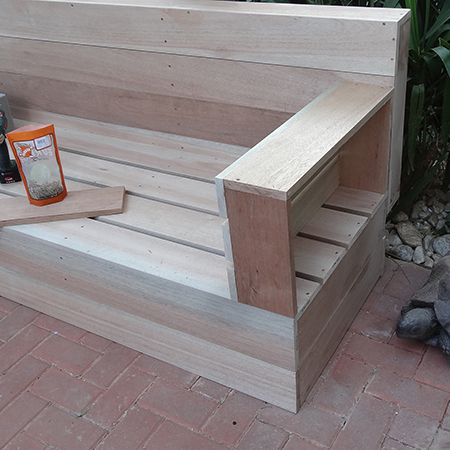
7. Use 32 x 69mm PAR pine or meranti blocks to join the double layers of panels together for the front, back and sides. In the original design this was a solid panel, but due to lack of stock I had to make a modification.
8. The blocks are attached at both ends of the front panel, as well as a block just off centre, and you will find out why it is mounted off centre below. Remember to leave a 20mm gap at the end for mounting the side panels.

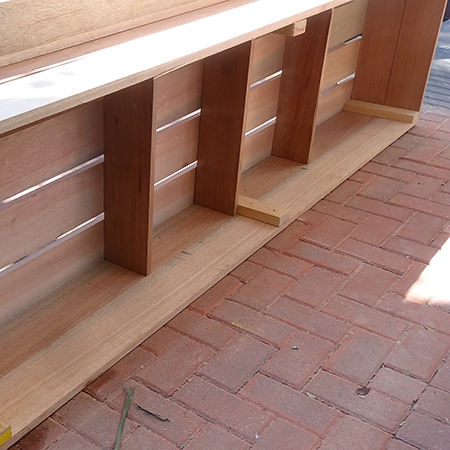
9. For the supports underneath I only used a single strip of meranti. This cut down on the cost and really is strong enough. But you can add a double level support if you need extra support. Add an extra length of 144mm meranti for this.
10. The supports are secured through the front, back and seat.
11. On the original design the frame was mounted onto the base. I moved the frame off the base and secured it to the back of the base.

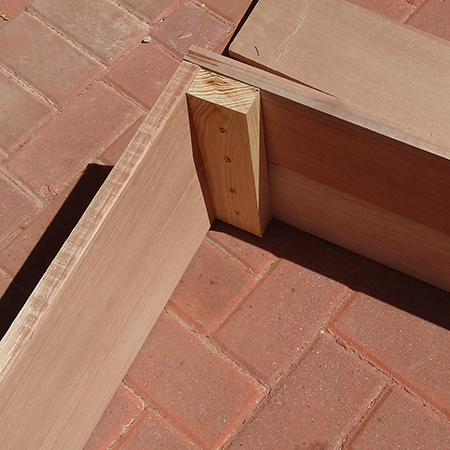
12. To compensate for the design modification some 69 x 69mm blocks were cut to 180mm length. Two blocks were glued together and these were then attached to the base (from inside and above). Works like a dream!
Now all that's left is to make the arm rests. Again, use the cutting list and diagram below to assemble.
GOOD TO KNOW
Corner clamps come in handy if you are working on your own.
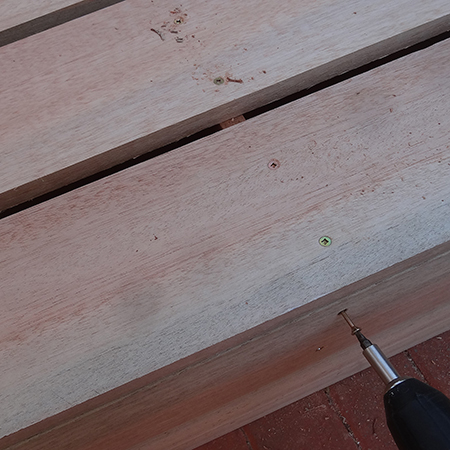
13. The tops are screwed onto the front and back supports.
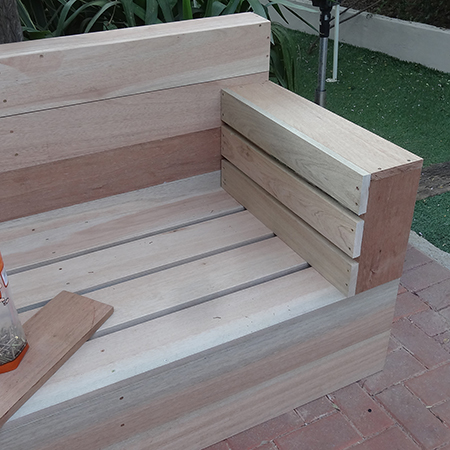
14. The top and bottom slats are fastened first and then spacing adjusted for the centre slat.
It honestly was an easy project. The meranti cost R2 600 and I know that the foam and fabric will add another R1 000, so a total of R3 600. I priced similar designs from various suppliers in South Africa and the cost ranged from R10 000 without cushions up to R35 000 for an upholstered patio sofa.
Finishing
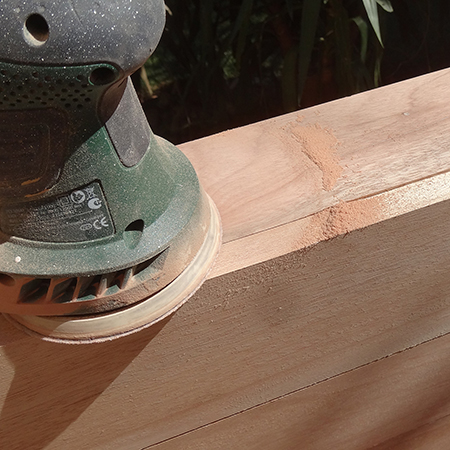
I had to use my Random Orbit Sander and 60-grit sanding pads to do a
bit of levelling here and there due to a slight bowing on some of the
planks. After that I sanded with 120-grit to smooth and finished off
with 240-grit to make sure there were no splinters. I also rounded off
all the sharp edges.
Still have to apply clear exterior varnish to the entire piece, including the underside for maximum protection. I know I normally don't endorse varnish for exterior furniture, but this wood is very dry and there was hardly any moisture content, so I thought I would give this a try for once! The high-density foam for cushions and medium-density foam for the backrest is on order and I will upholster these with a bull denim fabric. Will post the finished sofa as soon as I have finished.