Make a Jute or Rope Bench Seat
This jute rope bench is very easy to make and is sturdy enough for two people to sit on and all you need is PAR pine, jute rope and sash cord that you will find at your local Builders Warehouse.
23/07/2021
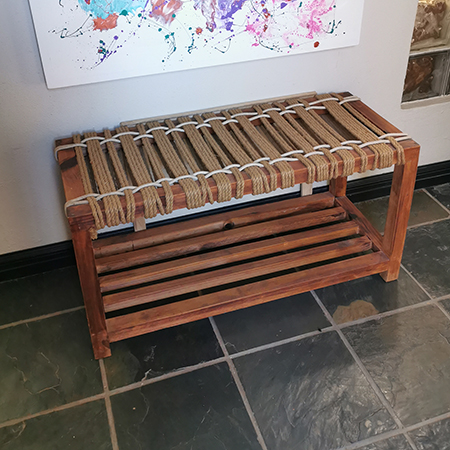
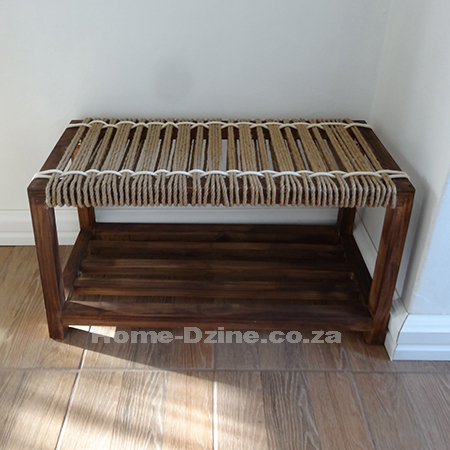
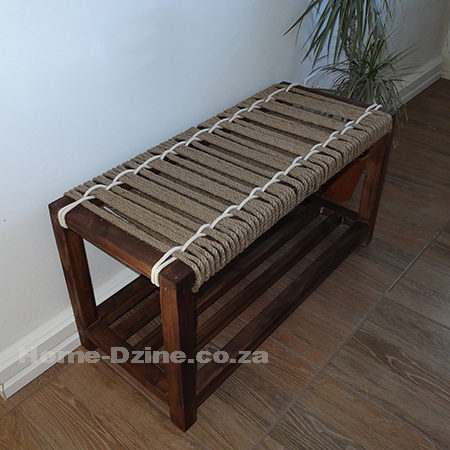
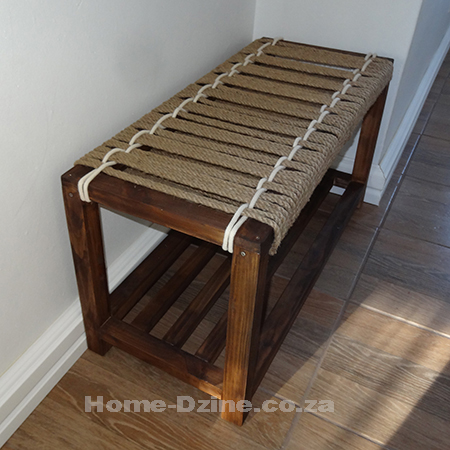
It has been over 10 years since I made my jute and rope bench and I wanted to share how it has stood the test of time. This project was actually one that we did on DIY-Divas.co.za and it was such a fun project for everyone who attended. What makes this basic pine bench so attractive is the rope seat and, as you can see in the images attached, it still looks as good as the day it was made.
The bench was made using PAR pine that doesn't cost much at your local Builders store and it was finished with a teak wood stain and then waxed rather than sealed. The jute rope and sash cord were also purchased at Builders.
Not a difficult project at all, we completed this project in a morning session (3 hours) at DIY-Divas.co.za. If you are planning to stay indoors this freezing cold weekend, here's an excellent project to warm you up!
Originally posted in 2010
This jute rope bench is very easy to make and is sturdy enough for two people to sit on. Use PAR pine, jute rope and sash cord that you will find at your local Builders Warehouse to make this jute bench as a decorative accessory or to add to a bathroom or bedroom.
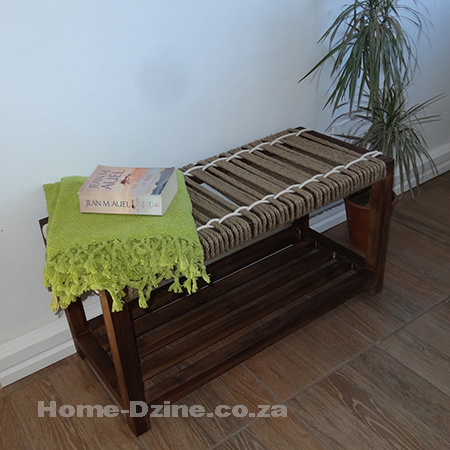
I think this jute bench would be perfect for a small bathroom and you can add baskets on the shelf for storage. Or place the jute bench at the end of a bed.
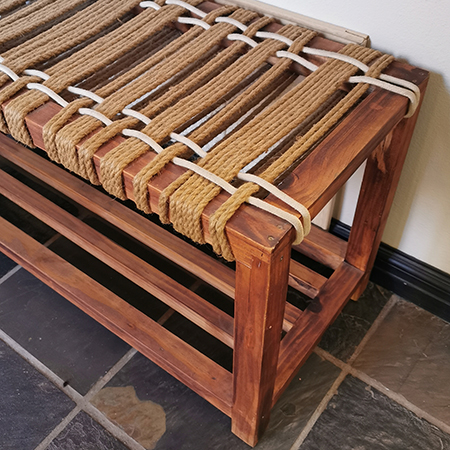
While I applied a simple weave design, you can be as creative as you like. Use a thinner rope or cord and add a detailed weave pattern.
YOU WILL NEED:
2 of 44 x 44mm x 900mm lengths PAR pine - top frame front/back
2 of 44 x 44mm x 856mm lengths PAR pine - shelf front/back
4 of 44 x 44mm x 400mm lengths PAR pine - legs
4 of 44 x 44mm x 300mm lengths PAR pine - sides
3 of 32 x 32mm x 856mm lengths PAR pine - shelf slats
Pattex No More Nails adhesive
8 steel corner brackets or braces
4.5 x 50mm cut screws
4.5 x 25mm cut screw
Woodoc gel stain
Woodoc antique wax
OR Plascon clear or tinted varnish
2 pack of jute rope
1 pack of window sash cord or rope
TOOLS:
Drill / Driver + assorted bits
Countersink bit
Mitre saw or wood chisel
Orbital or random orbit sander + 120- and 240-grit sanding pads
HERE'S HOW:
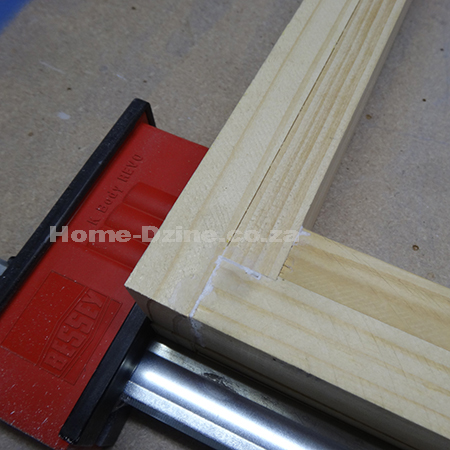
1. For this project I wanted to try something a bit different, so I used half-overlap joints to secure the top frame front and back to the legs. Since 44 x 44mm PAR pine is two pieces of pine laminated (glued) together, you already have a line to follow and just need to mark 22mm in on both the edge of the top frame and legs.
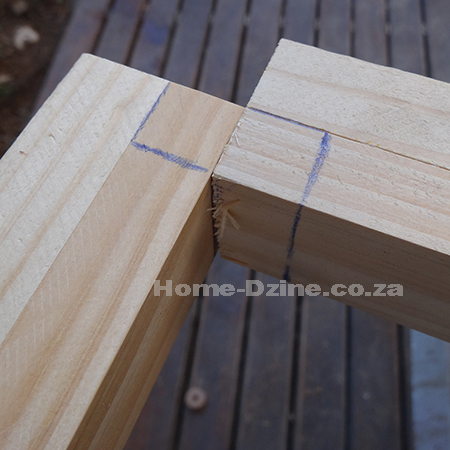
2. I used a mitre saw to cut away the block, but you could use a wood chisel.
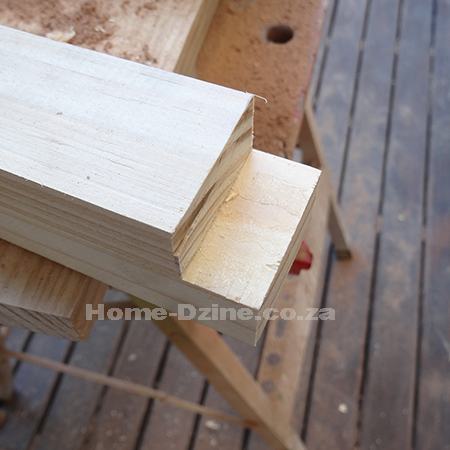
3. With the half-overlap joint you simply place the two cut sections together, glue and clamp for a joint that has no visible screws.
GOOD TO KNOW
Despite the half-overlap joints, I ended up adding screws to
the joint between the top frame and legs anway. I just didn't think it
was going to be strong enough with only glue holding it together!
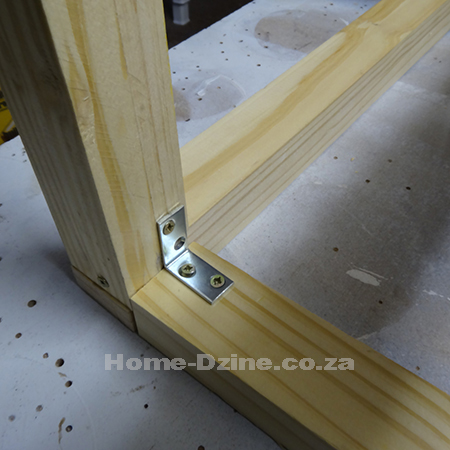
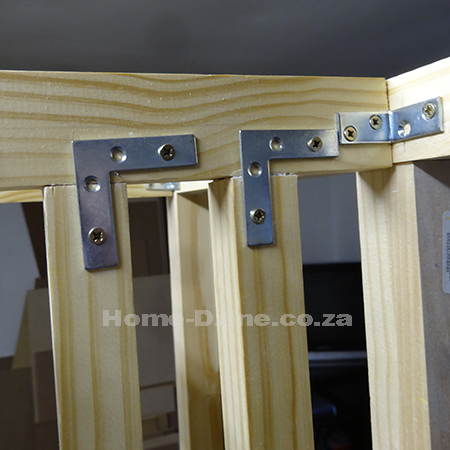
4. The sides are attached to the completed side frames using steel corner braces. The braces are mounted underneath and you won't really see them once the bench is finished.
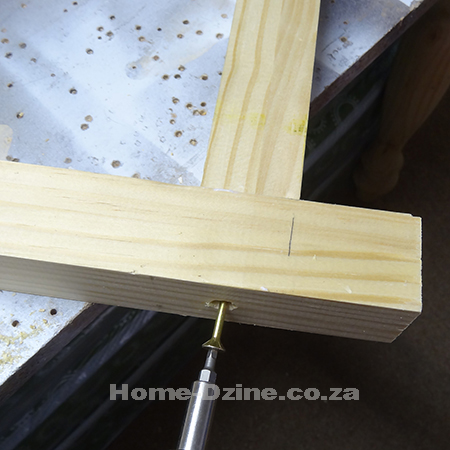
5. Measure and mark at 50mm up from the bottom of all legs. To attach the shelf frame apply a bead of Pattex No More Nails to the edges before drilling a 3mm countersunk pilot hole and securing with 50mm cut screws. Hold the shelf frame as you secure to keep it straight.
6. Attach the bottom shelf side in the same way as the top side, using steel corner braces underneath. The top of the shelf side lines up with the top of the shelf front/back.
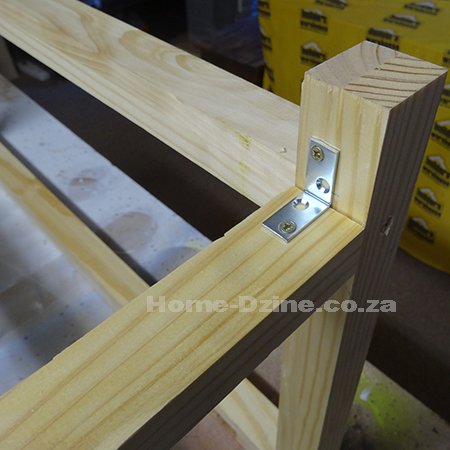
7. My original intention was simply to glue the slats in place. But after gluing I realised they needed more support, especially if you wanted to place heavy items on the shelf, so I added flat braces underneath the slats. You could also drill a countersunk pilot hole through the shelf side and use 50mm screws to secure, but don't forget that you will see the screws. Alternatively, you could also use a pockethole jig.
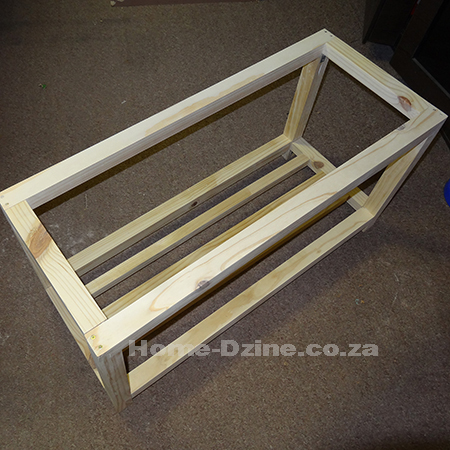
Completed frame. You can see that I added a couple of screws to the top of the half-overlap joint to secure the front and back frames to the legs.
FINISHING
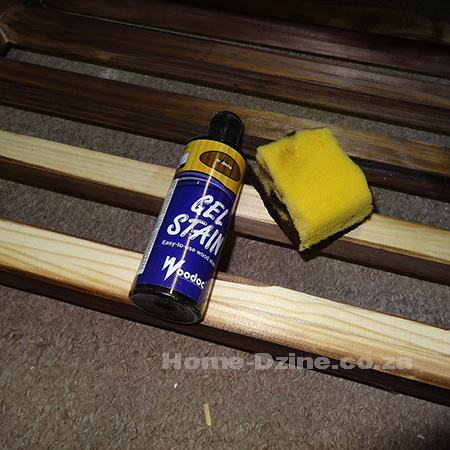
Sand using 120-grit to remove any rough or uneven edges and then sand with 240-grit for a smooth finish. Remove the sanding pad and rub along the sharp edges as well. To contrast with the jute I stained the bench frame with Woodoc imbuia gel stain. I like to use a sponge to apply the gel stain, but have a couple of pieces of sponge as the gel makes the sponge go all mushy. As an alternative you could leave unstained and apply antique wax, or use a Plascon clear or tinted varnish.
ADDING JUTE OR ROPE SEAT
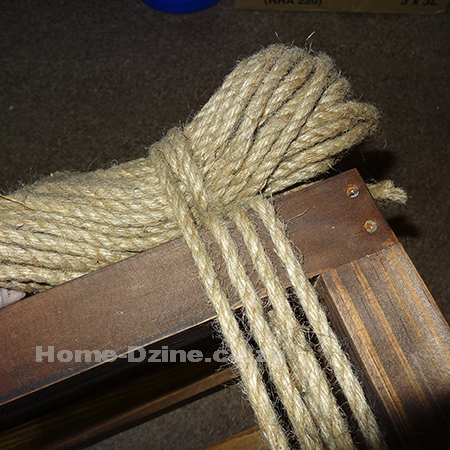
Secure one end of the jute rope with a couple of 25mm screws. I will also be adding a dab of hot glue once finished to make sure this doesn't come loose.
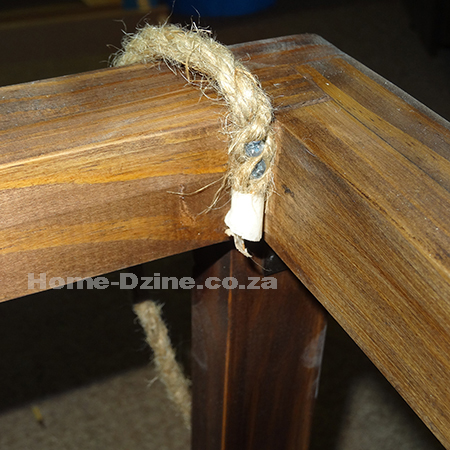
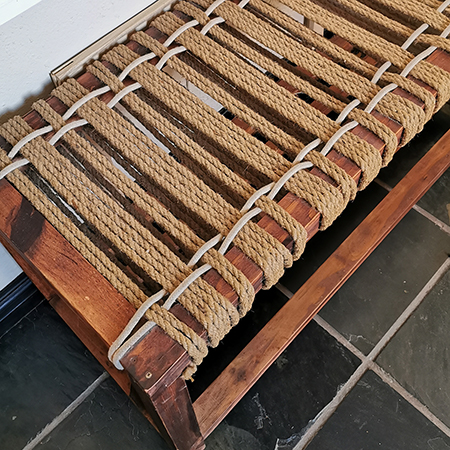
Start wrapping the rope over and under the top, leaving a 5mm gap between the strands. Any wider than this and you will end up with large gaps when you weave the sash cord through. Pull the rope tight as you wrap around.
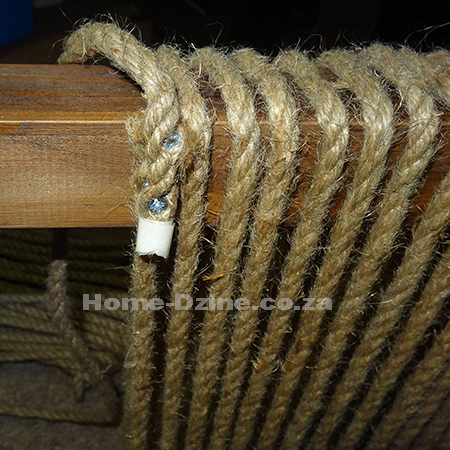
One pack of rope wasn't enough for the entire seat, so I joined the end of the old with new rope by adding a couple of screws to secure.
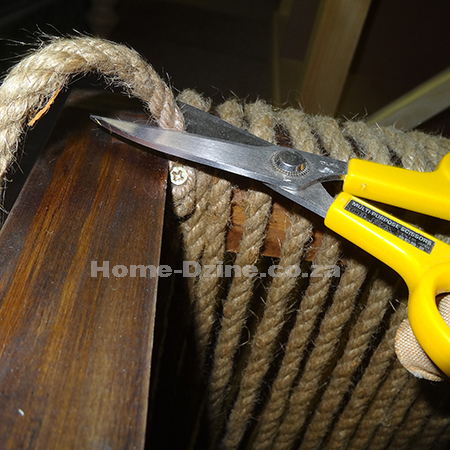
When you reach the end of the seat, add a couple of screws before cutting the rope.
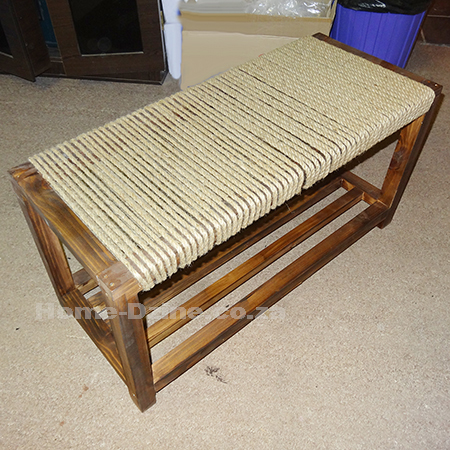
The completed jute rope bench before adding the contrasting sash cord.
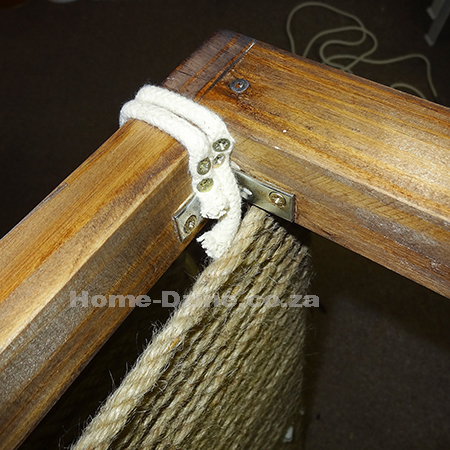
To weave through the sash cord, secure the end with a couple of screws and cut away any excess for a neat finish.
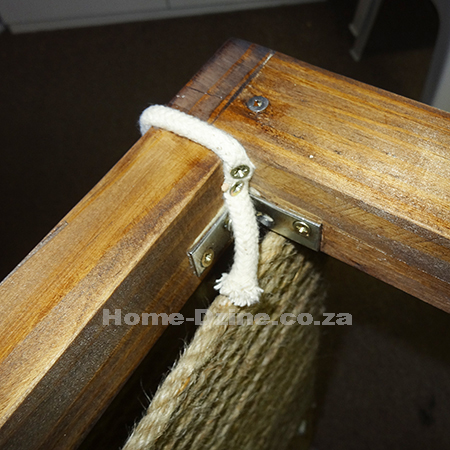
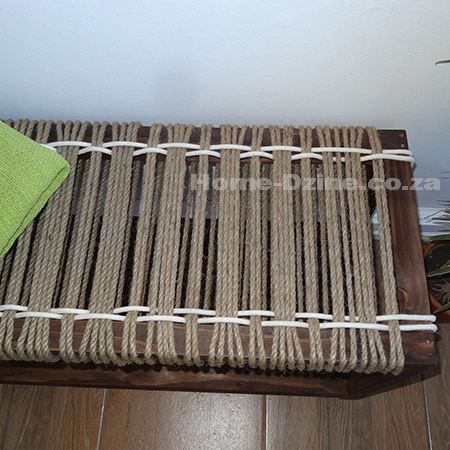
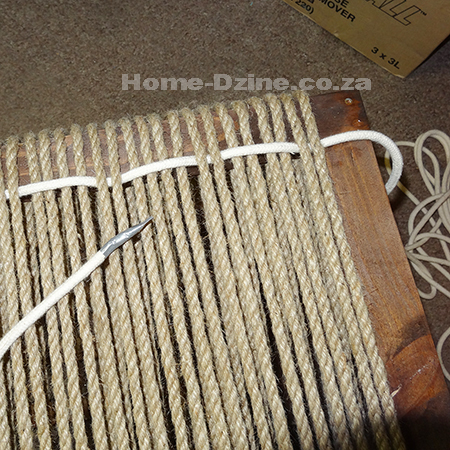
I wrapped some duct tape around the end of the cord to prevent it from unravelling and to make it easier to thread through. Thread the sash cord over and under to create your desired weave pattern.
When you reach the other side, pop in a couple of screws to secure the first and and then loop over and secure forthe second row.
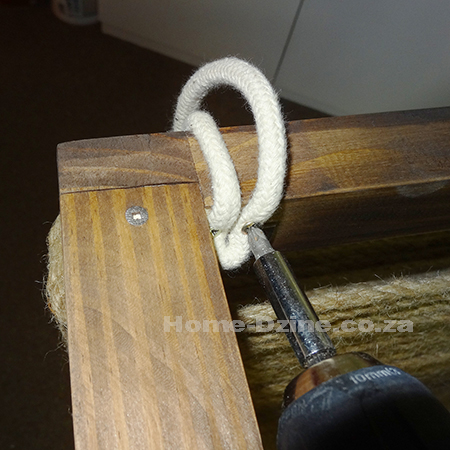
Secure the end of the second row at the starting point with a couple of screws and cut away the excess. Now you can repeat this for the front of the bench.