
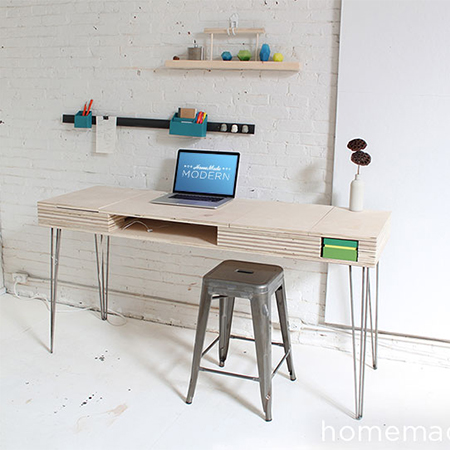
Multi-purpose flip-up desk
When you live in a small apartment where space is at a premium you can design a desk that can be used as a workstation, a place to do crafts and hobbies, or one that can also serve as a dining table. This flip-up desk can also be purposed for use as a contemporary dressing table.
homemade-modern.com
This multi-purpose desk is designed by homemade modern and is constructed using birch veneer plywood. While birch plywood is available here in South Africa, there are limited suppliers of this product(do on online search). As an alternative you could consider using bamboo board for a version that is just as eco-friendly.
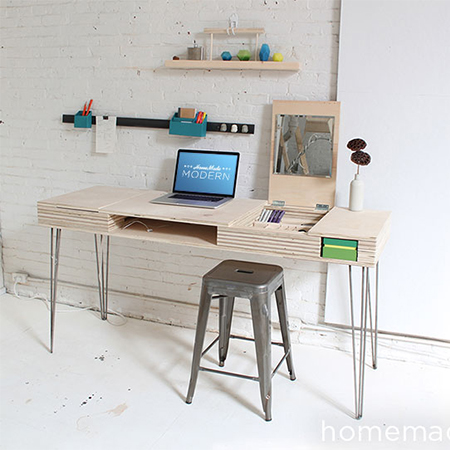
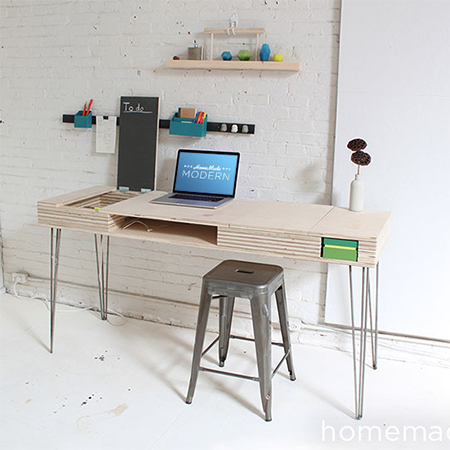
There are two separate storage compartments in the desk, each with its own flip-up lid. There's also storage sections under the top if you need to fit a slide-in/out facility for a keyboard, or just for stationary and supplies. One flip-up lid has been painted with chalkboard spray and on the other a mirror has been mounted, just to show how easy you can convert this desk into a dressing table.
The hairpin legs are from Ikea and are not available locally, but you could have them custom made or substitute with any legs. You will find brushed chrome legs at your local Builders Warehouse, as well as various other styles at suppliers such as Wholesale Cabinet Fittings (www.cabinetfittings.co.za).
YOU WILL NEED:
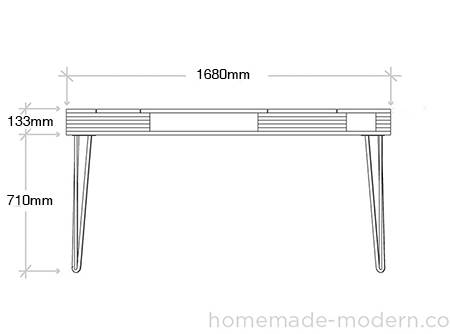
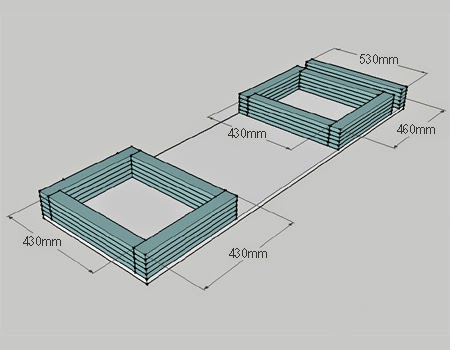
1 of 530 x 1680mm board - base
30 of 50 x 430mm board - compartment frames
10 of 50 x 460mm board - compartment frames
5 of 50 x 530mm board - end frames
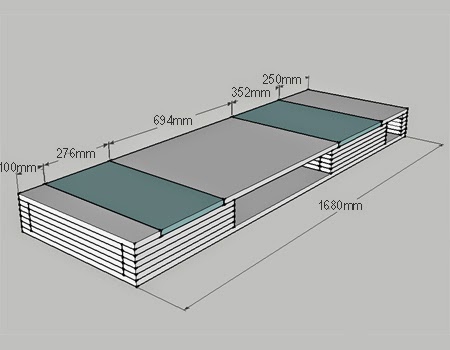
1 of 100 x 530mm board - top end
1 of 250 x 530mm board - top end
1 x 694 x 530mm board - top centre
1 of 276 x 530mm board - flap
1 of 352 x 530mm board - flap
4 butt hinges and 20mm screw
4 legs and 16mm screws
TOOLS:
Drill / Driver + assorted bits
Circular saw, router, Dremel trio or wood chisel
HERE'S HOW:
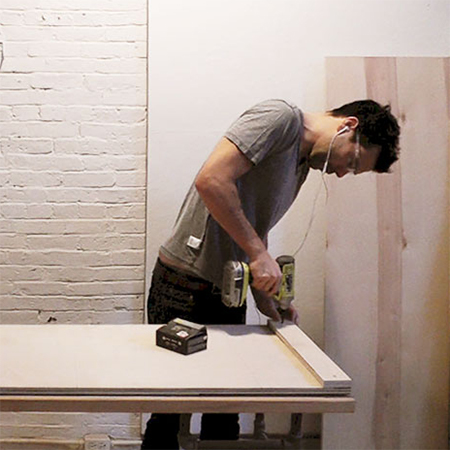
1. Place the base of the desk of a pair of sawhorses or workbenches. Although Ben screwed the compartment frames together, there's no reason why you can't use wood glue to assemble the compartment frames. Clamp the frames to the base until the glue has dried.
2. With the compartments secured to the base you can start adding the various top components. To keep the top screw-free, use wood glue to secure the top sections in place.
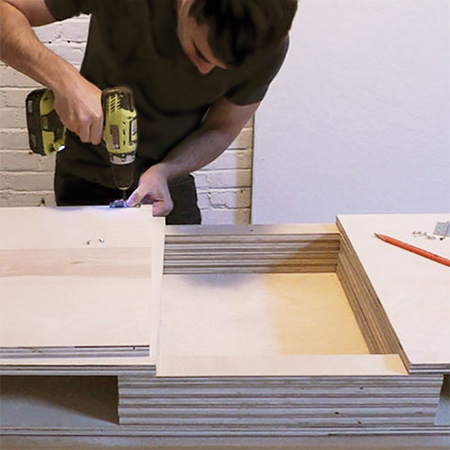
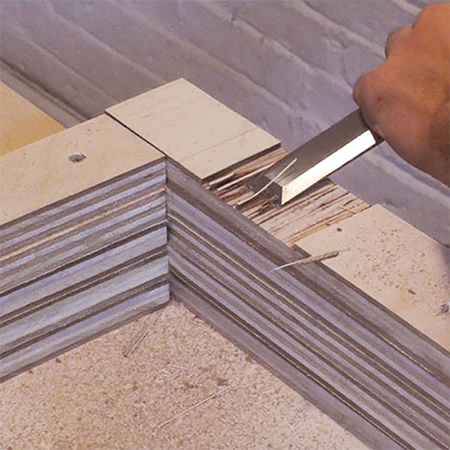
3. Measure and mark on the frame and the flaps for mounting hinges.
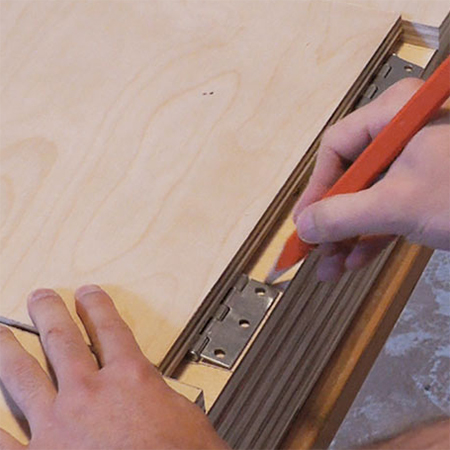
4. So that the top flaps sit flush you need to chisel out for the hinges to a depth of 6mm (or the total thickness of the hinges you are using).
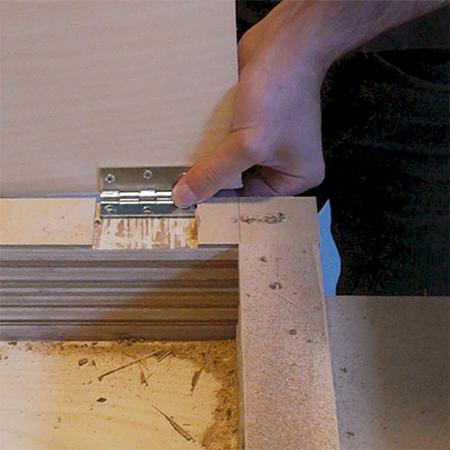
5. Now all that's left to do is secure the hinges in place.
Finishing
If you prefer to finish the desk rather than leave as is, you can
apply wood stain to tint to your choice of colour, and finish off with
varnish (satin or gloss) or apply antique wax.