Make a games table
This dual-purpose table easily converts into a games table and is made using PAR pine that you will find at your local Builders store.

homedepot
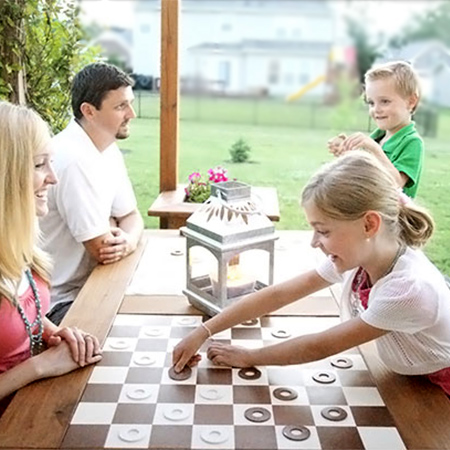
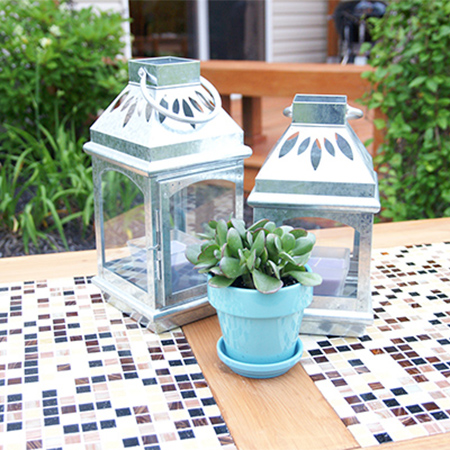
You can set up this games table for family fun indoors or out and create your own board designs if you want to play more than one game at a time. The games table is large enough to comfortably allow for four players.
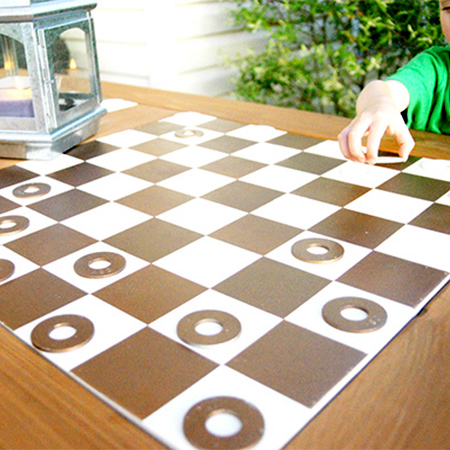
Make your own game pieces using large metal washers and Rust-Oleum Universal spray paint in your choice of colours.
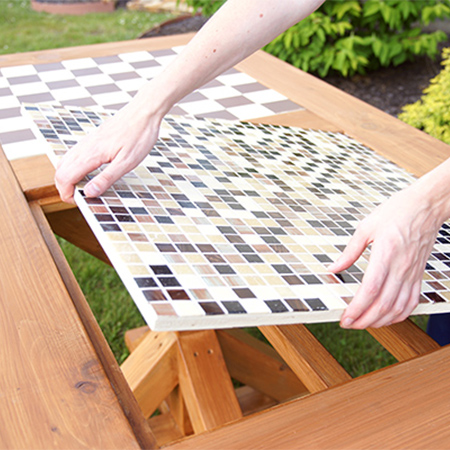
When not in use, flip over the boards to display the mosaic tile side for a decorative table.
YOU WILL NEED:
3 of 20 x 94 x 1800mm lengths of PAR pine cut
to:
- 2 of 20 x 94 x 1360mm PAR pine - table front
- 2 of 20 x 94 x 890mm PAR pine - table side
- 1 of 20 x 94 x 720mm PAR pine - table centre
divider
4 of 32 x 32 x 1800mm lengths of PAR pine cut
to:
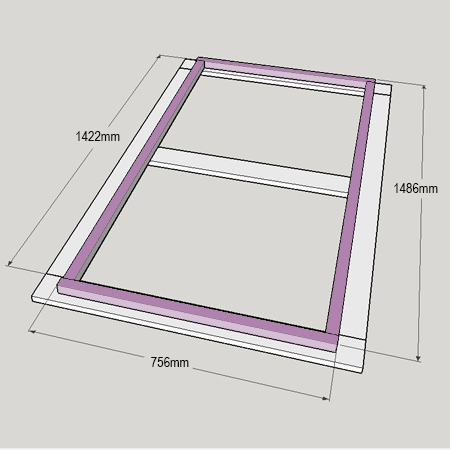
- 2 of 32 x 32 x 1422mm PAR pine - frame front
/ back
- 2 of 32 x 32 x 1422mm PAR pine - frame centre
pieces
- 2 of 32 x 32 x 756mm PAR pine - frame sides
2 of 69 x 69 x 1800mm lengths of PAR pine cut
to:
- 1 of 69 x 69 x 740mm PAR pine - table leg
- 4 of 20 x 69 x 368mm PAR pine - table base
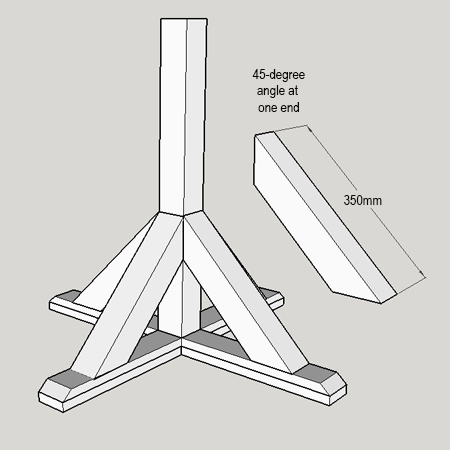
- 8 of 69 x 69 x 350mm PAR pine - table
base/top supports
2 of 632 x 700mm 12mm plywood - board inserts
Pack of 50 / 4 x 35mm screws
Pack of 50 / 4 x 45mm screws
Pack of 50 / 5 x 75mm screws
Wood glue
Plascon Ultra varnish and paintbrush
Flexible tile adhesive, grout and grout
sealer
Mosaic tile sheets
Rust-Oleum Universal spray paint
(2 colours)
Masking tape, wide
TOOLS:
See options below for joining methods
Drill / Driver
plus assorted bits
Jigsaw (with adjustable base) or mitre saw
Orbital sander plus 120- and 240-grit sanding
pads
Carpenter's square
Tape measure and pencil
Tools for tiling
Buy everything you need to make this draughts board at your local Builders Warehouse.
HERE'S HOW:
Make the table top
1. Join the sides to the front and back of the table top. To join you can use a pockethole jig, Tork Craft biscuit joiner, dowels or steel braces and wood glue to secure these sections.

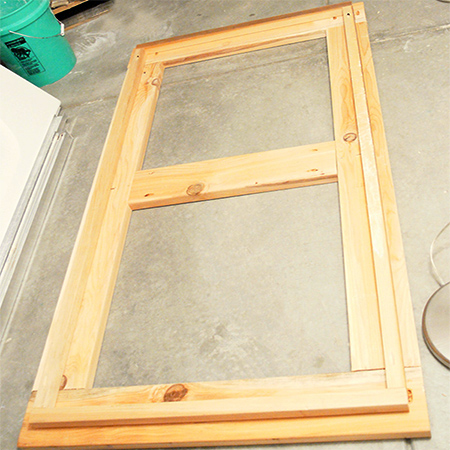
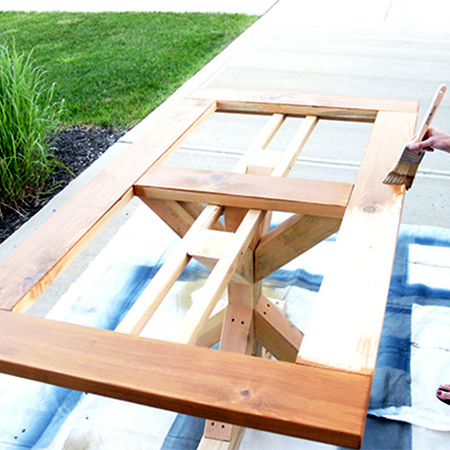
2. Join the under frame using the same method and then secure this to the underside of the table top with 45mm screws at the ends and the centre. The under frame needs to provide an overhang in the centre of the table to provide a ledge for mounting the game boards.
BELOW: Here you can see the ledge that provides support for the game boards.

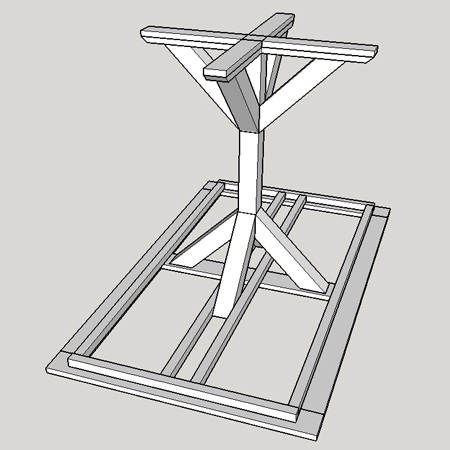
Make the table base
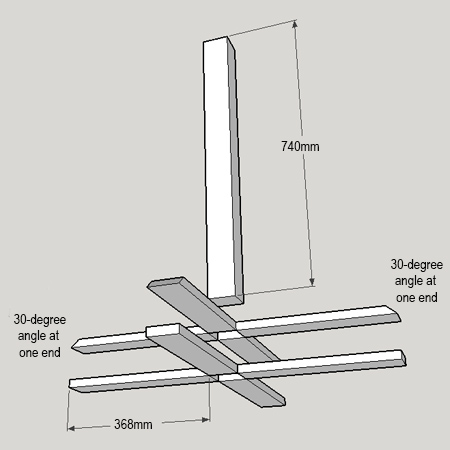
3. Secure the 4 bottom pieces onto the table leg using pocketholes.
4. Cut 30-degree angles at one end of the top base sections before using glue to secure these on top of the lower sections.
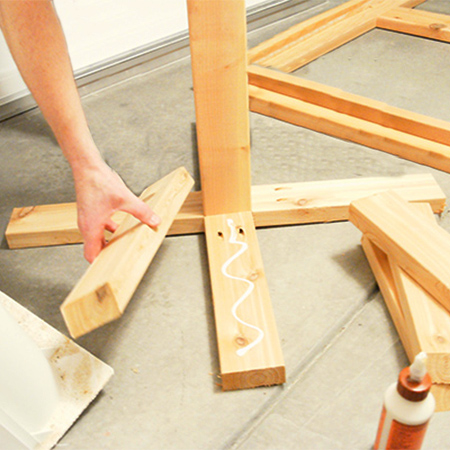
5. Cut opposing 45-degree angles at the ends of the 8 table base/top supports.
6. Use two 75mm screws at the top and base of each support - driven in at an angle - to secure the supports to the base.
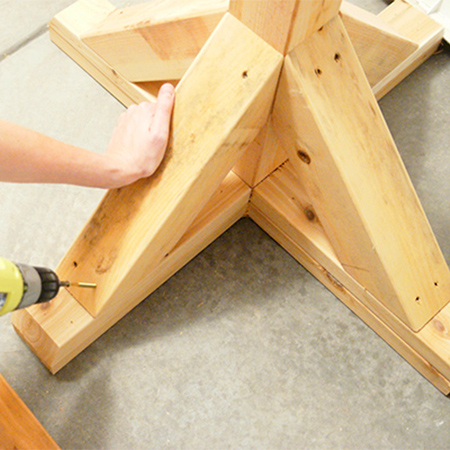
7. Secure the remaining 4 supports to the top of the leg to support the table top.
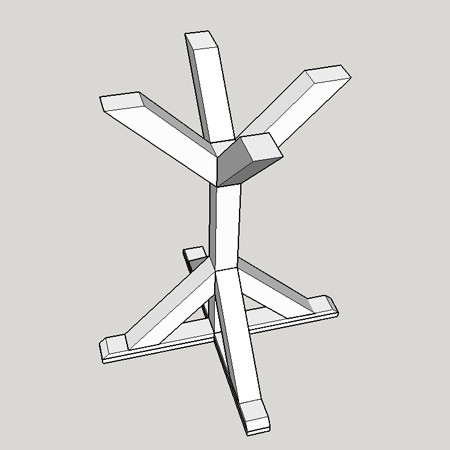
8. Place the base on the underside of the table top. Position the two centre pieces against the side of the two side supports. Drive screws through the support into the table centre and through the sides of the centre pieces into the base supports. Use 45mm screws to secure the centre pieces to the underside of the table at the ends and on the table centre.
9. Take the time to sand the assembled table to remove any uneven edge and smooth the surface of the wood. Wipe clean before applying Plascon Ultra varnish according to the instructions.
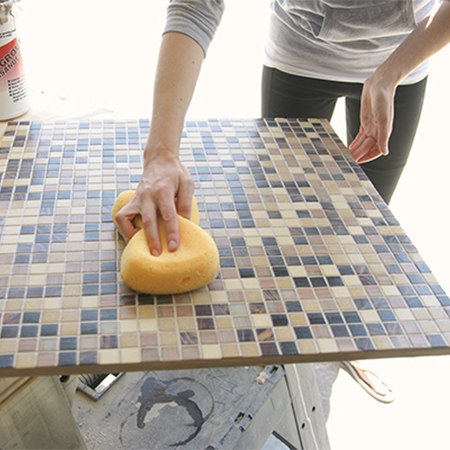
Make the boards
Before tiling and painting these boards test fit into the opening and sand to fit if necessary. On one side of the plywood boards apply a layer of flexible tile adhesive using a trowel. Press the mosaic tile sheets into the adhesive and leave overnight. Finish off with a layer of grout to fill in the gaps, leave for 30 minutes, wipe clean with a damp sponge to remove excess grout and then apply grout sealer.
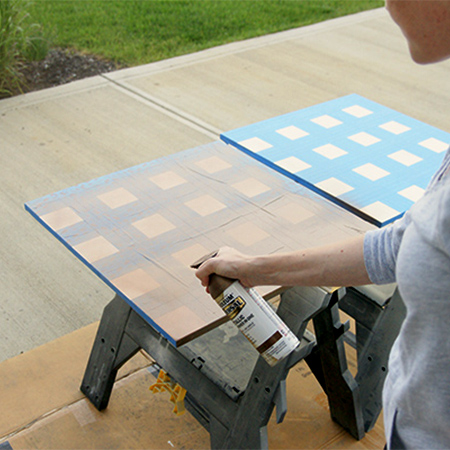
Make sure the tile side is completely dry before working on the other side to create the game boards. Use wide masking tape to mark out a checker board. Use Rust-Oleum Universal spray paint in your choice of colour to add blocks to the game boards. Spray on one colour, let dry, remove tape and then re-apply masking tape to spray on the second colour.