
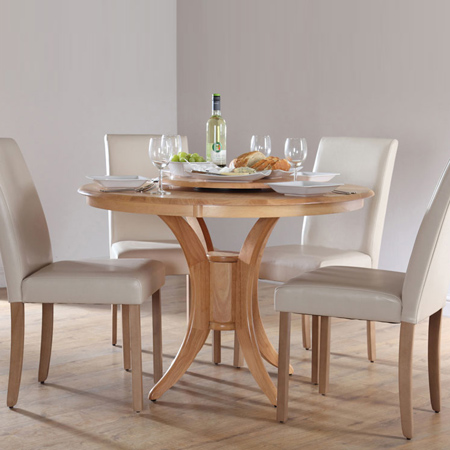
Build a round or circular dining table
Although the project shown here is for a round or circular dining table, you can modify the size of the project to make a round coffee or side table. Once you realise how simple making this round table really is - you are definitely going to be making more!
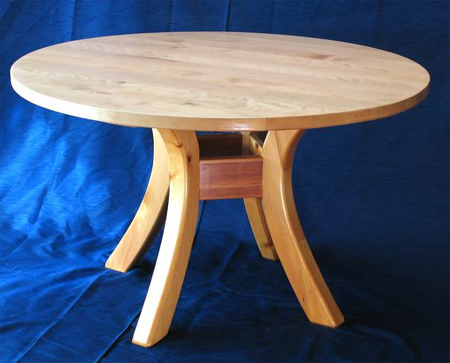
If you have ever wondered how they make the central supports for a round dining table, after tackling this project you will have a far better understanding of the basic techniques involved.
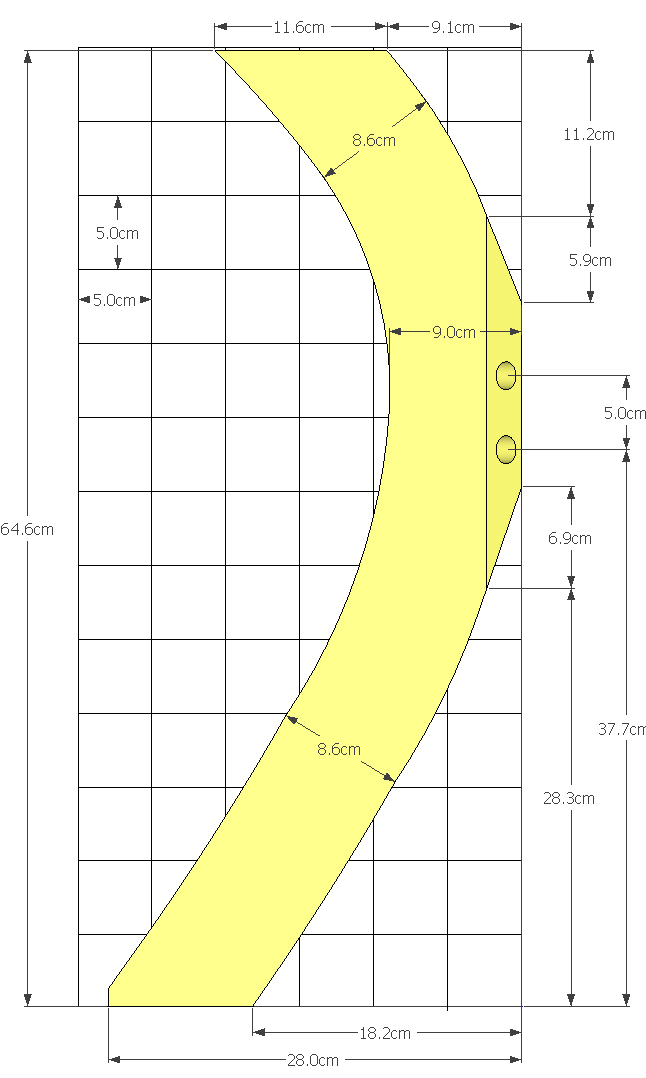
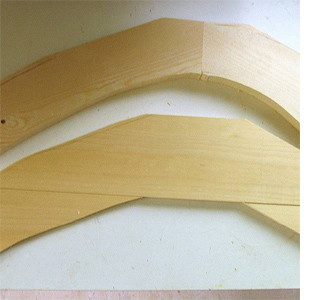
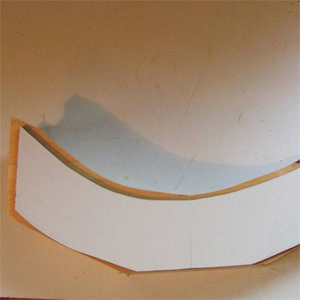
Use this template to shape the legs. The leg itself is 65cm high and 8.5cm wide along the curved part, except where the legs join the cross pieces, where it is a bit wider. Two pieces of 50 x 150mm PAR pine should be enough to draw the shape - as seen at left. Glue together - end grain to end grain - with a butt joint.
The trick to making the curved legs is to laminate PAR pine together. Making the legs out of multiple pieces actually allows orienting the grain a little better, for more strength. Note the notches I cut out to allow attaching the clamp. This is part of the wood that gets cut away anyway, so it doesn't matter much.
The next step is to cut out the approximate shape, leaving about half a centimeter around the template outline. Chances are the joint between the two sections isn't completely flat, so planing or sanding will fix this.
Using 50 x 150mm PAR pine, cut sections and place these to make the shape of the already cut leg. Add excess pieces to fully cover the shape of the leg. It doesn't matter if you use small pieces, as these will be on the inside. Do this twice for each leg.
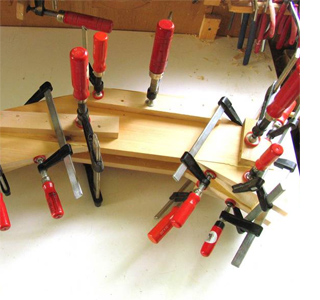
Glue the cut pieces to both sides of the original leg piece. Use clamps to press the board pieces against each other edge to edge for good bonding.
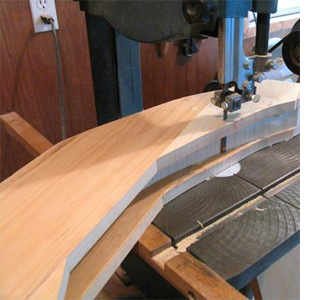
Now you are ready to trim the excess off the boards that were glued on both sides of the original leg shape. This isn't strictly necessary, but it makes it much easier to put the template back on the leg and not risk putting it where there isn't wood underneath.
Place the template above over the glued together section to outline the shape with a pencil.

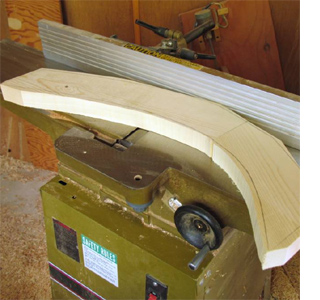
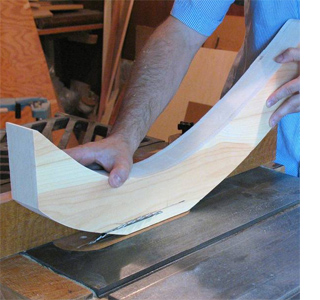
Follow the draw lines to cut away the flat section at the back of the leg. This surface is a reference for where the leg ends up, so it's important for that surface to be flat. Now we are ready to do the final outline cut of the table leg. This time we have to be really careful, because after this cut, it's just sanding to get it smooth. At this stage, the leg is about 70mm thick, but needs to be planed down on both sides to be about 60mm thick.
With a table saw set at 45 degrees, cut away 20mm x 20m at a 45- degree angle. If you have planed the leg down to 60mm thickness, the uncut part on the back should be 20mm wide after the cuts.
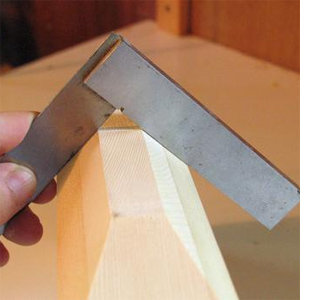
Before you continue, check that the two 45-degree angles form a 90-degree angle. If not, you will really curse yourself when you try to put the whole thing together. When I built the original table, I wasn't careful enough about this, and it took a lot of force on final assembly to get it all together!
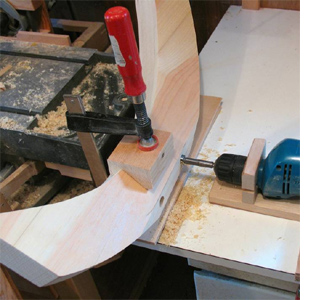
Now you need to drill out holes for dowels. 20mm diameter is a good size. I use a simple little horizontal boring jig to do these reasonably accurately. The tilting angle on a drill press is not usable for this, as the table leg would end up hitting the vertical column of the drill press.
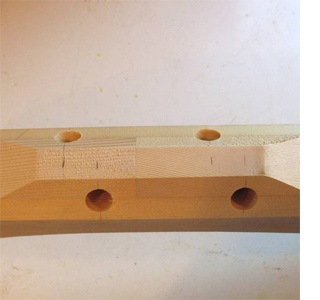
The20mm diameter holes are offset by 20mm from each other along the leg, so that the dowels can intersect with each other. Make two legs as shown, and two that are mirror images of the one shown. If you make the legs all identical, you would have to make the cross pieces that join here asymmetrical, which can lead to confusion later. With the sanding left until the last, any nicks that you put into the legs while working them can be removed.
After sanding, use a round router bit to round the edges, or sand rounded. Do the routing after the sanding, so that the guide roller won't end up following any unevenness from the cuts.
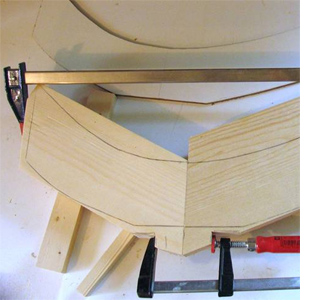
The cross pieces are 185mm long x 120mm wide x 30mm thick. Offset the holes in the cross pieces so that when joined to the table legs, they line up. As you glue these together, check that the angle comes out square. If it's a little bit off square use some clamps to check that is square.
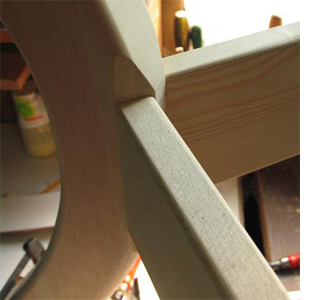
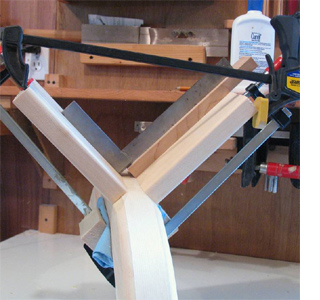
Here is a close-up once joined. To join it is better to join two legs and three connecting pieces to form a square 'C'. After that, join two legs with one connecting piece to form an 'I'. That way, if the distance of the two ends of the 'C' doesn't exactly match the distance of the holes of the 'I' part, you can use a clamp or a spreader clamp to bend it to force it to fit.
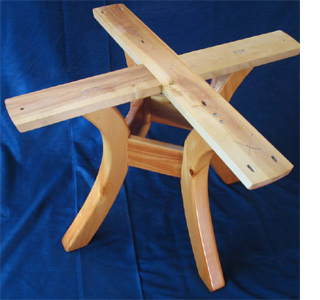
Here are the cross pieces for mounting to the table top. If you make the table top out of solid wood, this is necessary, as the top expands and contracts slightly with changes in humidity. The continuous part of the cross should be perpendicular to the grain of the table top to hold the table top flat. Making the table top is no different for other tables.
