DIY 4-drawer cabinet with easy install drawer runners - make the cabinet
I have been wanting to make a drawer pedestal for my office for ages, so just to show how easy it is, I use the new method for installing drawers runners - and even a blonde can do it !
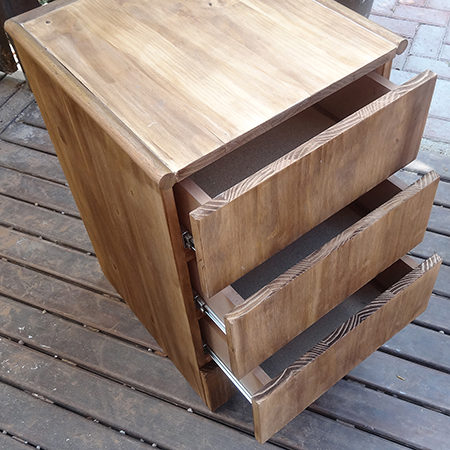
I need a 4-drawer pedestal for my office, so what better time to try out the new method for installing drawer runners the easy way. Of course, I still needed to build the cabinet beforehand.
YOU WILL NEED:
Apart from the laminated pine, all the other pieces were cut to size from offcuts left over from previous projects, so please excuse the fact that they might not look exactly like those specified in the cutting list below!
2 of 455 x 700mm laminated pine - sides
2 of 400 x 455mm laminated pine - top / base
8 of 69mm PAR pine cut to 399mm - frame supports
4 of 170 x 435mm laminated pine - drawer fronts
1 of 20mm dowel 1800 long - top surround and cut to fit (my dowel is 25mm dia)
16mm screws
40mm screws
Pattex No More Nails adhesive
Alcolin WoodMate or Pattex acrylic sealer
Wood filler
Woodoc gel stain - I used antique oak
Sponges or lint-free cloths
TOOLS:
Mitre saw or mitre box and backsaw
Drill / Driver plus assorted bits
Pockethole jig - or substitute with angle brackets
Orbital sander plus 120- and 240-grit sanding pads
Tape measure and pencil
Steel rule or carpenter's square
You can buy everything you need for this project at your local Builders store.
HERE'S HOW:
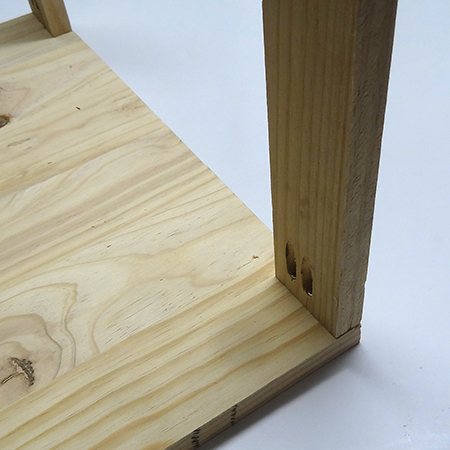
NOTE: I am using my Kreg pockethole jig to assemble the cabinet. This method allows you to make furniture without any visible screw holes but you can substitute with dowels, biscuits or brackets for the same result.
1. Use the pockethole jig to drill holes in all the frame supports, as well as the base.
2. Place one of the sides on a flat, level surface and secure 2 top supports onto the side with 40mm screws. Make sure the support is flush with the top and side edges.
3. Each drawer opening is 150mm high. Use a tape measure and pencil to measure and mark at 150mm down from the top support and at 170mm down for the thickness of the pine support. Repeat this for the remaining openings.
GOOD TO KNOW
If your pine is not 20mm thick - allow for the thickness of the pine you will be using. If your pine is slightly thinner of thicker you can allow for this at the base of the unit by making the bottom drawer smaller or larger, as required.

4. Now you can continue to add all the remaining supports on the drawn marks.
5. Place the other side on your worktop. Transfer the measurements for the supports onto the other side and place the frame with the mounted supports on top of this. Secure with screws on the drawn lines, making sure everything lines up.
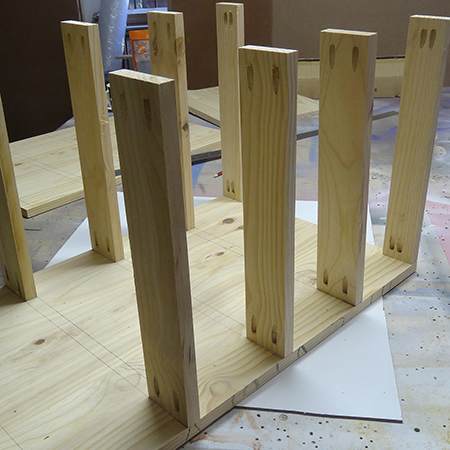
6. Attach the base in the same way. Below is what your completed frame should look like.

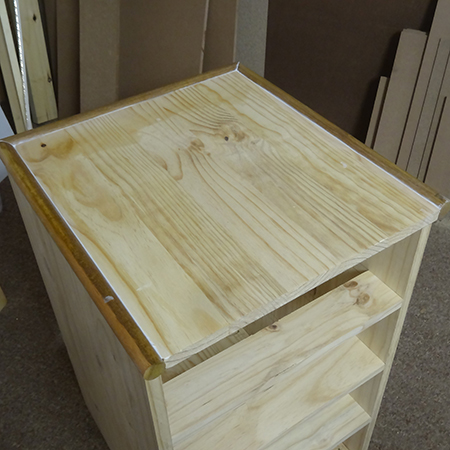
7. Screw the top in place, allowing a gap at the sides and back for mounting the dowel surround. If you prefer to leave this off you can have the top cut to size, or larger if you want an overhang at the sides and front. Secure with 40mm screws through the support and into the underside of the top.
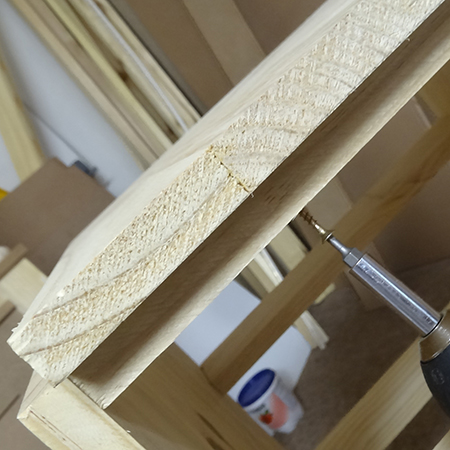
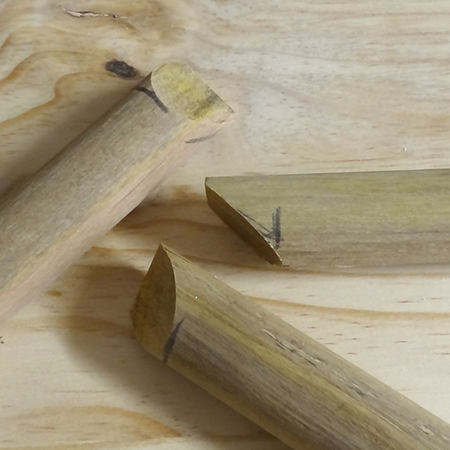
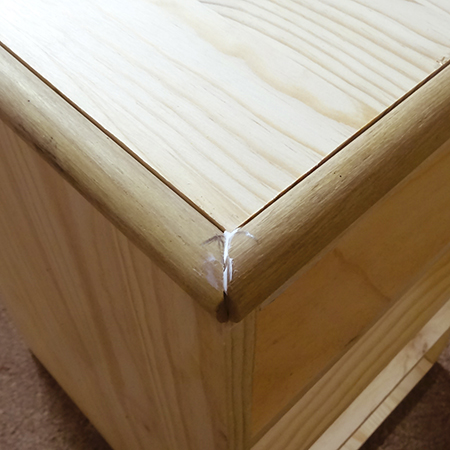
8. Cut 2 dowels for the sides, each with a 45-degree angle to form the frame. My dowels are 25mm and are too large, but if you use 20mm diameter dowels the corners should be perfect. Cut the back dowel last, so that you can adjust the length to fit.
9. Glue the dowels onto the frame of the cabinet using Pattex No More Nails adhesive and leave this to set for a couple of hours.
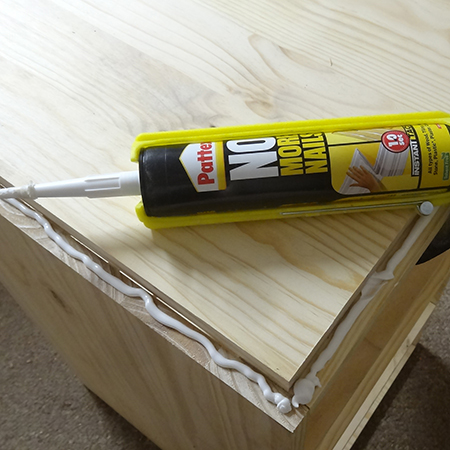
10. I also used Pattex No More Nails adhesive to fill in the gap around the edge of the dowel frame and top, and wood filler at the dowel corners.
You now have a basic frame for your drawer unit. Although I stained my cabinet later on, it is easier to do it now.