
DIY 3-level bunk beds
After featuring the article on finding space in a small bedroom for more beds, and finding the instructions for making a 3-level bunk bed, I thought it would be nice to provide metric measurements and options for using local materials if you want to make the 3-level bunk beds.
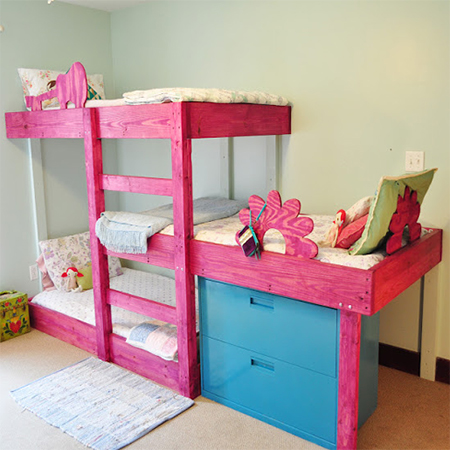
These pine bunk beds are an absolutely wonderful way to add three beds into one small space. Looking at the design, it will only cost you around R800 if you buy your PAR pine direct from a timber merchant.
YOU WILL NEED:
A. 6 of 20 x 144 x 1940mm PAR pine - bed sides
B. 6 of 20 x 144 x 920mm PAR pine - bed ends
C. 9 of 20 x 94 (or 69) x 920mm PAR pine - base supports
D. 3 of 920 x 1900mm - 16mm particle board - bed bases
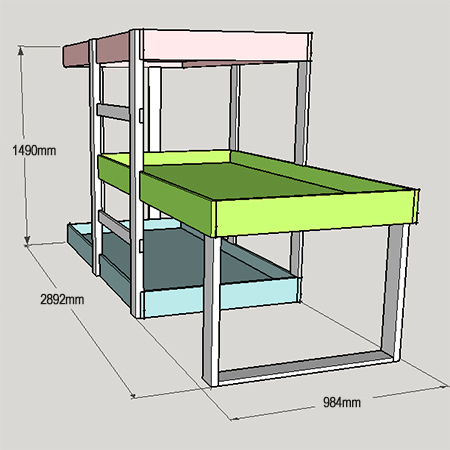
E. 2 of 44 x 1490mm PAR pine - upright supports / ladder sides
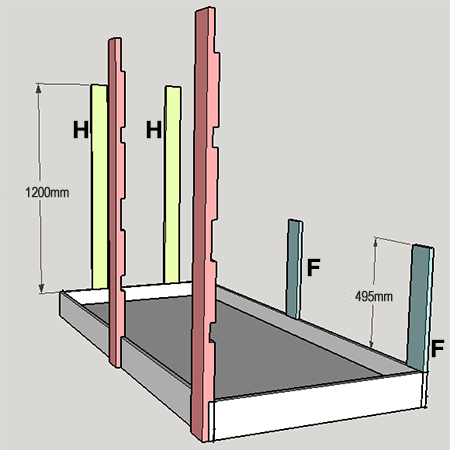
F. 2 of 20 x 94 x 495mm PAR pine - back wall supports - lower
G. 2 of 20 x 94 x 563mm PAR pine - back wall supports - upper
H. 2 of 20 x 94 x 1200mm PAR pine - end wall supports
J. 2 ox 20 x 94 x 679mm PAR pine - centre bunk end support - sides
K. 1 of 20 x 94 x 880mm PAR pine - centre bunk end support - cross-piece
L. 2 of 20 x 94 x 988mm PAR pine - ladder steps
30 of SX8mm fischer wall plugs and 55 - 60mm screws
4 x 35mm cut screws
4 x 50mm cut screws
TOOLS:
Drill / Driver plus assorted bits
Countersink bit
*Circular saw or mitre saw for cutting rebates (*or see substitute method)
Optional: Pockethole jig
Note: For all joining, drill 3mm countersunk pilot holes.
HERE'S HOW:
Preparation
Sand and stain all the sections before assembly.
1. Assemble beds
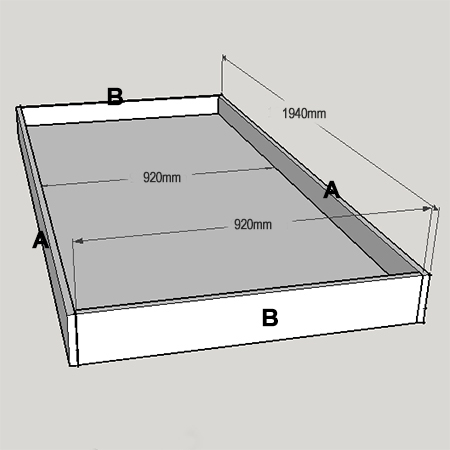
Assemble the frames for the beds by joining the bed sides to the bed ends using 4 x 50mm screws. You can do this around the bed base to ensure everything fits nicely together.
Measure up 44mm from the bottom of the base and use this as a guide for mounting the base supports. These supports can be attached using pocketholes, by drilling through the sides, or by using steel angle braces.

2. Cut upright supports
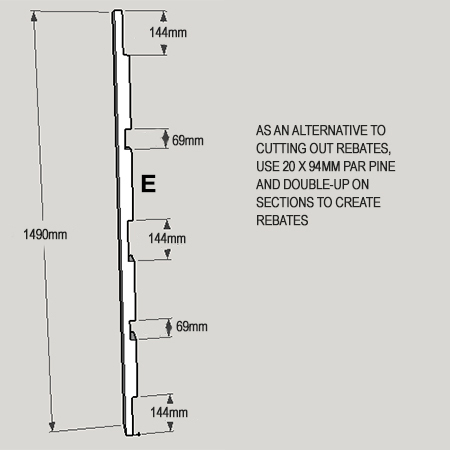
On both uprights cut out rebates for mounting cross pieces. You can use a circular saw or mitre saw to do this, or you can substitute the 44mm PAR pine with 20mm PAR pine and double up to create rebates by screwing sections onto the 20mm-thick upright.
3. Install bottom bunk bed
Place the bottom bunk bed in position against the wall. Note that you may need to remove skirtings, or substitute the 20 x 94 with 44 x 94 in order to fit in front of skirtings.
Use dowels to attach the back and end supports to the top of the bed frame. Also drill dowel holes in the top of the end supports and into the supports for securing the top and centre bunk beds to the wall. Secure these supports to the wall using SX 8mm nylon wall plugs (fischer) and 55 to 60mm screws.
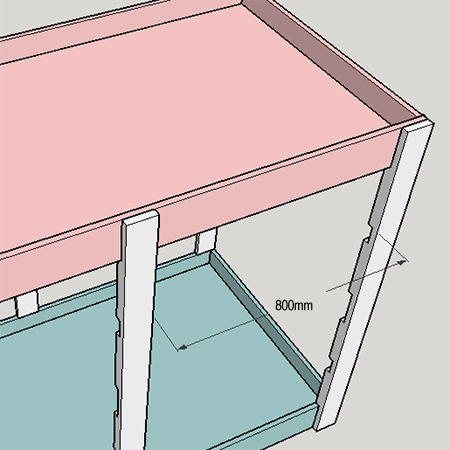
Attach the two uprights that form the sides for the ladder. Attach the end ladder upright first and then measure in 800mm to attach the second ladder upright.
4. Install centre bunk bed
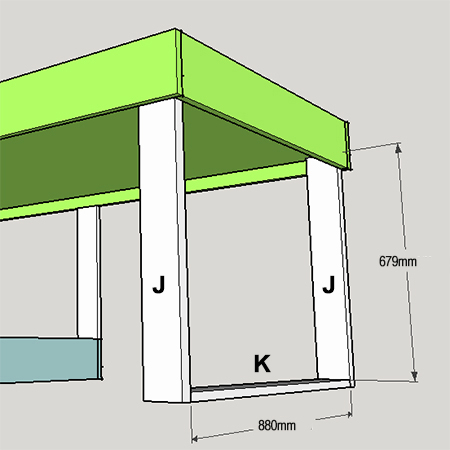
Assemble the end frame for the middle bunk. Although not shown on the original design, I feel a cross-piece is essential to ensure integrity of the design. I don't like the idea of having a free-standing leg supporting a bed, and especially in a child's bedroom. The end frame is secured to the underside of the bed.

Use dowels to attach the upper supports to the top frame of the centre bunk. These should also have dowel holes for attaching to the base of the top bunk.
Now, with some help, you can place the centre bed in position and secure everything in place. The upper supports are attached to the wall using wall plugs and screws. I would also secure the bed frame to the wall along the side using wall plugs and screws. Secure the ladder uprights to the front of the centre bunk, making sure there is an 800mm gap between the uprights.
GOOD TO KNOW
Run an Electronic Detector over the wall before drilling to ensure there are no cables or pipes in the wall.
5. Install top bunk bed
Attach the back wall supports (upper) to the base of the top bunk and then have helpers on hand to help you place the top bunk. The bed needs to be supported while you attach the back wall supports (upper) to the wall using wall plugs and screws. Again, I would also secure the bed frame to the wall at the one end and along the side using wall plugs and screws. Secure the centre bunk to the two ladder uprights using 4 x 35mm screws.
6. Attach ladder steps
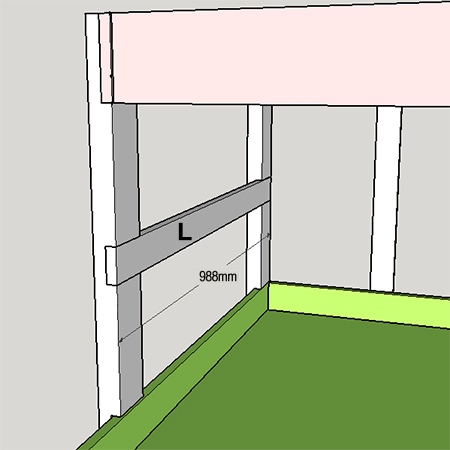
Insert the two steps and secure in place with 4 x 35mm screws.