
Make a Storage Side Table for a Living Room
A storage side table is a practical piece of furniture if your living room is short on space - and storage - and the instructions below let you make one in a day
28/10/2023
I listed this as a Quick Project because it essentially is just that. If you have BisonLam or SupaLam cut to size, assembly is a breeze and it does not require any additional painting or finishing because both of these products have a super-white finish that is easy to care for. When arranging to have the board cut to size also make sure that they offer an edging service to finish all the cut edges that are visible.
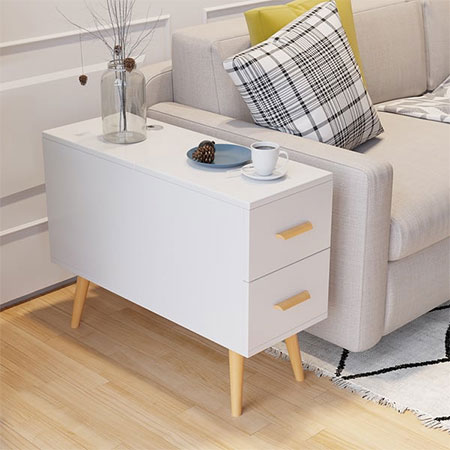
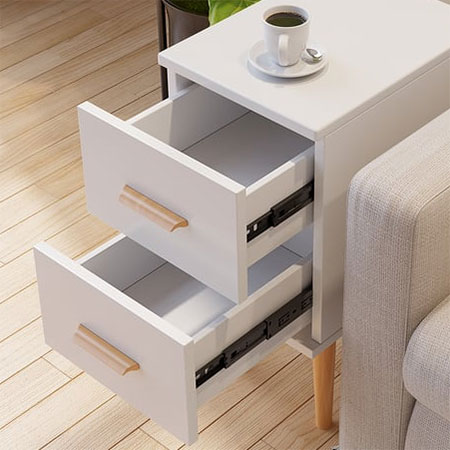
We spend a lot of time in our living room and any dual-purpose or multi-function furniture will not only allow for more space in the room but it will provide much-needed storage to keep essentials close at hand and clutter out of sight. A side table like this one offers a top storage compartment that is ideal for storing remotes, headphones and such while the two drawers can accommodate magazines or books, toys or games, etc.
Select your own hardware for the storage side table when fitting the legs and drawer handles. Builders stock a variety of hardware and accessories that you can choose from, or shop around.
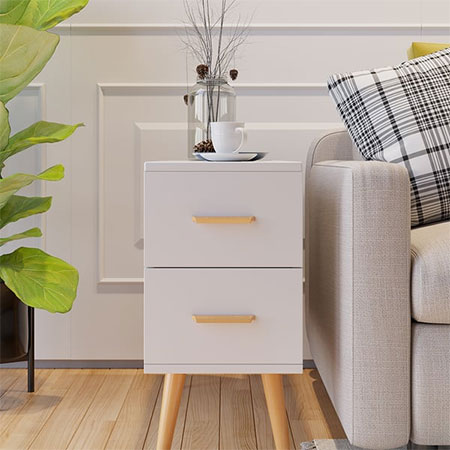
What makes this storage side table unique is that it is not something you can purchase at a home decor or furniture store and you can make minor modifications to alter the height, width or length so that it fits nicely into a space. You can also opt to use a MelaWood or laminate board if you require a specific finish. Follow the step-by-step instructions to make this storage side table.
YOU WILL NEED:
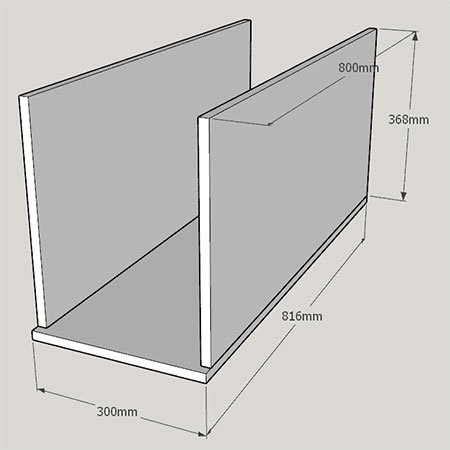
1 of 16 x 300 x 816mm - base
2 of 16 x 368 x 800mm - sides
2 of 16 x 268 x 368mm - divider and end
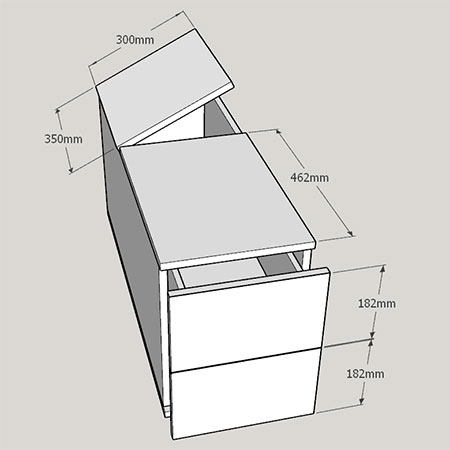
1 of 16 x 300 x 462mm - top, fixed
1 of 16 x 300 x 350mm - lid, storage compartment
2 of 16 x 182 x 300mm - drawer face
4 of Ball bearing drawer runners and 16mm screws
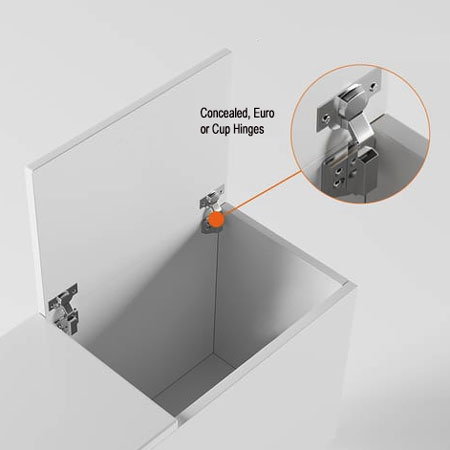
2 of Concealed, Euro or Cup hinges and 16mm screws
4 of Legs and screws
Wood glue
Note: A material list is not provided for the drawers other than the drawer faces. Use a 12mm thick board product to construct the drawers. A detailed diagram is included below and you have the option to modify the drawer base according to your skill level.
TOOLS:
Drill plus assorted bits
35mm Forstner bit
Tape measure and pencil
Safety gear
Note: The tools for assembly have not been included in the above list as there are several options to choose from. You can use a Kreg Pocket Hole Jig, Biscuit Joiner or simply assemble as you would any project, keeping in mind that you want the screws to be out of sight as much as possible.
Before purchasing materials or starting the project, read through the instructions below to see the various options you have when building the storage side table.
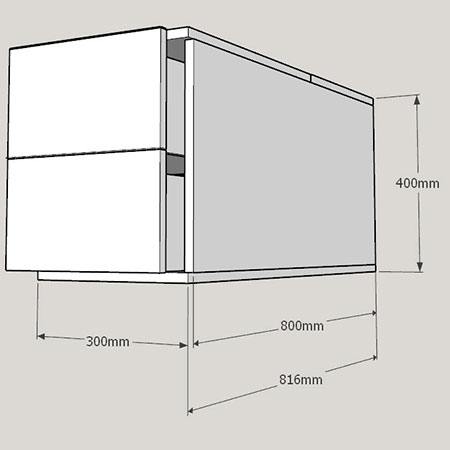
OVERALL DIMENSIONS FOR THE STORAGE COFFEE TABLE
HERE'S HOW:
Step 1
The first step to assembling the storage side table is to secure the sides to the base. However, you have an option here; if you do not have the tools to work inside the space once the sides are attached, only fasten one side to the base and proceed to the next step.
Step 2
The next step is to install the divider that sits between the storage compartment and the space for the drawers.
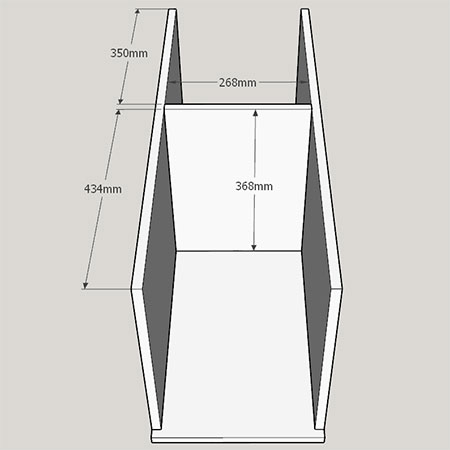
Once the divider is fitted, you can install the end section.
Step 3
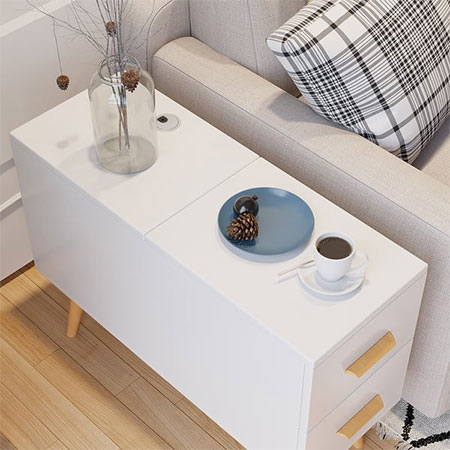
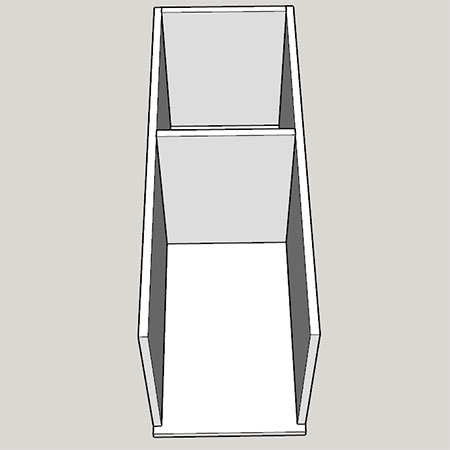
In this step, you will install the fixed top and lid for the storage compartment.
The lid for the storage compartment is mounted using Euro, Concealed or cup hinges. Use a 35mm Forstner bit to drill out the holes for fitting the hinges.
Step 4 - Assemble the Drawers
As mentioned under the You Will Need section, materials to assemble the drawers have not been included mainly because you have choices here. For affordability and to keep the weight down, the drawers themselves (excluding the drawer faces) should be assembled using a 12mm thick board product. Most stores only offer board thicknesses of 15mm upwards, so you will have to shop around or purchase this material from a timber and board merchant. You can use 12mm SupaWood and apply a painted finish to match the unit or you can source 12mm BisonLam or SupaLam with its super-white finish.
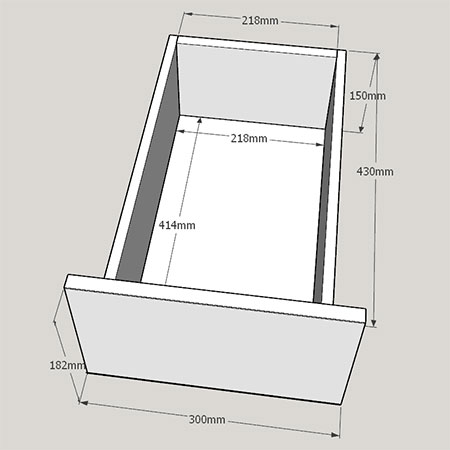
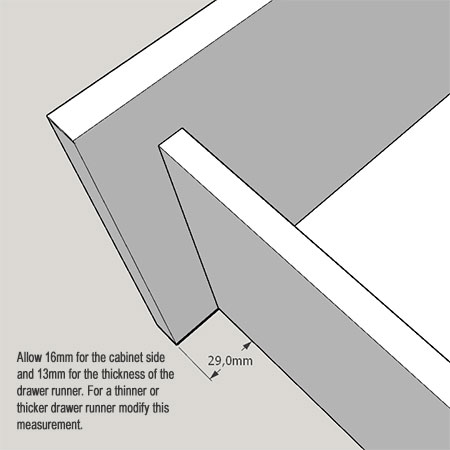
The important thing to remember when assembling the drawers is to allow for the thickness of the drawer runners that will fit between the drawer and cabinet sides. Most are 13mm but there are other thicknesses as well, so remember to allow for this.
Step 5 - Options for the drawer base
I always prefer projects that offer options because not every DIY enthusiast has the same skills and the same tools. For the drawer base, there are a few solutions to look at:
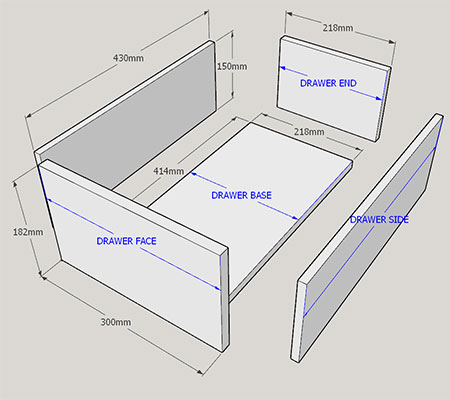
- Use the same 12mm material used for assembling the drawer and fit this between the drawer face, sides and back.
- Raise the height of the drawer when mounting on the back of the drawer face to allow for a 3mm or 6mm panel that can be glued and screwed, stapled or pinned underneath.
- Use a router to cut slots in the sides, end and drawer face to allow for slipping in a panel for the base.