
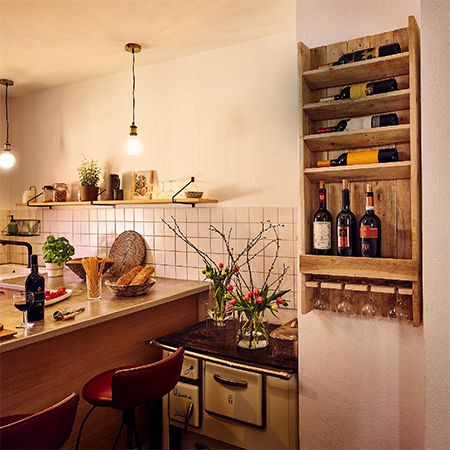
Make a Simple Wood Wine Rack - Great Beginners Project
Anyone starting out with DIY will love the simplicity of this wood wine rack and you can use pallet wood to make it for free!
29/07/2023
www.bosch-diy.com
When you are starting out with DIY projects it can be difficult to find projects that are easy and still practical and can be used in the home. This wood wine rack might be basic but it teaches you a few methods and techniques and you end up with a wine rack you will feel proud to mount on a wall.
This wooden wine rack is mounted on a wall and lets you store your wine collection for easy access. Plus, it has a rack at the bottom for wine glasses. All-in-all you are ready for drinks with friends!
YOU WILL NEED:
5 of 16 x 90 x 1100mm - back board
2 of 16 x 90 x 1100mm - sides
6 of 16 x 90 x 404mm -shelves
1 of 16 x 90 x 440mm - apron
2 of 16 x 90 x 420mm - cross pieces
4 x 30mm cut screws
4 x 40mm cut screws
TOOLS:
Crowbar
Drill/Driver plus assorted bits
Jigsaw plus clean-cut jigsaw blade
Sander plus assorted sanding pads
25mm spade, MAD or Forstner drill bit
G-clamps
Claw Hammer
Tape measure and pencil
Safety gear
Pre-Assembly Tip
If your wine glasses are longer than those shown here, make sure to add extra length to the back board and sides to allow for this.
HERE'S HOW:
Step 1 - Preparation
- Use the crowbar to pry loose all the length of wood you will need to make the wine rack.
- You can use the claw part of a claw hammer to remove all visible screws and double-check that there are no metal fittings still attached.
- Cut all the lengths as specified in the cutting list above.
- Sand all the cut sections with 120-grit sanding pads to remove any splinters and smooth rough edges.
Why you need to use CUT SCREWS
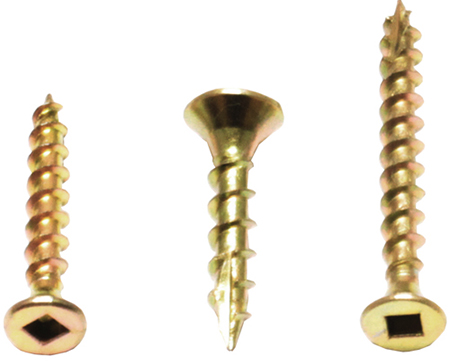
Cut screws are slightly different to other wood screws in that they have a unique cutting point at the tip. This allows the screw to cut into the wood easily without a pre-drilled pilot hole and reduces cracking or splitting of the wood.
Step 2 - Assemble the Back Board
Line up the [5] pieces for the back board making sure that the best side is face up. Secure a cross piece and clamp in place before you drive in [2] 30mm screws per board - as shown in the image below.
Step 3 - Side Panels
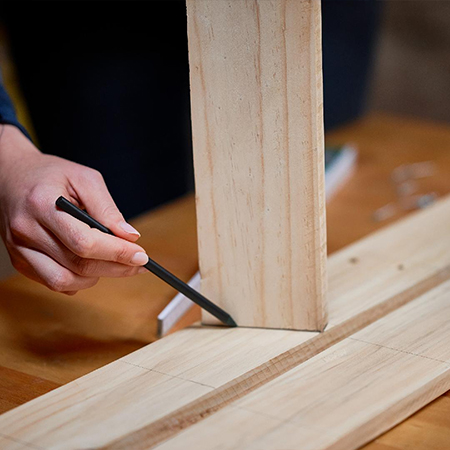
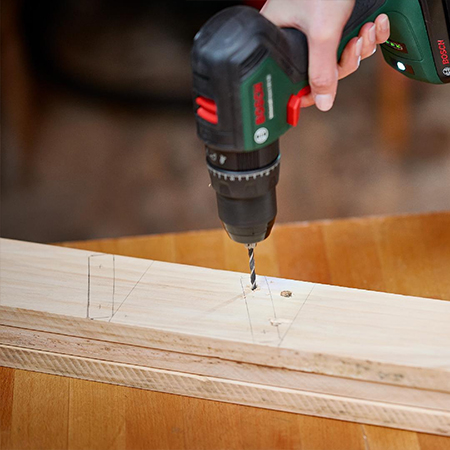
Look closely and you will notice that the shelves that hold the wine bottles are angled to prevent any bottles from sliding off the shelf. To get this right, take [1] shelf and place this at an approximately 30-degree angle and mark this on [1] side section. Repeat this for the remaining [3] shelves. You only need to mark one side section.
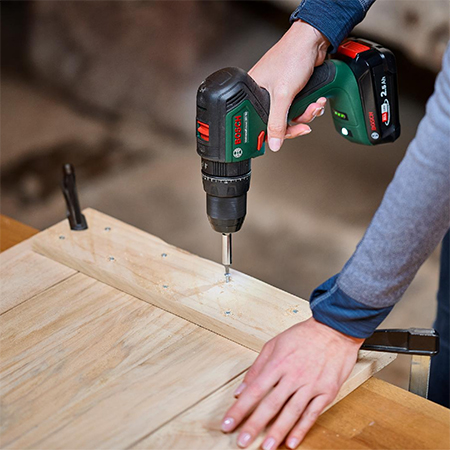
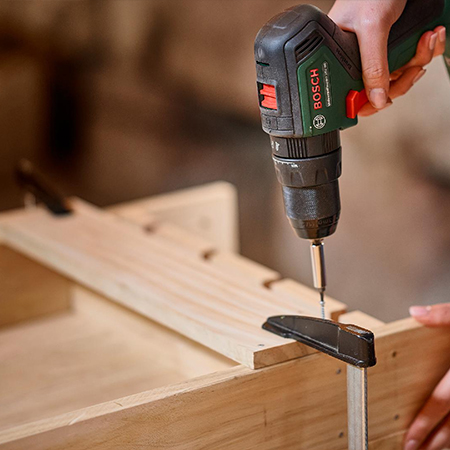
Step 4 - Pre-Drilling for the Shelves
Place the side sections on top of each other with the marked side on top. Clamp the sides at the top and bottom to prevent movement while you drill [2] 3mm countersunk pilot holes for mounting the shelves. See below for more details.
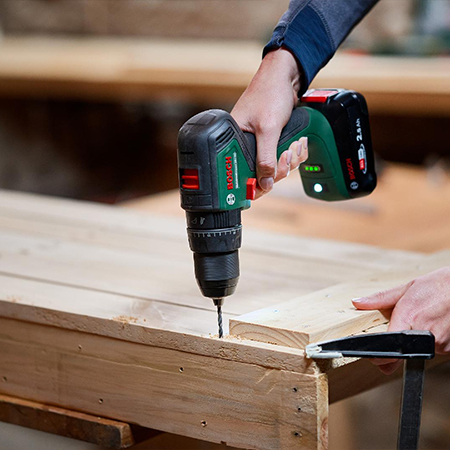
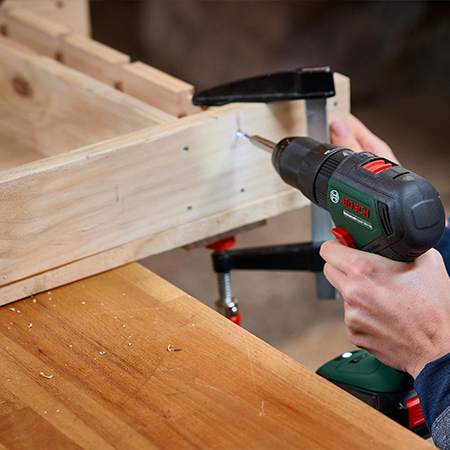
Step 5 - Attach the Back Board
At this stage in the project, you can now attach the back board to the side sections. Place the back board on top of a side section and secure with [5] 40mm cut screws all along the length. Repeat this for the other side section.
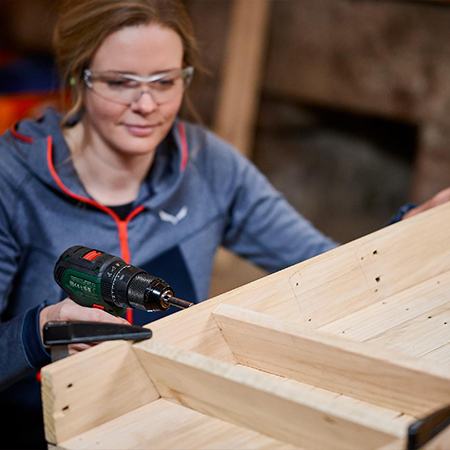
Step 6 - Position and secure the Shelves
Using the pre-drilled pilot holes, hold the shelves at the right angle and drive in 30mm screws. Countersinking the holes ensures that no screws will stick out along the sides but you can hide screw heads with screw cap covers or apply a thin layer of wood filler to disguise.
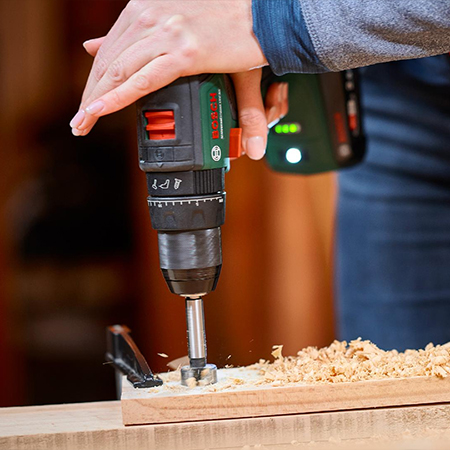
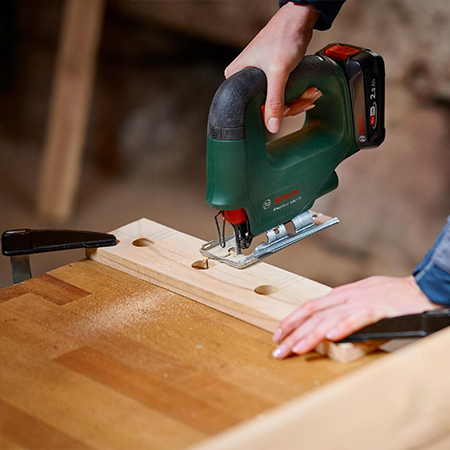
Step 7 - Drill the Glass Holder
To drill holes in the glass holder (shelf), measure and mark to drill [4] holes with a 25mm spade, MAD, or Forstner bit. Our spacing is 100mm apart. Place the glass holder (shelf) on a scrap piece of wood and clamp firmly in place.
To finish off the glass holder (shelf), use your jigsaw to cut slots from the front to the drilled hole. This will allow wine glasses to be easily hung on the glass holder.
Step 8 - Attach Shelf and Glass Holder
Position both the remaining shelf and glass holder where they are to be mounted and drill countersunk pilot holes before securing with 40mm screws.
Step 9 - Install Apron
The final step of the assembly process is to secure the apron over the front for the standing wine bottles using 30mm screws. Align the bottom edge of the apron with the bottom of the shelf that will hold the bottles. NOTE: If you want a finish where you don't want visible screws to show on the front, use wood glue, panel pins, and hammer.
Finishing
Finish the shelf to complement the existing decor in the room where you will install it. You have the option to varnish the wood with a clear or tinted glaze, you can apply chalk paint for a distressed finish or can paint with acrylic paint or spray paint.