
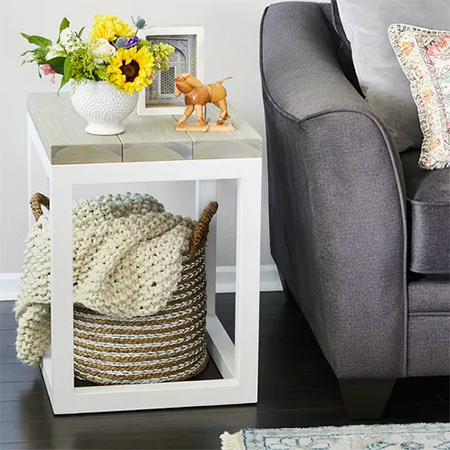
Make a Side Table in Under an Hour!
Looking for a quick way to add a side table or two to your living room? You can make this charming side table in under an hour!
08/04/2023
better homes and gardens magazine
A couple of strategically placed side tables in a living room fulfill a practical function not only one of decoration but also to have a table for accent or mood light, a resting place for drinks, or just a surface for decor accessories for the room. Made using affordable PAR pine that you can purchase at any Builders store and have cut to size at the same time, this side table will not cost much to make and can easily be assembled in under an hour.
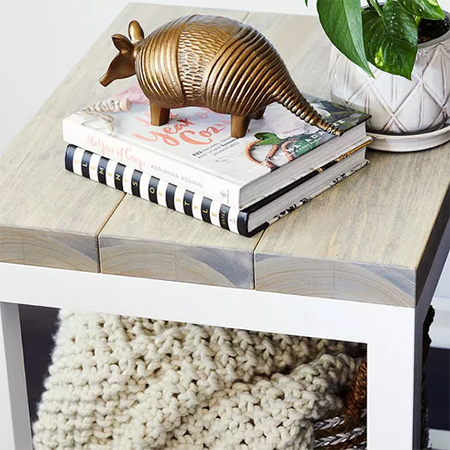
The side table is made entirely of PAR pine but you can substitute with any type of wood. The top of the table consists of three 38 x 180mm PAR pine planks which can be substituted with a double layer of 21mm PAR pine glued together for the chunky thickness that gives this table extra appeal.
YOU WILL NEED:
2 of 44 x 44 x 3000mm PAR pine - table frame
3 of 38 x 180 x 538mm PAR pine - table top *
Wood glue
32mm coarse-thread pocket hole screws
OPTIONAL: Kreg pine or white plugs
4 of angle brackets and 16mm screws
Choice of finishing
* Can be substituted with a double layer of 21mm-thick pine glued together
TOOLS:
Drill plus assorted bits
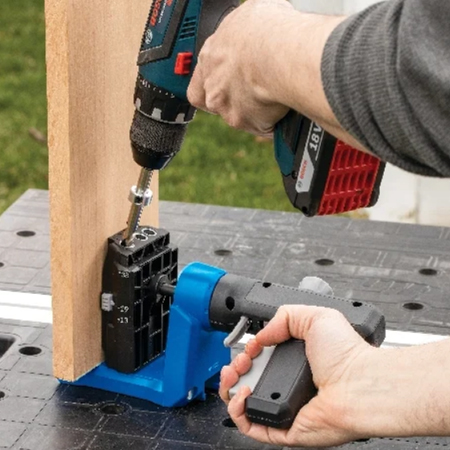
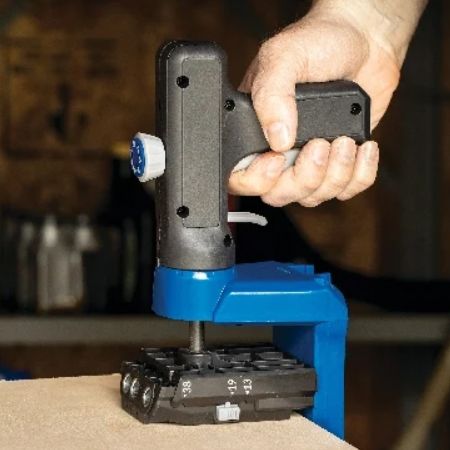
Kreg pocket hole jig
Corner clamps
Orbital sander plus 120- and 240-grit sanding pads
Tape measure and pencil
Safety gear

HERE'S HOW:
Step 1 - Assemble the base for the table
Drill [2] pocket holes at the ends of all the [8] 44 x 44 x 450mm pieces. Note that the pocket holes on the right side should be spaced close together and those on the left should be wider apart. This will ensure that the screws will not interfere with each other when joined to the uprights.
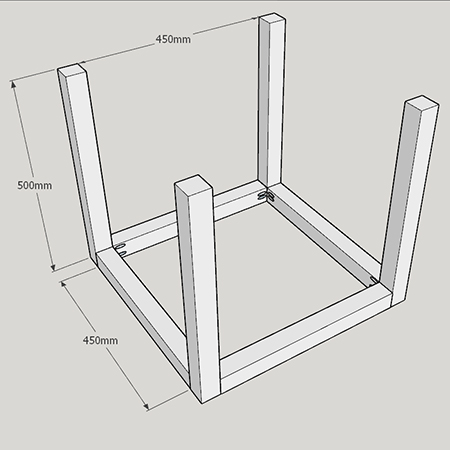
Use wood glue and pocket hole screws to assemble the pieces as shown in the diagram above. Clamping the pieces together while you assemble will ensure perfectly matched faces and sturdy assembly.
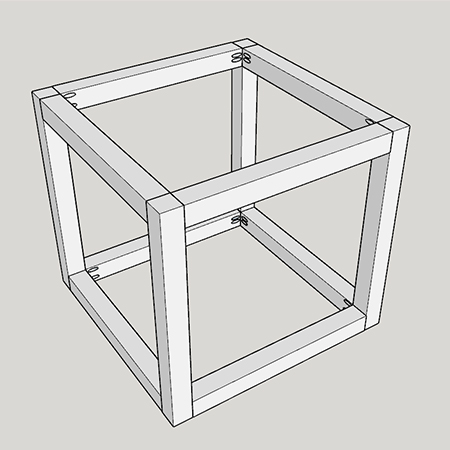
2. Finish the base for the table
Take the remaining [4] 44 x 44 x 450mm pieces and attach these at the top of the uprights with wood glue and pocket hole screws. Make sure that the top edges are flush all around.
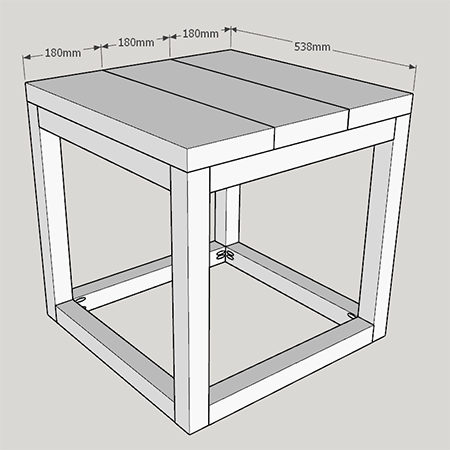
3. Add the table top
Use your Kreg pocket hole jig and wood glue to assemble the [3] pieces for the top. Clamp this overnight. Place the top over the frame, making sure that it is flush on all sides, and use angle brackets and 16mm screws to secure the table top to the frame.
4. Finishing the side table
Sand the assembled side table with 120-grit sanding pad to remove any rough or uneven edges and finish with 240-grit sanding pad until silky smooth.
If you have Kreg plugs, these can be glued in place before painting or finishing.
You now have the option of how you want to finish the side table. The one shown here has a whitewash applied over the table top to take away the yellow hue of pine and then wax was applied for protection. The base was painted with a washable sheen paint.