
How to Accurately Install Cabinet Knobs and Handles
Installing cabinet handles and knobs requires accurate measuring and marking but if you do it properly your kitchen cupboard and cabinet doors will look professional.
30/05/2023

plankhardware.com
Installing cabinet hardware such as handles and knobs seems like an easy task to do, and it is - if you do it the right way. But it is important to measure and mark properly before you even start drilling holes in the doors or you could end up with handles or knobs that do not line up on your kitchen cabinets or cupboards.
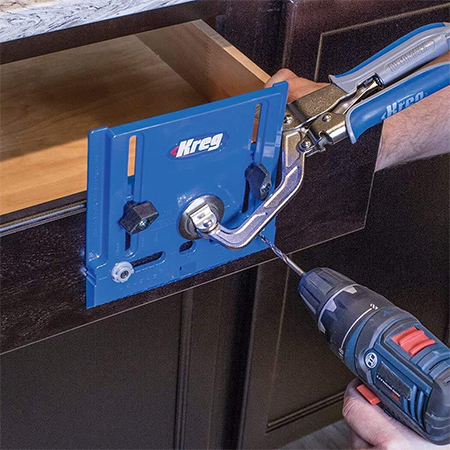
The easiest way to install handles and knobs is with the Kreg Hardware Jig. A tool that takes away all the measuring and marking on every single door in the kitchen. By setting up the Kreg Hardware Jig, you then have accurate and repeatable results that are precisely lined up on all your cupboards and cabinets, wall or floor-mounted. If you don't have the Kreg Hardware Jig and prefer to do the installation the old-fashioned way, find step-by-step instructions below.
The Kreg Hardware Installation Jig to install handles and knobs retails at around R800 at Builders stores but it is also available at select hardware stores around the country.
1. Fitting Handles to Doors
The most important part of any DIY project is measuring and marking. If anything goes wrong at this stage of the process, your end results will not guarantee success. When fitting handles or knobs to a row of cabinets or cupboards, whether in the kitchen, bathroom, bedroom, or other, getting the measurements exactly right is a must.
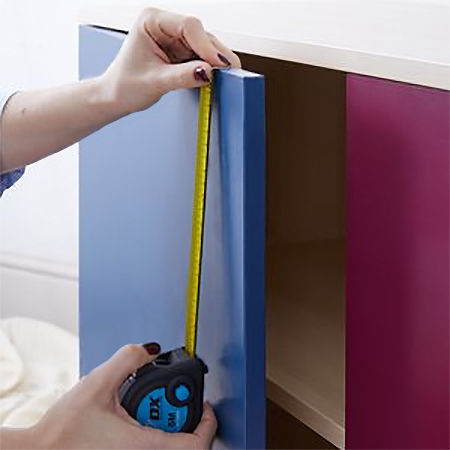
To start the process work from the left or right based on which way the door will open - the side opposite the hinges. Measure 50mm in from the edge of the door and then 50mm from the top of the door and 50mm up from the bottom of the door. Use a straightedge and pencil to draw a straight line from the top to bottom pencil marks. You can adjust the measurement from the edge/side of the door if you want the handle closer or further in.
DIY TIP 1
If the doors are still to be painted you can mark the location with a pencil, but if they are already painted use a soft pencil that will not damage the surface and can be wiped away.
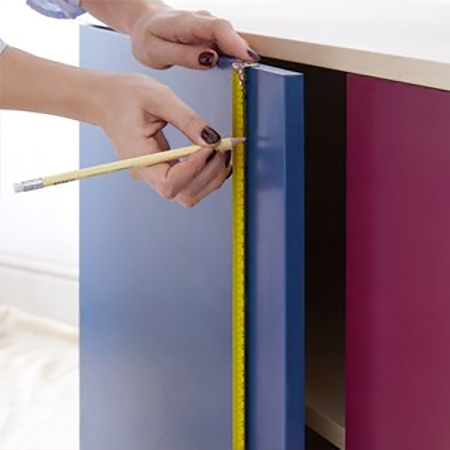
Take the handle that you want to install and measure the distance between the two screw holes making sure to measure from the exact centre of one hole to the other hole. You will then transfer this measurement directly onto the door so that you know exactly where to drill the two holes for mounting the handle.
DIY TIP 2
Before you drill the holes, have a scrap piece of wood handy that you can place at the back of the door where you will drill the holes. Clamp this in place so that as you drill it will prevent blow-out or leaving a damaged hole at the back of the door.
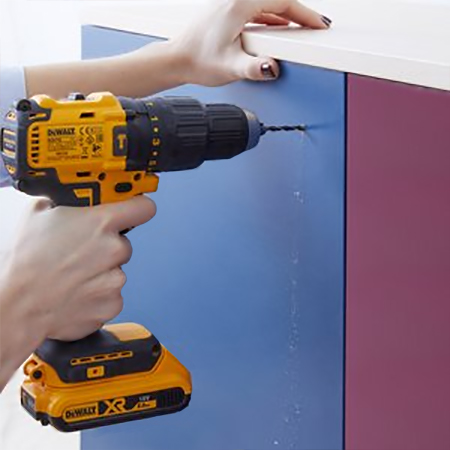
Pop on your safety glasses and power up your drill. But wait... Before you drill the holes make doubly sure that they are exactly where you want them to be. You don't want to complete the project and then realise the handles are in the wrong place.
DIY TIP 3
Make sure that you use the correct bit for drilling the holes. Using a wood bit with its sharply pointed tip makes it easier to drill a precise hole at the location and prevents the bit from sliding around.
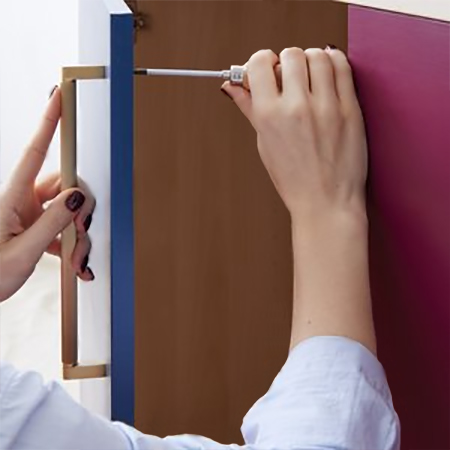
Position the handle over the drilled holes and
then push the screws into the holes and twist
manually to hold the handle in position while
you use a screwdriver or drill to secure the
handle firmly in place. If you use a power
drill, place it on a low torque setting to
ensure you do not strip the screw head.