How to make a tub chair
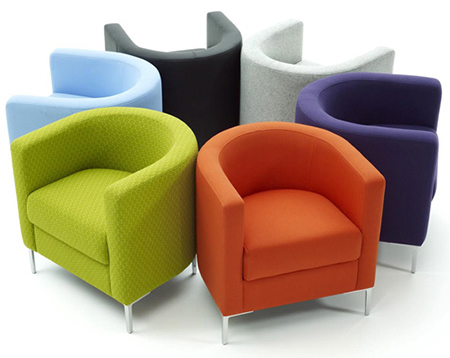
One of my favourite and most comfortable chairs is a tub chair. These days a tub chair can cost anywhere from R1500 upwards, but you can make your own for a fraction of the cost. I don't care if they are trendy are not... they are comfortable and if you can upholster or make a slipcover in your choice of fabric.
I have often looked at tub chairs and thought how easy it would be to make one, and since I need a comfortable chair for my home office I thought this would be the perfect opportunity.
This is a prototype design to see how well the technique for construction works, because I wasn't sure how stable it would be. But having now made the tub chair - it is absolutely perfect. It's sturdy and strong. The only fault I have is that it is smaller than I thought it would be, but the dimensions and measurements below have been amended to accommodate for this.
Now that I have all the kinks worked out I am going to make a second (larger) tub chair. My son has grabbed the smaller one for his bedroom and I'll make another for my home office.
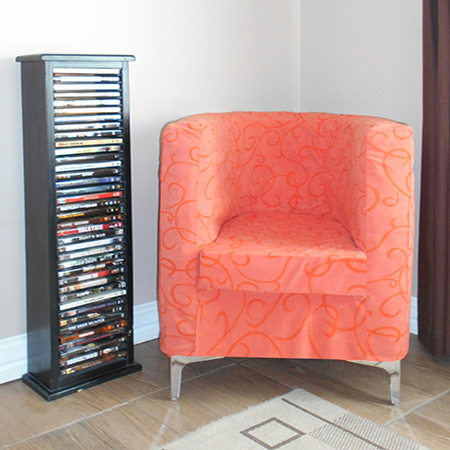
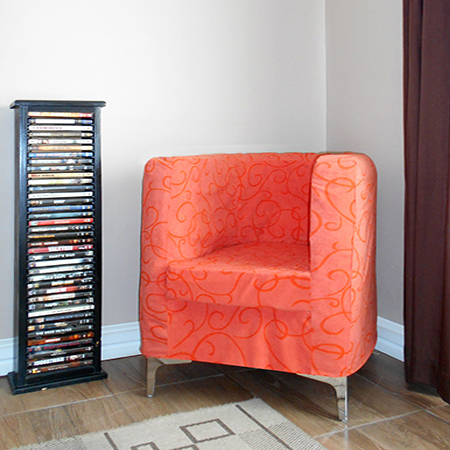
The tub chair shown above is fitted with a slipcover that can be removed and dry cleaned or washed, depending on the type of fabric. You will see below that the chair is covered with a smooth lining fabric to allow easy removal and fitting of the slipcover. I will be making two versions of the tub chair... this one with a slipcover and a second that is upholstered. The instructions for the upholstery can be found here and you can find instructions for the slipcover here.
YOU WILL NEED:
2 of 700 x 700mm 16mm MDF (or plywood or particleboard)
1 of 120 x 450mm 16mm MDF (seat support)
11 x 120 x 400mm 16mm MDF (seat support)
3 of 20 x 69 x 1800mm PAR pine
1 of 700 x 1800mm Masonite or hardboard
Corrugated cardboard sheets (use an old (large) cardboard container)
Piece of Masonite / hardboard for front panel (see final)
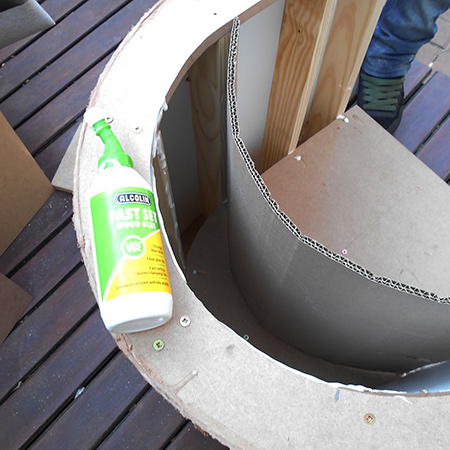
Wood glue (I used Alcolin and Ponal)
Contact adhesive
4.5 x 50mm screws
Sheet of 25mm thick medium density foam
TOOLS:
Bosch Tacker
Drill / Driver and assorted bits
Jigsaw and clean-cut blade
Pockethole jig or steel angle brackets and screws
Craft knife and sharp scissors
Tape measure and pencil
All the materials and tools that you need for this project can be bought at your local Builders.
If you work out the total cost for this project (excluding fabric) it comes to around R800.
HERE'S HOW:
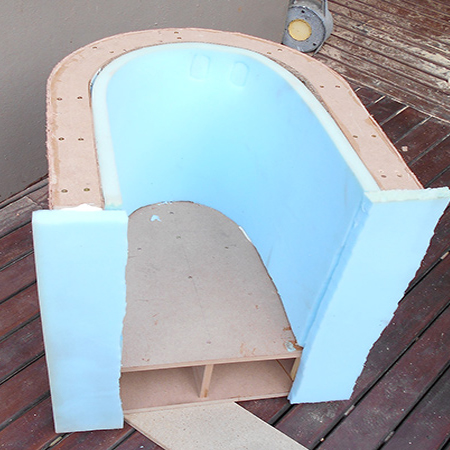
The method for making the tub chair is actually quite simple once I worked out the best materials and assembly. The seat assembly provides the first level of support and the pine struts are mounted to the base and the seat. The hardboard sheet around the outside also adds even more support.
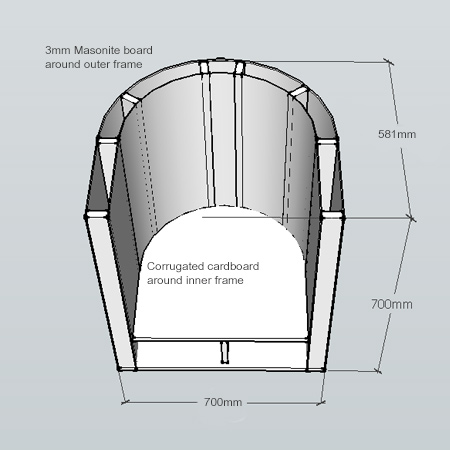
The entire assembly is wrapped in a thin layer of foam (thicker or double layer on the armrests if you prefer) before being covered with lining fabric.
I will be making two versions of the tub chair, one with caster wheels, and one with legs (as seen in the top image). I found the exact same legs at Fabric Link in Florida of all places, at a cost of R19.99 each.

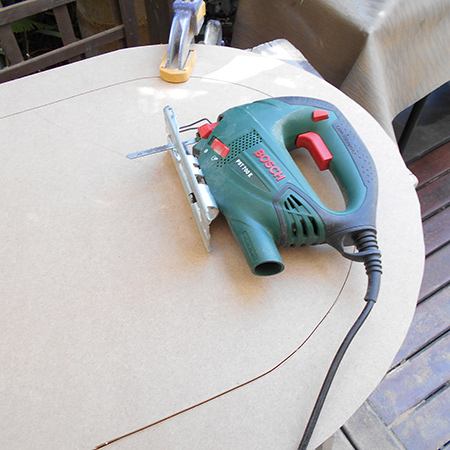
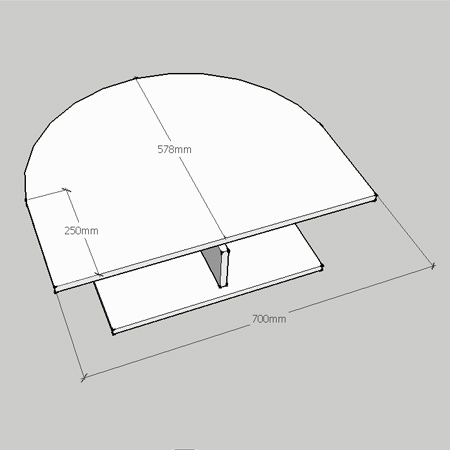
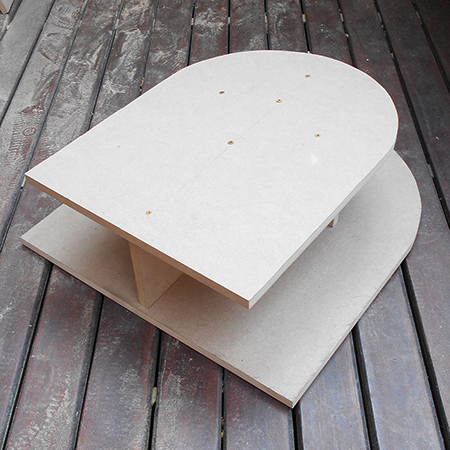
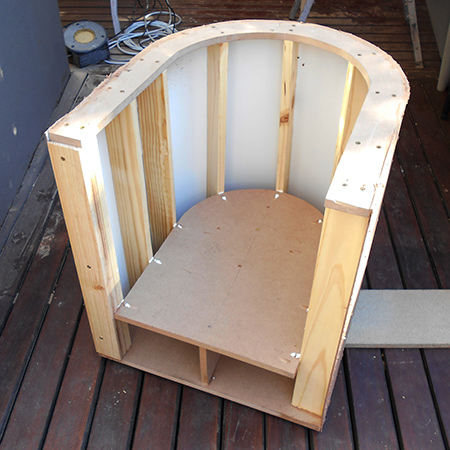
1. To make the curved back for the seat and base mark a line 250mm from the front edge and 350mm from the sides. At the centre hammer in a panel pin and use a length of chain and pencil to draw a half circle.
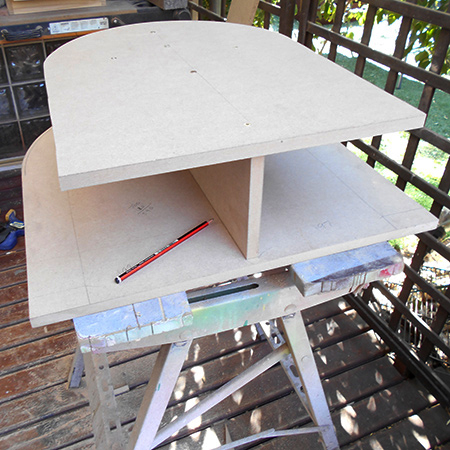
2. Cut out the base by following the drawn line and for the seat draw a second line 69mm in to cut out the top frame and the seat from one section.
3. Cut half joints in the two base support sections to join these together.
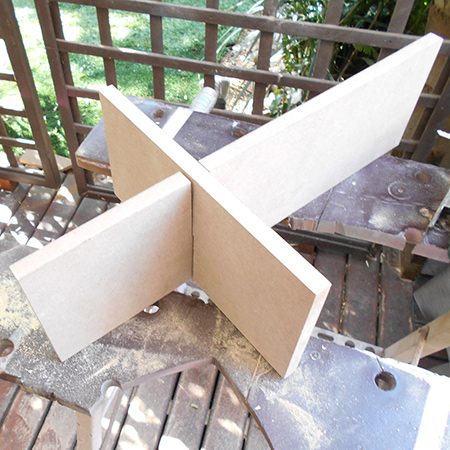

4. Attach the seat support to the underside of the seat by drilling pilot holes through the top. Secure with 50mm screws.
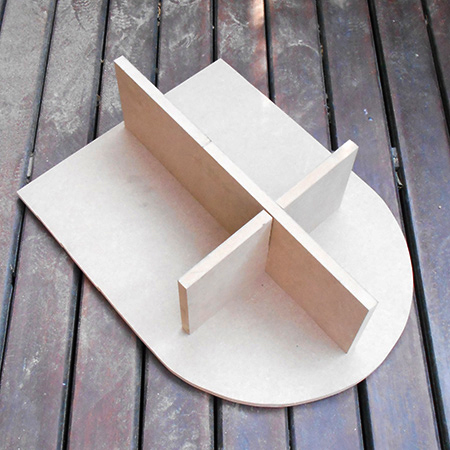
5. Centre this on top of the base and draw the outline onto the underside of the base, so that you know where to drill pilot holes to attach the seat section to the base with 50mm screws.
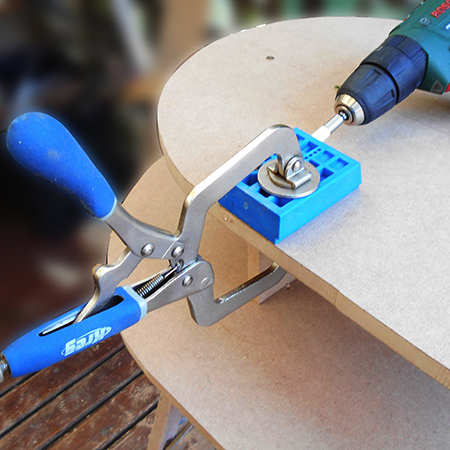
6. To ensure a sturdy design I used my pockethole jig to drill holes along the edge of the seat in order to secure the pine struts to the top seat. If you don't own a pockethole jig (shame on you!) you can use steel angle brackets instead. You won't see these once the chair is finished as the seat cushion will cover them.
7. The pine struts are 600mm long, so you can cut 3 out of a 180mm length of PAR pine. Each strut is attached to the seat (via the pocketholes) and also secured through the base with 2 screws.

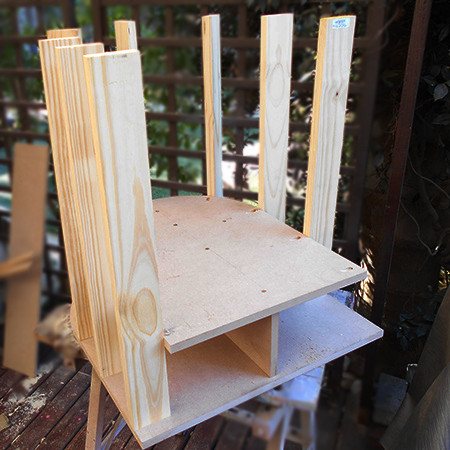
8. Although I took this photo one step later, this step is to add the top frame onto the struts using two screws on each strut.
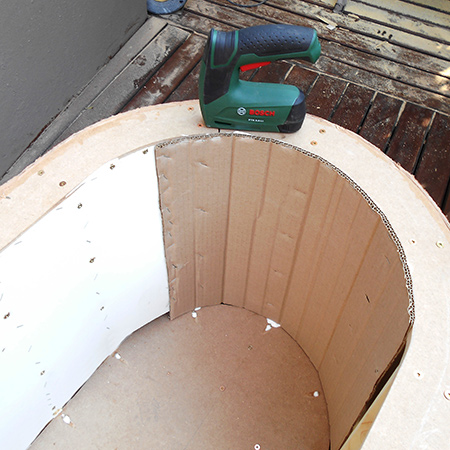
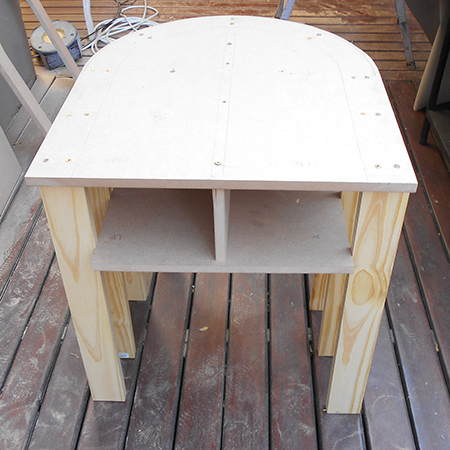
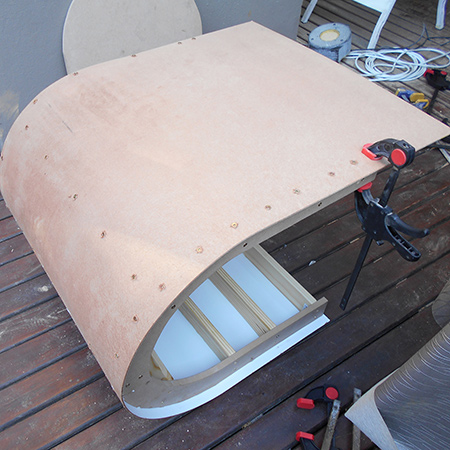
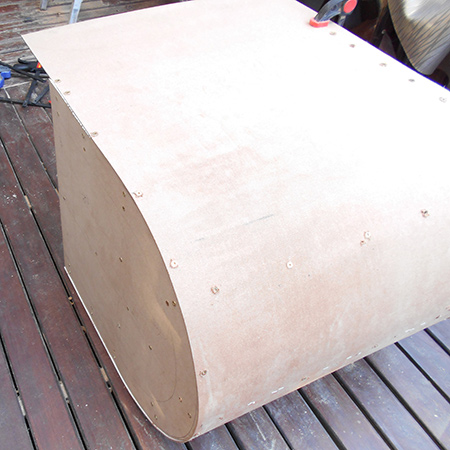
9. No you can bend and secure the Masonite / hardboard to the outside. I used wood glue and screws to hold the starting point in place and then clamped and screwed as I worked the board around the frame. Be gentle... you don't want the Masonite to break.
GOOD TO KNOW:
The screw heads must sit on top
of the board to hold it in place. If you drive
them too deep the board will pop off.
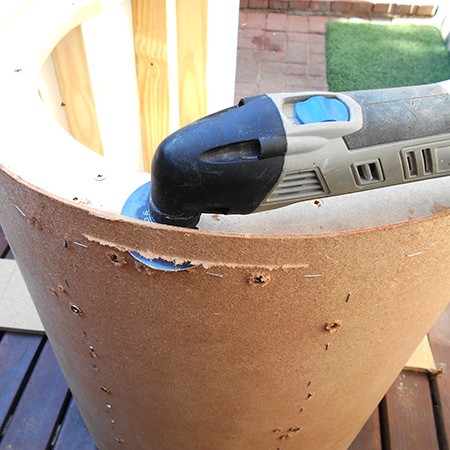
10. I was originally going to fit Masonite around the inside of the frame, but is kept breaking. As an alternative I recycled a cardboard box to make the support. The corrugated cardboard is extremely strong (double layer) and works just fine. The cardboard was glued and staples to the inside of the frame and struts.