
Make a secret shelf
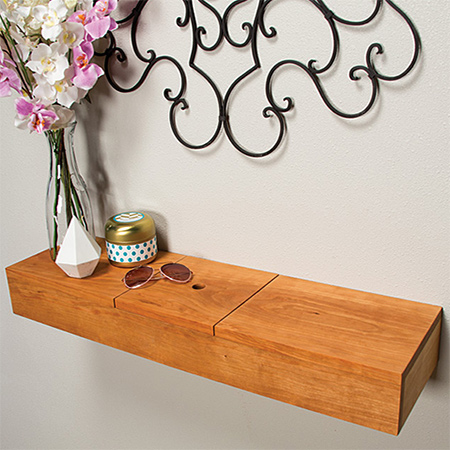
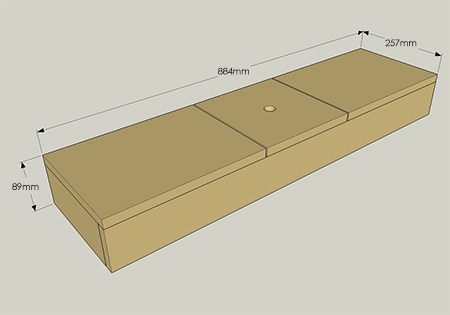
Make a secret shelf to hide small valuables and documents. Once closed, the secret shelf is invisible.
Use PAR pine that can be bought at your local Builders Warehouse to make this secret shelf - and have all the pieces cut to size for easy assembly. Once made, you can finish off the shelf using Woodoc Gel Stain in your choice of wood tint, and then apply either Woodoc Interior Sealer or Woodoc Antique Wax.
For invisible joining use a Kreg Pockethole Jig and pockethole screws to assemble the pine sections. Kreg can be found at your local Builders Warehouse or specialist hardware store.
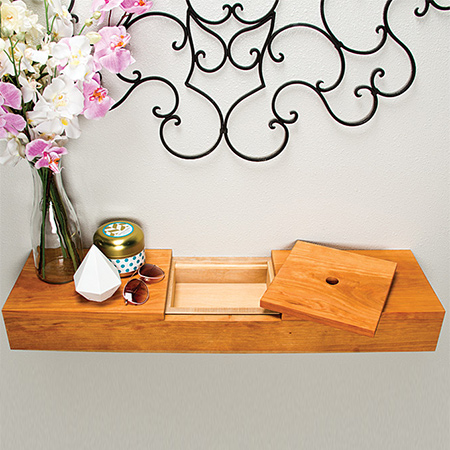
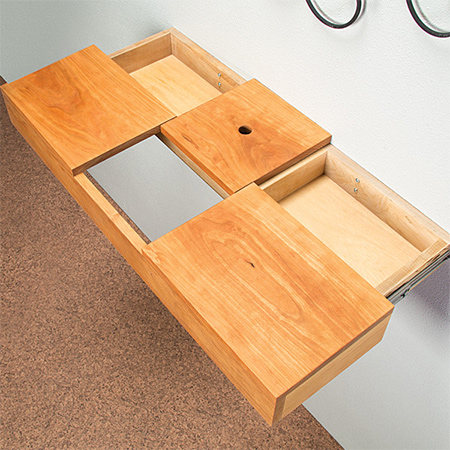
In this secret shelf there is only one visible compartment. The other two compartments are revealed when you pull out the drawer. Lift up the centre lid for a handy storage compartment. Or, pull the entire shelf away from the wall to reveal two additional hidden storage areas.
YOU WILL NEED:
2 of 67 x 812mm - wall box, front / back
4 of 67 x 191mm - wall box, sides / dividers
1 of 215 x 792mm - 3mm masonite / plywood, wall box, bottom
3 of 6 x 6 x 190mm - shelf lid, cleat
2 of 67 x 235mm - drawer apron sides
1 of 67 x 884mm - drawer apron front
2 of 257 x 335 - shelf tops
1 of 212 x 257mm - centre compartment top
Wood glue
30/32mm coarse-thread pockethole screws
25mm spade or MAD bit
Wood filler - colour to match finished tint
50mm panel pins
200mm ballbearing drawer sliders [2]
Wall plugs and 65mm screws [4]
TOOLS:
Drill / Driver plus assorted bits
Kreg Pockethole Jig
Quick clamps
Orbital sander plus 80-, 120- and 180-grit sanding pads
Spirit level
Hammer
Tape measure and pencil
Buy everything you need for this project at your local Builders Warehouse. Note: The don't always have stock of the ballbearing drawer runners, but you can buy them at Gelmar.
HERE'S HOW:
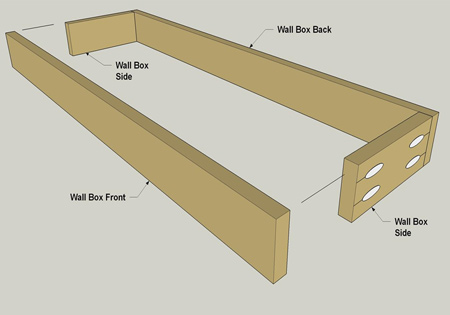
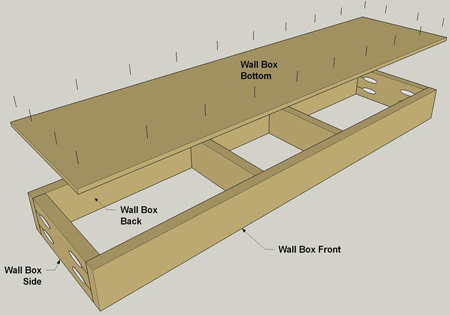
1. See diagram below to assemble the wall box front, back and side sections using wood glue and pockethole screws.
GOOD TO KNOW: Both the wall box and drawer assembly are made using 67mm pine. Sand down the top edge of the wall box by 1 to 2mm with 80-grit sanding pads to allow easy fitting of the drawer.
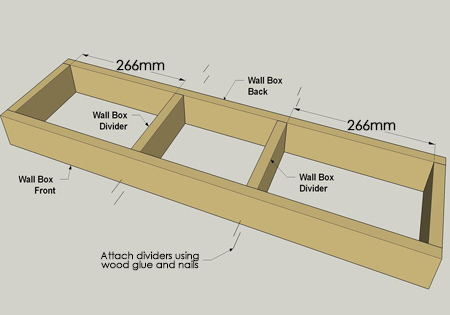
2. Place the dividers as shown below and secure using wood glue and panel pins. Clamp for a couple of hours until the glue dries.
3. Attach the wall box base using wood glue and panel pins. Use clamps to hold the base in place while you drive in the panel pins.
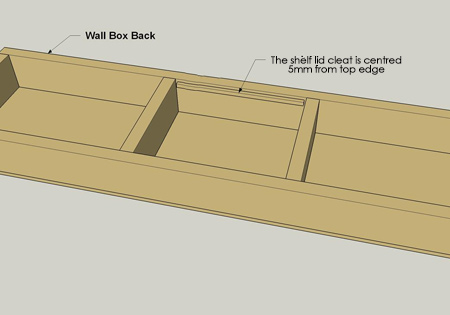
4. Position a cleat inside the wall box assembly, making sure it’s positioned 5mm down from the upper edge of the box side. Once you have the position of the cleat marked, spread glue on the cleat and clamp in place until the glue dries.
GOOD TO KNOW: The centre compartment lid rests on this cleat, holding it at the same height as the rest of the top.
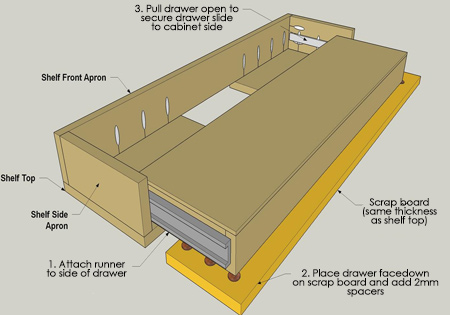
5. Assemble the drawer as shown below using wood glue and pockethole screws.
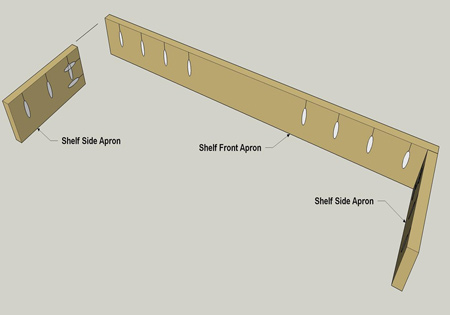
6. With the [2] shelf tops face down, attach the shelf apron assembly using wood glue and pockethole screws and then attach the shelf tops to the apron and front.
![6. With the [2] shelf tops face down, attach the shelf apron assembly using wood glue and pockethole screws and then attach the shelf tops to the apron and front.](../2016/nov/364.jpg)
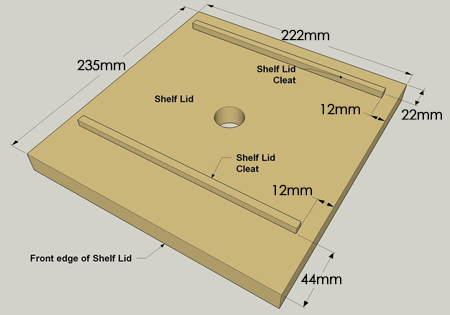
7. On the underside of the centre, drill a centre finger hole with a 25mm spade bit and then attach the two remaining cleats. Glue in place.
GOOD TO KNOW: Before moving one, sand all the sections and wipe clean. Apply your choice of wood tint and interior sealer or antique wax and leave to dry overnight.
8. For the pullout drawer, ballbearing drawer runners provide smooth operation and are easy to install. Unclip the two sections and attach one section to the side of the drawer cabinet and then the drawer sides. See below for details. Click here to easy instructions for mounting ballbearing drawer runners.
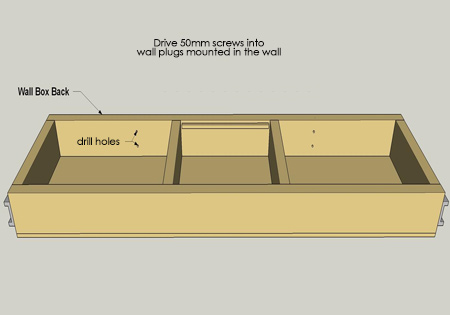
9. Remove the pullout drawer. Have someone help while you hold the shelf against the wall to mark the location for drilling and mounting. Check with a spirit level before making the wall. Secure to the wall with nylon wall plugs and 65mm screws. Click here for tips on drilling into walls. An alternative option for mounting the shelf onto the wall is to use a French cleat.
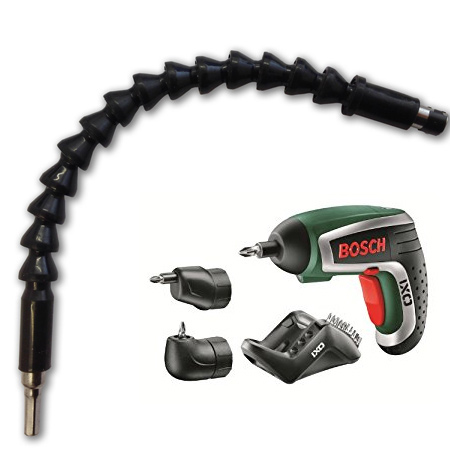
GOOD TO KNOW: When using a larger drill / driver you may need a right-angle head, or adjustable screw attachment.
10. Insert the drawer and your secret shelf is now ready.
buildsomething.com