Make A Shelf In 10 Minutes!
If you need extra storage in your home, here's a 10 minutes shelf you can DIY in... well, 10 minutes!
18/02/2021
family handyman
Shelves are easy enough to make, especially if you are looking for a quick solution for extra storage or to set up an interesting display on your walls. This 10-minute DIY shelf is made using PAR pine that you can purchase at any Builders or hardware store and you can use a pneumatic nailer, wood glue, or screw it together - whichever you prefer.
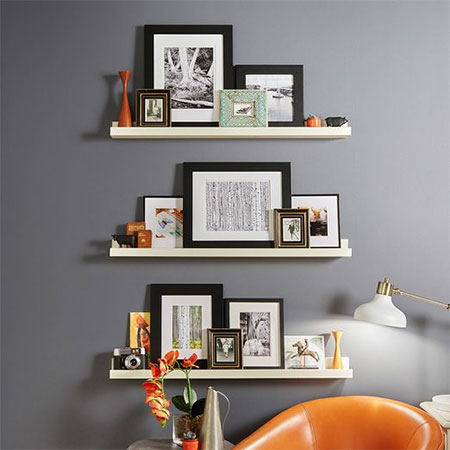
More of a ledge than a shelf, the design of the shelf can be modified if you want a wider shelf, or you can make it longer. If you want to set up a display on a blank wall, make more than one shelf and arrange them on top of each other or in a staggered arrangement.
Once your shelf is assembled and you are ready to hang on the wall, check out these easy instructions for adding a couple of keyhole hangers to the back of the shelf.
YOU WILL NEED:
PAR pine in the lengths and widths required for your custom shelf **
Picture hangers, or use keyhole brackets
Wall plugs and screws
Painter's tape
Wood glue
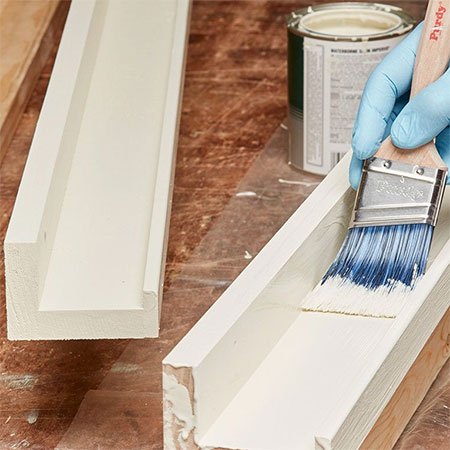
Paint, sealer or varnish to finish
** Having everything cut to size at Builders means you can immediately start assembling your shelves.
TOOLS:
Pneumatic nailer or drill/driver plus assorted bits
Sander plus 120- and 240-grit sanding pads
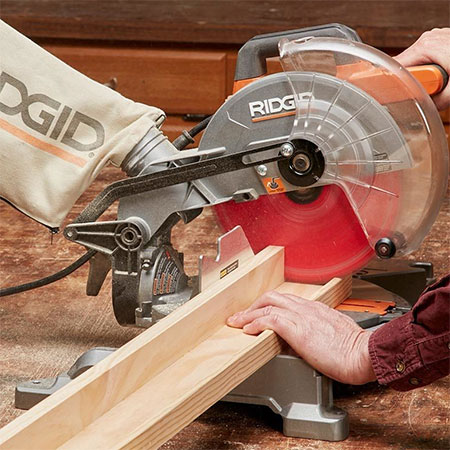
Saw to trim your shelf
Spirit level
Quick Clamps
Safety gear
HERE'S HOW:
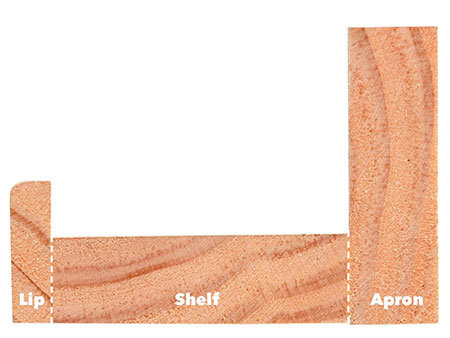
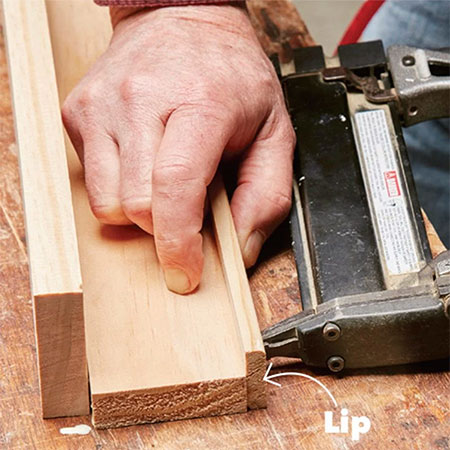
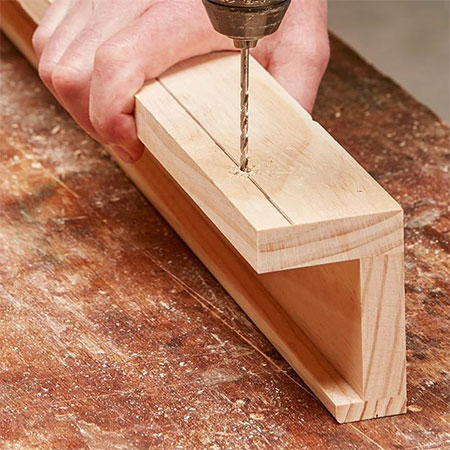
1. Starting with the lip, glue and secure this to the end of the shelf - see diagram above. To do this you can glue and clamp overnight, or use a pneumatic nailer or screws.
2. Repeat the above process to attach the apron to the other side of the shelf.
3. If the ends of the shelf are uneven, which they shouldn't be if everything was cut to size, you can trim this away using a saw. If you don't own a saw, you can use a sander and 80-grit sanding pads but it will take longer using this method.
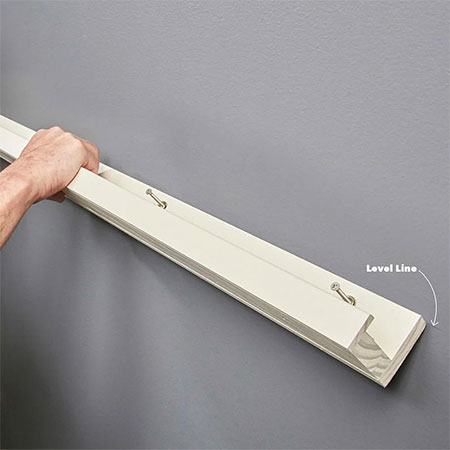
4. To hang the shelf, in this project the screws are driven through the front of the shelf into the wall. Pre-drill holes for the screws. If you are going to be using invisible keyhole hangers, follow the instructions in the link above.
5. Sand the assembled shelves with 120- and then 240-grit sanding pads before wiping clean and painting, sealing or varnishing - the choice is yours.
6. Use a spirit level to mark where the shelf will be placed, drawing a level line on the wall to make it easier.
7. Have someone hold the shelf for you while you score the surface using the screws. Place a screw in each of the pre-drilled holes and turn until you feel it scratching the wall and marking the position for drilling the holes.
8. Now you can drill the holes in the wall, insert the wall plugs and hang your new shelf. The HSS or masonry/brick drill bit should be the same size as the wall plugs you have selected to mount the shelf on the wall.