
Quick Project: Make a Set of Stackable Toy Boxes
These stackable toy boxes are great for a kid's bedroom or playroom and when not in use they can be stacked neatly on top of each other and put out of the way.
13/03/2019
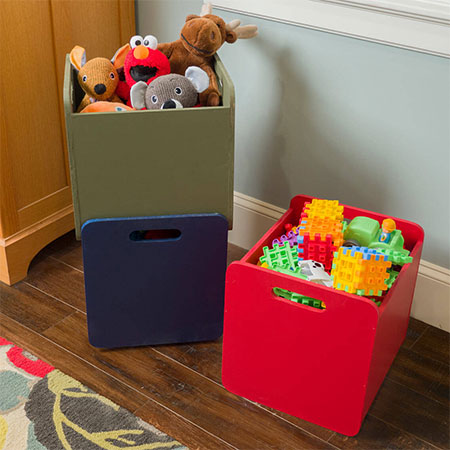
These colourful stackable toy boxes are ideal for storage in a kid's bedroom or playroom. When not in use they can be stacked neatly on top of each other and put out of the way.
Use 12mm plywood or SupaWood to make the stackable storage boxes and then grab some cans of Rust-Oleum 2X spray paint to paint them in bold, bright colours.
YOU WILL NEED:
2 of 380 x 354mm - 12mm board - handle sides
2 of 360 x 305mm - 12mm board - front and back
1 of 360 x 330mm - 12mm board - base
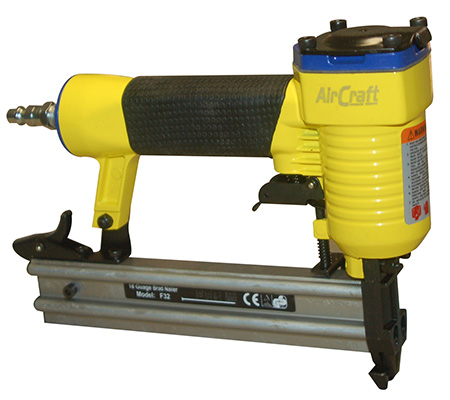
4 x 45mm screws - or use a pneumatic brad nailer
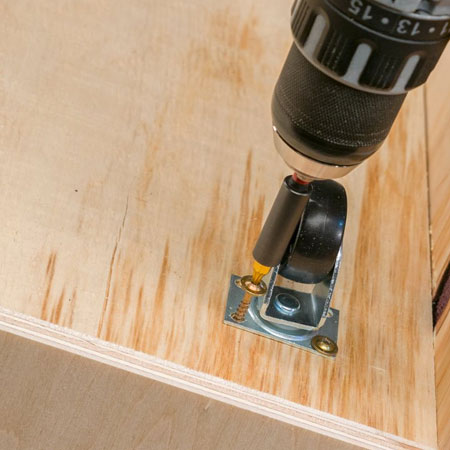
4 of caster wheels and screws
TOOLS:
Drill/Driver plus assorted bits
Jigsaw and clean-cut blade
Orbital sander plus 120-grit sanding pads
Tape measure and pencil
HERE'S HOW:
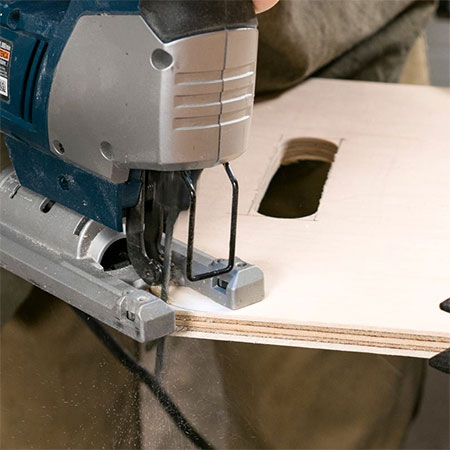
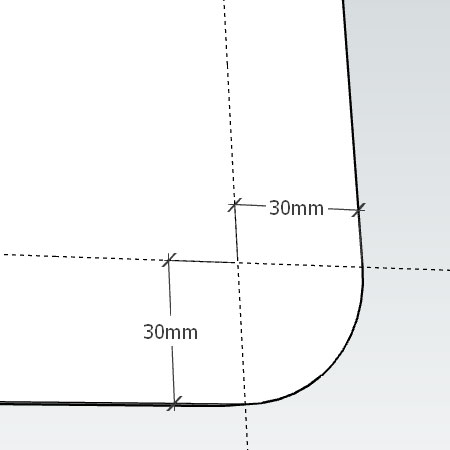
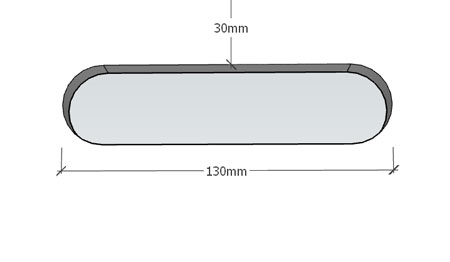
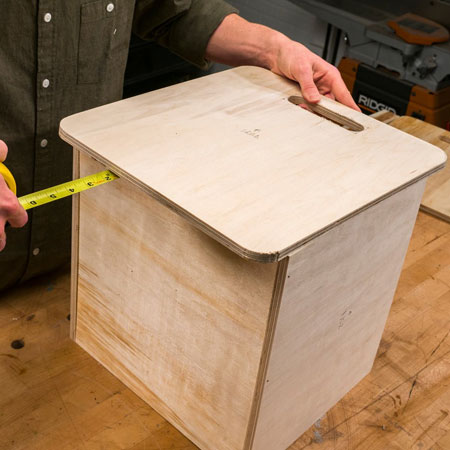
1. On the sides (with the handles) measure and mark to cut curves on all the corners and to cut out the handle. See diagram below for rounding off the corners.
2. Also cut out holes for the handles as shown in the diagram below.
3. Now you are ready to assemble the storage boxes. Start by attaching the front/back to the base with wood glue and brad nails (or screws). After that you can attach the handle sides onto the base and front/back, again using wood glue and brad nails (or screws). If you are using screws, remember to pre-drill countersunk pilot holes.
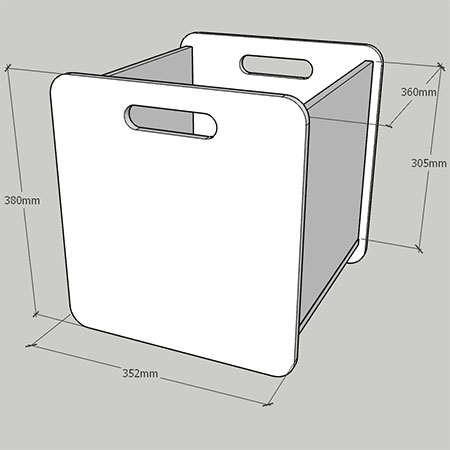
GOOD TO KNOW: The handle sides have a 40mm reveal at the bottom, so be sure to line up before you join the pieces together.
4. Mark the location for the caster wheels and then screw the castor wheels to the base.
family handyman