
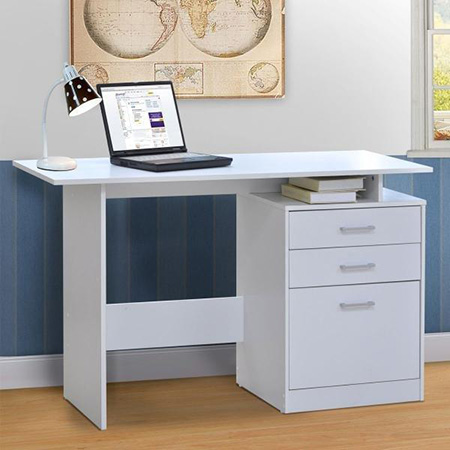
Practical desk for child or teen bedroom
This trendy desk is made using 16mm MDF from your local Builders and painted with a Bosch PFS spray gun. The modern design blends will most bedroom styles and it offers storage drawers for school supplies or stationery.
YOU WILL NEED:
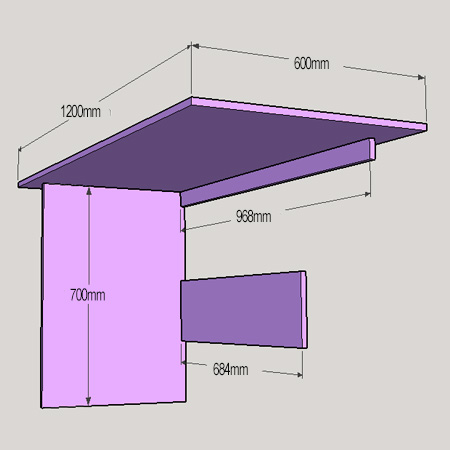
1 of 600 x 1200mm 16mm MDF - desk top
1 of 500 x 700mm 16mm MDF - side
1 of 200 x 684mm 16mm MDF - back crosspiece
1 of 50 x 968mm 16mm MDF - top crosspiece
1 of 80 x 500mm 16mm MDF - top support
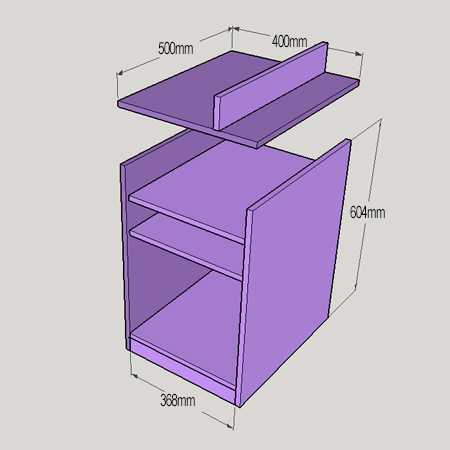
1 of 400 x 500mm 16mm MDF - cabinet top
2 of 500 x 604mm 16mm MDF - cabinet sides
2 of 368 x 488mm 16mm MDF - shelf dividers
1 of 368 x 500mm 16mm MDF - cabinet base
1 of 50 x 368mm 16mm MDF - cabinet front panel
2 of 105 x 364 12m MDF - small drawer front
4 of 87 x 476mm 12mm MDF - small drawer sides
2 of 87 x 364 12mm MDF - small drawer back
2 of 340 x 476mm 12mm MDF - small drawer base
1 of 324 x 364mm 12mm MDF - large drawer front
1 of 324 x 240mm 12mm MDF - large drawer back
2 of 324 x 476mm 12mm MDF - large drawer sides
1 of 316 x 476mm 12mm MDF - large drawer base
2 of 450mm ball-bearing drawer runners for large drawer + 12mm and 16mm screws
Wood filler
3.5 x 30mm cut screws
4 x 45mm cut screws
Knobs or handles of choice
Finishing: Bosch PFS spray gun and Prominent Paints Ultra Sheen
TOOLS:
Drill / Driver plus assorted bits
Countersink bit
Tape measure and pencil
Orbital sander plus 120- and 240-grit sanding pads
HERE'S HOW:
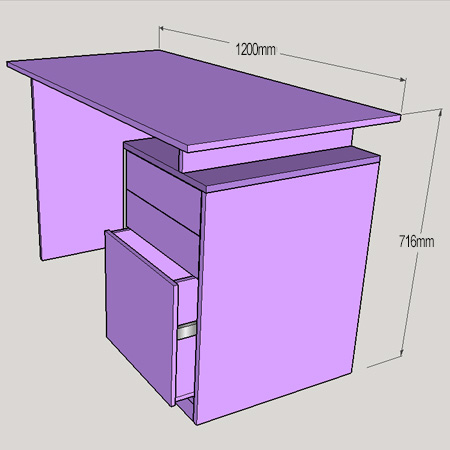
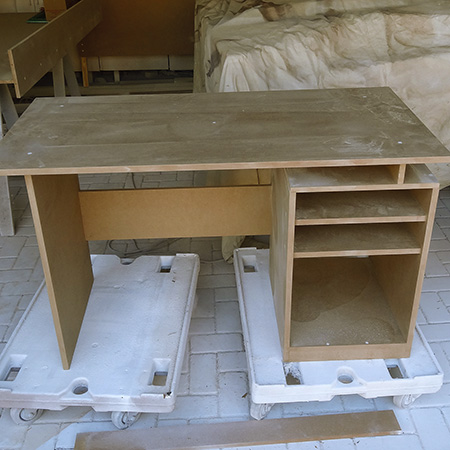
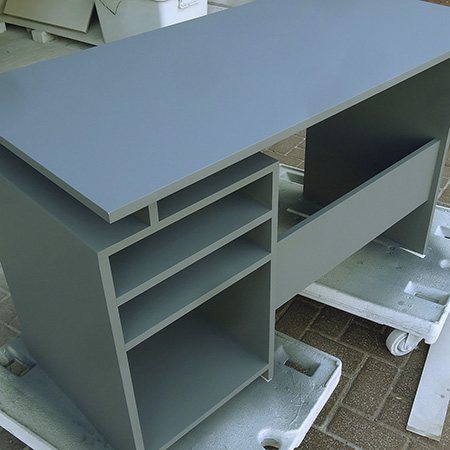
The desk measures 716mm high and 1200mm long and offers more than enough space to learn and study. You can easily make a shorter version by reducing the length of the top, but be sure to leave enough space for a chair. The top of the desk also has a 50mm overhang at the back to allow for any skirtings or if placed close to a power outlet.
Assembly is easily done if you have all your pieces cut to size at your local Builders Warehouse. All the pieces are joined together by pre-drilling 3mm pilot holes, countersunk where the screw will be drilled through.
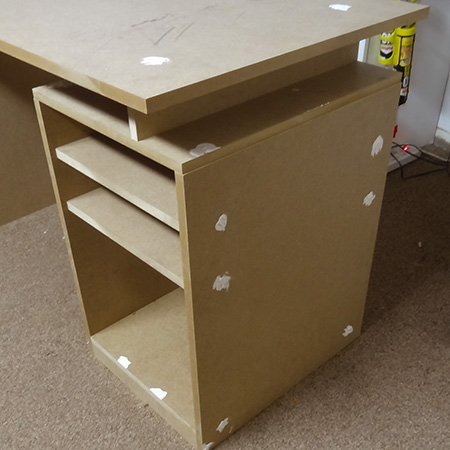
Step 1 is to the make the cabinet, adding the top support to the cabinet top before attaching the sides, base, shelves and front apron at the bottom of the cabinet. The top support is mounted 100mm in from the edge of the cabinet top and attached through the underside of the cabinet top so that no screws are visible.
Step 2 consists of attaching the side panel, top crosspiece and back crosspiece onto the cabinet, and then adding the top onto this.
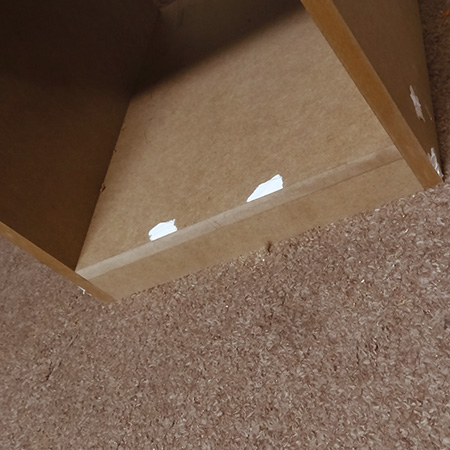
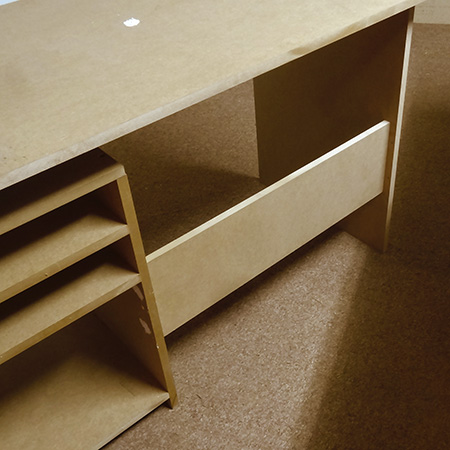
BELOW: Base of cabinet showing cabinet front panel mounted underneath the base.
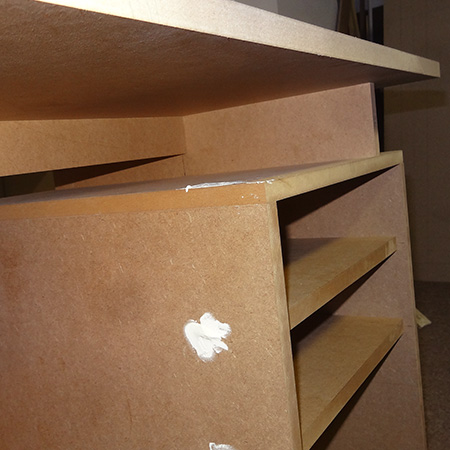
BELOW: Details showing the cabinet with top support and top. Notice how all the screw holes are covered with wood filler.
BELOW: The top crosspiece is attached to the side and top support and ensures that the desk top does not bow.
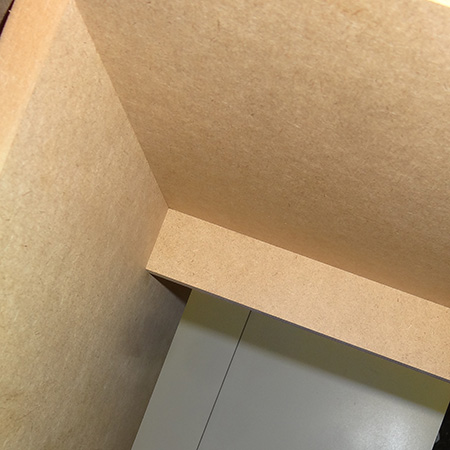
BELOW: The bottom crosspiece is secured to the side and side of cabinet for stability and strength.
Assemble the drawers
Assemble the large drawer by attaching the front and back to the sides with 3.5 x 30mm screws. The front is larger by 12mm on both sides to allow for drawer runners to be fitted. You will find tips here on mounting ball-bearing drawer runners.. Insert the base and secure through the front, back and sides using 3.5 x 30mm screws.
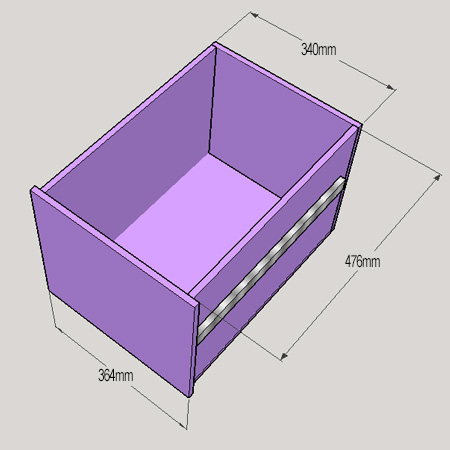
Assemble the top drawers with all edges flush at the top so that the front will overhang the shelf dividers. The two small drawers are not fitted with drawer runners, but if you wish to add these deduct 24mm from the width of the back and base sections.
BELOW: Once the wood filler is dry you can sand with 120-grit to remove any uneven edges, and then sand with 240-grit to smooth filled areas and cut edges of the board.
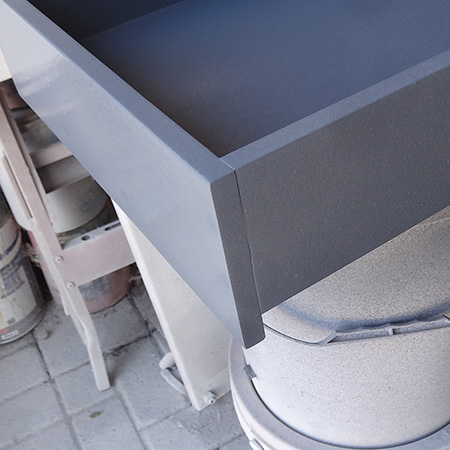
The client wanted the desk sprayed in a charcoal grey colour, which doesn't actually reflect well in the image below but looks stunning in real life. The desk was spray with two coats of Prominent Ultra Sheen, lightly sanding with 400-grit sandpaper before applying a further coat of paint using a Bosch PFS spray gun.

All our projects are sprayed with a Bosch PFS spray gun. There simply is no better way to apply paint if you want a truly professional finish.
When you have finished all the painting you can attach your choice of handles or knobs to the drawers.