
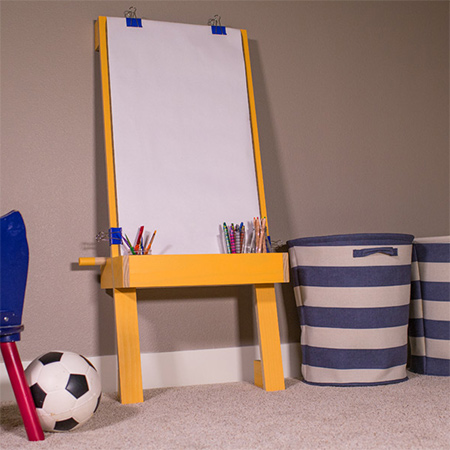
Creative Easel
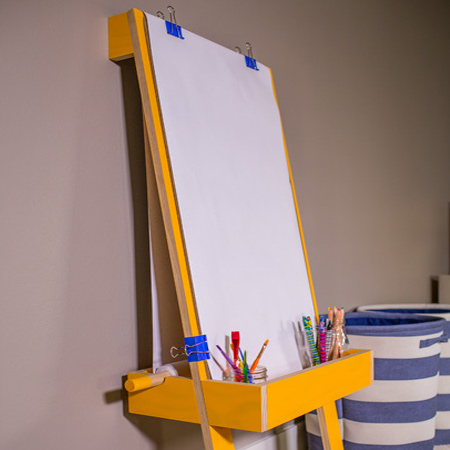
Let your child express their creativity with this easy easel. The easel sits against a wall and has a handy tray for art supplies.
Visit www.BuildSomething.com for more great Kreg Pockethole Jig projects.
YOU WILL NEED:
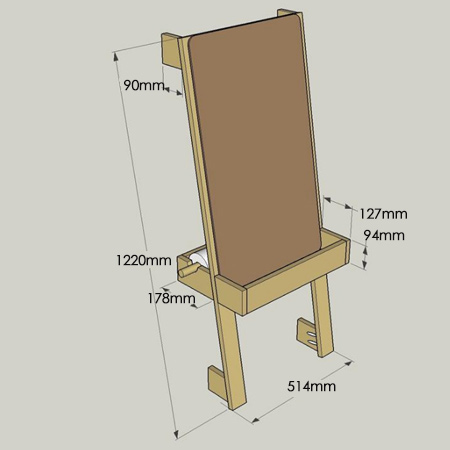
2 of 22 x 67 x 380mm pine - rail
2 of 22 x 67 x 1220mm pine - leg
2 of 22 x 94 x 100mm pine - feet
2 of 22 x 94 x 90mm pine - wall support
2 of 22 x 94 x 470mm pine - tray front / support back
2 of 22 x 94 x 127mm pine - tray front, sides
2 of 22 x 98 x 178mm pine - support back, sides
1 of 22 x 105mm pine - tray base, front
1 of 22 x 156mm pine - tray base, back
1 of dowel, cut to fit
Quarter sheet of 3mm Masonite or Hardboard
32mm pockethole screws, coarse-thread
25mm diameter pine dowel
Wood glue
Acrylic paint for finishing
TOOLS:
Drill / Driver plus assorted bits
Kreg pockethole jig
Jigsaw plus clean-cut blade
Orbital sander plus 120- and 180-grit sanding pads
Tape measure and pencil
Find all the tools and supplies for this project at your local Builders Warehouse.
GOOD TO KNOW: Kreg offer a variety of Pockethole Jig kits. You will find these at your local Builders Warehouse or specialist hardware store, or visit www.VermontSales.co.za to enquire as to your nearest retail stockist.
HERE'S HOW:
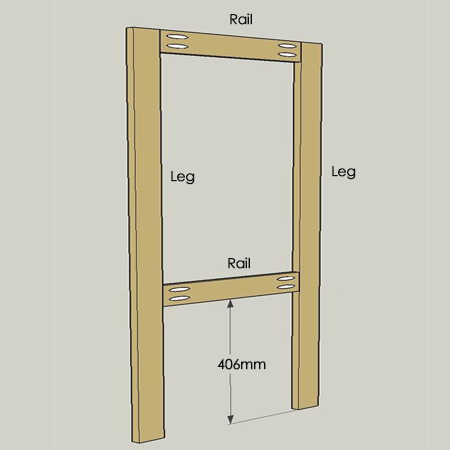
1. Use pocketholes to attach the rails to the legs with wood glue and pockethole screws.
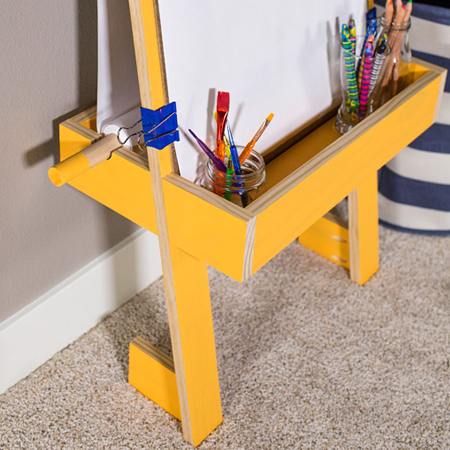
2. Use a jigsaw to cut the angled parts for the feet, tray sides, and support sides. Cut a 10-degree angle on one side. You also need to cut two half circles in the support sides for the dowel. Mark with a compass, and cut out with a jigsaw.
3. Drill pocketholes as shown below and secure the feet and supports onto the legs.
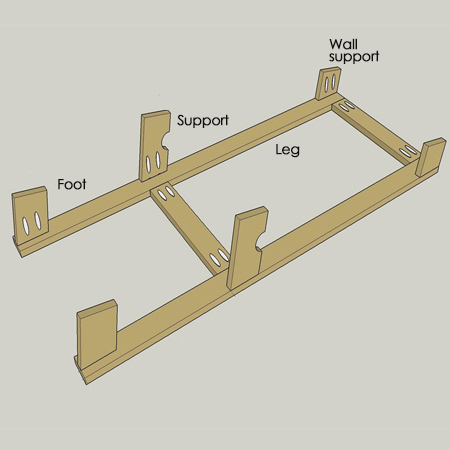
GOOD TO KNOW: Align with the lower rail and supports with the top, bottom and lower rail.
4. Cut a dowel to length to hold a paper roll.
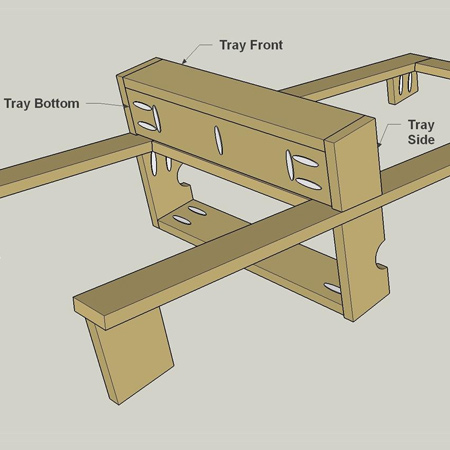
5. Drill pocketholes in the pieces shown below and secure with wood glue and pockethole screws.

6. Attach the tray front and the bottom, as shown.
7. Cut the support board for the easel from a sheet of Masonite or Hardboard to fit on the front of the easel. Round off the corners and then sand them smooth. This section can be left loose, or secured onto the frame with a few panel pins.
8. Sand all the assembled sections before applying paint or stain and sealer / varnish.
buildsomething.com