Spray paint pine furniture
I am sure there are many of you out there who have at least one item of pine furniture in your homes.
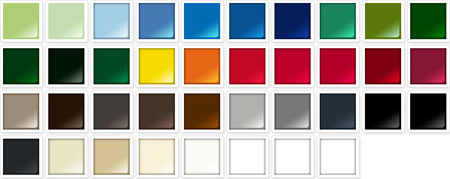
Pine is probably the most affordable furniture out there, apart from making your own, but it always has that look about it. People tend to pile on the varnish and hope for the best. When it gets chipped and scratched it just starts to look awful. For this project I'm going to show you how easy it is to give pine furniture a makeover, and the fun part is that you can change it to any colour you want.
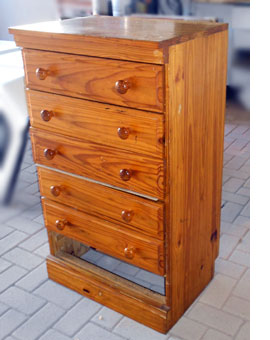
This chest of drawers was presented for a makeover with the instruction to... make it look better! The pine chest of drawers is not in very good condition. It has been moved from home to home and has taken more than its fair share of knocks and bumps.
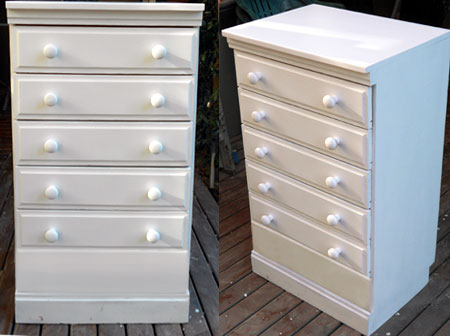
What you need to remember is, that you can makeover any piece of furniture in your home. It's simply a matter of knowing what to do and doing it right. This is what the finished pine chest of drawers looks like after being prepared and painted. Much nicer and, after adding a panel to the opening where a drawer is missing, the piece is ready to go back into use.
So how would you go about giving a varnished pine chest of drawers a makeover?
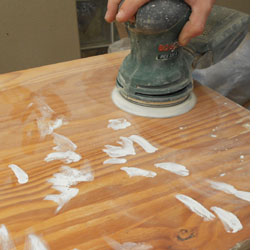
Sand the varnish
If the piece is still in excellent condition you will only need to give a light sanding with 180-grit sandpaper. Where these is quite a bit of damage you will need to sand with 120-grit sandpaper to remove as much of the damage as possible. You can use a multi-sander, orbital sander or random orbital sander (seen here) to do the sanding.
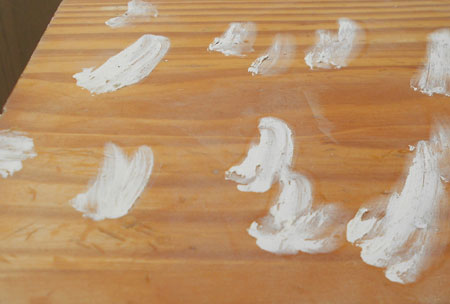
Repair with wood filler
Before applying wood filler, wipe the piece down with a cloth slightly dampened with mineral turpentine. This not only cleans away any dust, but also prevents the wood from sucking moisture out of the wood filler and causing it to dry too quickly. Deep dents and scratches can be filled in with wood filler, which is left to dry and then sanded smooth, along with the entire piece, using 240-grit sandpaper.
Any missing chunks can be repaired with Alcolin QuikWood. This is an epoxy-based filler that sets rock hard and must be sanded smooth with 120-grit and then 240-grit sandpaper.
GOOD TO KNOW
It isn't necessary to apply big globs of wood filler, only enough to fill the hole and sit slightly on top of the surface. If you apply too much wood filler in one go it will crack.
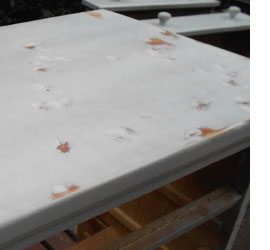
Inspect and repair
After sanding it isn't always easy to see any uneven spots, so I like to apply a light coat of spray paint, as this makes uneven areas very visible. If there is a low spot that requires more filler, I can now add this, let dry and sand smooth before painting.
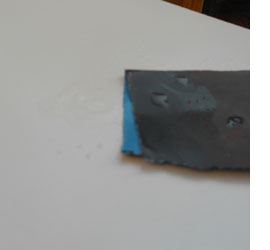
Spit and polish
For areas that are too raised, I like to call this process spit and polish because I have a bad habit... When using wet/dry sandpaper I spit on the surface and then rub with 800- or 1000-grit sandpaper. By rubbing in a circular motion you can rub away any excess for a nice smooth finish.
Even though I am using Rust-Oleum Gloss Protective Enamel spray for this project, the spit and polish still works and will work on any painted surface that needs touching up.
Work, work, work
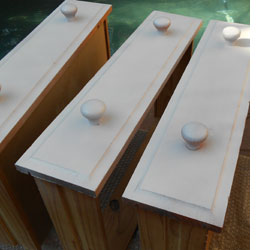
The cabinet and drawers get the same treatment. Sand, fill, sand, etc. You will find that on pine furniture when they cut any shape onto drawers there is always a rough spot around the edge, where the grain of the wood can be seen. It's a good idea to fill this with wood filler as well for a smooth, even finish.
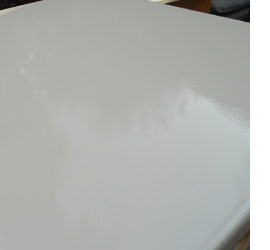
Glorious gloss
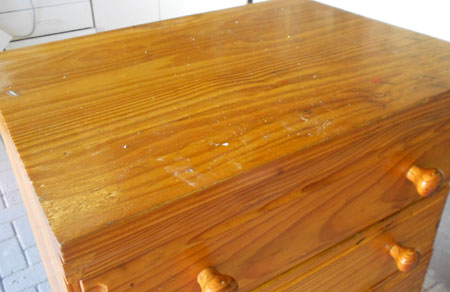
Although it's hard to see, the finish looks super glossy. Even though the original top was badly scratched and gouged, with all the fixing up and preparation the gloss finish looks ultra shiny. I am using Rust-Oleum Gloss Protective Enamel spray in white for this project, because the chest of drawers is going back into use and this paint is extremely durable and will protect against scratches and bumps.
Always shake the can well before use. The cans have an agitator that mixes the ingredients. A short burst on a scrap piece of wood will ensure that the flow is running when you spray onto the surface of your project. When applying the spray paint, hold the can at a slight angle downwards and have it no less than 30cm away from the surface.
Press the trigger to start spraying before the surface - in other words spray into the air on one side, and then spray evenly from one side to the other - keeping your finger on the trigger all the time, only releasing the trigger when you are away from the surface. Repeat this all the way over the surface as quickly as possible, so that there are no gaps between the rows and this will leave a luxurious finish that could have been professionally applied.
Rust-Oleum Gloss Protective Enamel can be applied to metal, wood, concrete or masonry, both indoors and outdoors, and comes in a wide range of colours.