
Give Knotty Pine a Lick of Paint
Here's how to paint over knotty pine or tongue and groove wall panelling and ceilings.
styleathome.com
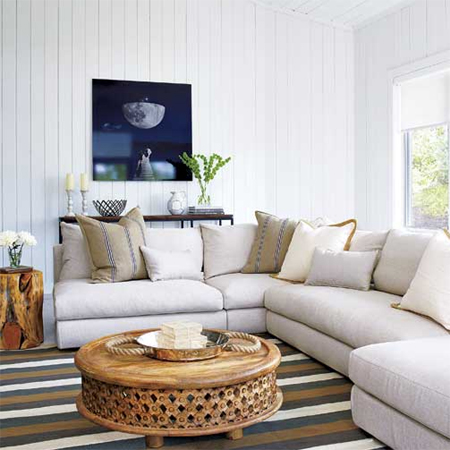
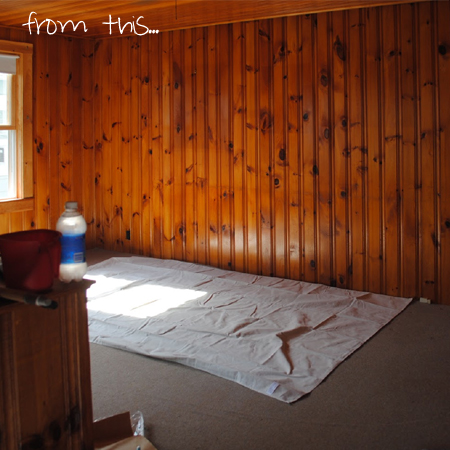
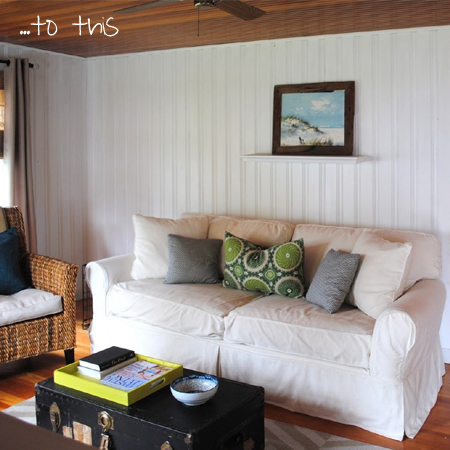
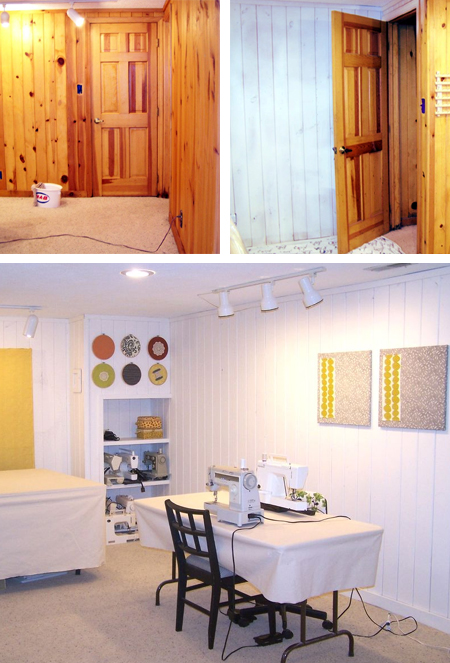
Knotty pine - or tongue and groove panelling - can look amazing in a rustic home. But it can also overpower a small space. Since most knotty pine installations on walls and ceilings are invariably varnished, over the years this tends to yellow with age and knotty pine becomes more of an eyesore than a feature. Here's how to paint over knotty pine or tongue and groove wall panelling and ceilings.
I have seen rooms where knotty pine wall panelling adds a warm, cosy atmosphere to rooms. But if you are reading this, chances are your room isn't one of those! While a fair amount of preparation is needed for knotty pine, once it's done you will be amazed at the transformation that takes place after painting knotty pine.
housebyholly.blogspot.com
YOU WILL NEED:
Masking tape
180-grit sandpaper
Wood primer
Plascon Double Velvet or Wall & All
Drop cloths
TOOLS:
Paint sprayer or painting equipment
Orbital sander + 180-grit sanding pads
Dust mask
HERE'S HOW:
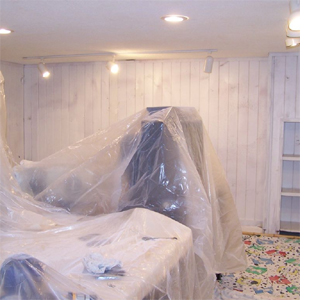
1. Before you start, cover fittings and furniture with plenty of dropcloths. Use masking tape to mask off areas not to be painted. Ensure plenty of ventilation as you work.
Unless you plan to coat knotty pine with an oil-based paint, knotty pine needs to be sanded to remove or de-gloss the surface to prepare it for painting. This is the labour-intensive part of the project, and the most important.
2. Use an orbital sander, preferably one fitted with a micro-filter, to sand down the panelling; sand between the grooves with hand sanding. Sand the entire finish with 180-grit sanding pads or sandpaper - sanding with the grain. It's important to de-gloss the existing finish to provide a surface for subsequent coats of primer to adhere to.
3. After sanding and wiping clean, it's time to apply wood primer. The primer acts as a blocking agent and provides a good bond between the knotty pine and paint. Leave out the primer and you could end up with dark areas seeping through the final paint coats.
Now you can save yourself a lot of time by investing in a Bosch PFS spray system. Simply add primer to the paint pot and connect the hose. Switch on and start spraying. You can work from the bottom up - or the top down, applying a even coat of spray over the surface. Set the nozzle for fine spray and you won't have to worry about drips or runs. Clean by rinsing the paint pot and nozzles under warm water.
4. Allow the primer coat to dry overnight. Fill up the paint pot with the top coat and spray on two coats of paint, allowing drying time between coats.

Tips on painting knotty pine
1. Fill any holes or chips with wood filler or Alcolin QuikWood in advance, so they are dry and sanded before you start.
2. Always sand a varnished or previously painted finish to de-gloss for a better bond between finish and primer.
3. Always apply a wood primer to knotty pine to prevent stains on the finish.
4. Topcoat with a washable paint such as Plascon Double Velvet or Plascon Wall & All as an alternative to oil-based paints, as these won't yellow over time. It is also easier to paint over these when the time comes to refresh.