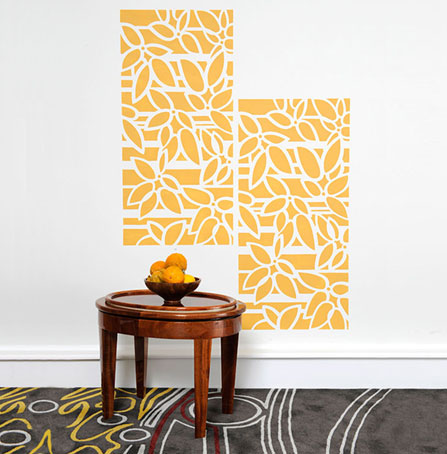
Create an instant feature wall
Stencilling with a foam roller is by far the fastest stencilling technique, and also the easiest. However, there are couple things to keep in mind to make sure the results are perfect. In this project we'll show you how to add an instant feature to a wall using a stencil, paint and foam roller.
GOOD TO KNOW: If you want crisp lines on your stencil print, or if you are using contrasting colours use spray adhesive. Shake the can well, then lightly mist your stencil with spray adhesive, let it dry for a few seconds and place the stencil on a wall or whichever surface you’re working on.
Here's how:
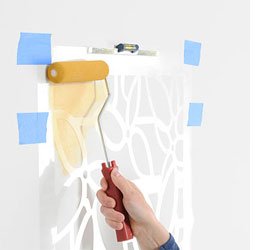
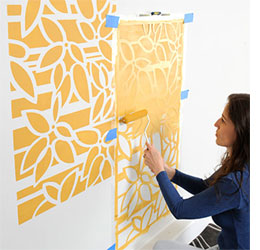
After mounting your stencil to the wall with masking tape, start rolling over the stencil with your loaded foam roller - applying light to medium pressure. You’ll see that your initial coverage might be a bit light, so keep rolling over the stencil in short back-and-forth strokes until you get your desired coverage.
It is much better to start light and quickly build the opaque coverage, rather than press on the roller too hard right from the start and possibly get paint bleed underneath the stencil. You’ll very quickly get the feel for just perfect pressure, and your stenciling result will be fabulous.

It’s very easy to check how it’s going by carefully lifting a corner of the stencil and taking a peek. I always check when I stencil, and I recommend you do too. It’s easy to make any adjustments early into the project. Place the stencil back and continue stencliling. Usually after a couple prints you’ll notice that there is not enough paint in your roller anymore. It means it’s time to reload your roller with more paint.
GOOD TO KNOW
Avoid the temptation of pressing hard on a roller to squeeze out the last bit the paint! You may get undesirable paint seepage if you use excess pressure.
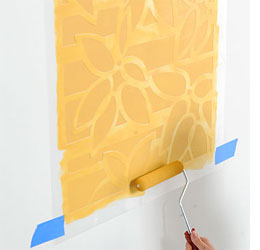
While rolling over the stencil with your roller, pay attention to the edges. It’s easy to get carried away and roll over the edge, especially once you see how easy and fast it is. If this happens, simply wipe off the spot with a moist rag or baby wipe. Also, strategically placing a piece of masking tape at the narrowest edges will help prevent “roll-overs”. Just slow down a bit next to the edges and you’ll not roll over them.
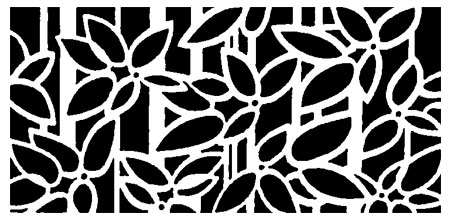
Removing of the stencil is the most exciting part of the whole process! Can you believe I just rolled that with a roller? So much fun. Now let’s do it again! Make your own stencil using the design below, or order your stencils online.