
Transform old furniture with paint and hardware
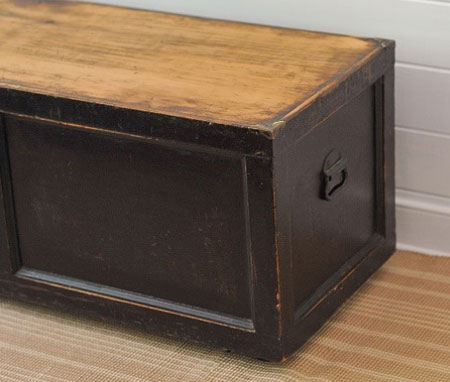
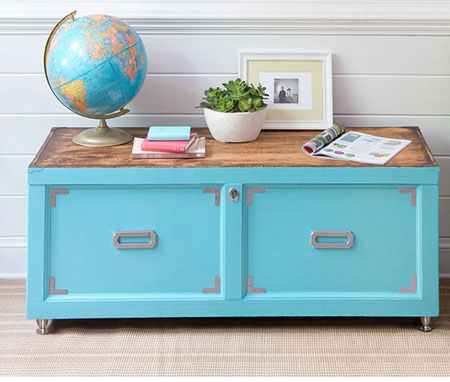
An old wooden chest is given some TLC and a new life with paint and hardware.
26/06/2018

It's easy to give new life to old pieces with paint and hardware. This plain wooden chest was a bargain find, and with some TLC it is transformed into a statement piece for a living room.
HERE'S HOW:
1. Prep your piece by removing all the old hardware so that you can sand down and fill any holes or cracks with wood filler. If you're going for a rustic look, it isn't necessary to make the piece look perfect for an aged or vintage look. Use 120-grit sandpaper to de-gloss a shiny finish and provide a good surface for the new paint to bond to.
GOOD TO KNOW: If the piece has been treated with wax or oil, wipe down with mineral turpentine and steel wool before sanding.
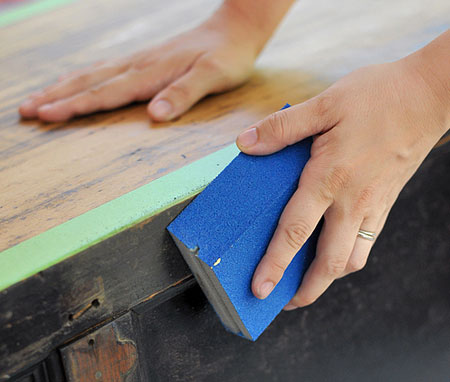
2. Use painter's tape to mask off any areas not being painted. In this case, the top of the chest was left as is and only the front, sides and back were painted.
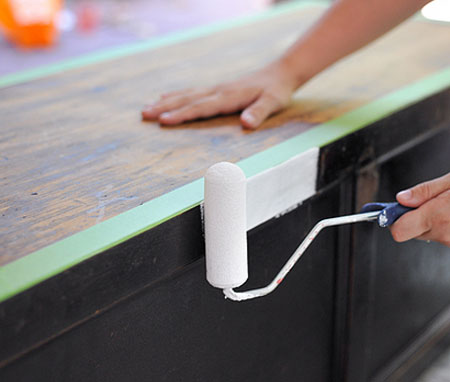
3. Apply primer over the areas to be painted. Using a primer ensures that there will be no bleed through the painted finish. You will find a selection of quality primers at your local Builders Warehouse. Be sure to let the primer dry for the specified amount of time.
GOOD TO KNOW: If you want a smooth finish, use a combination of foam paint roller and paintbrush to apply primer and paint.
GOOD TO KNOW: Choose a paint colour that ties in with colour already in the room where the piece will be placed.
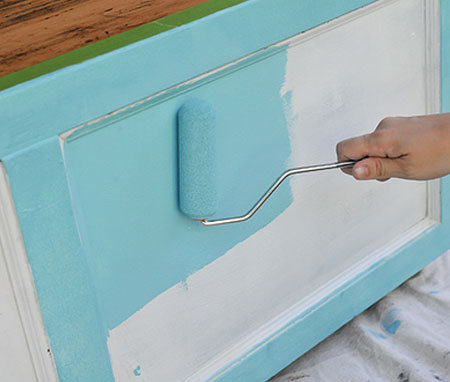
4. Once the primer is dry, apply two coats of your choice of acrylic paint. Allow drying time between each coat. Start off by painting any detail with your paintbrush and then go over this with a foam paint roller. For larger, flat areas you can use the foam paint roller to apply paint. In most instances two coats of paint should be sufficient.
5. Let the last coat of paint dry before carefully removing the painter's tape.
6. To protect the - unpainted - top of the wooden chest, apply your choice of furniture wax, oil, sealer or varnish.
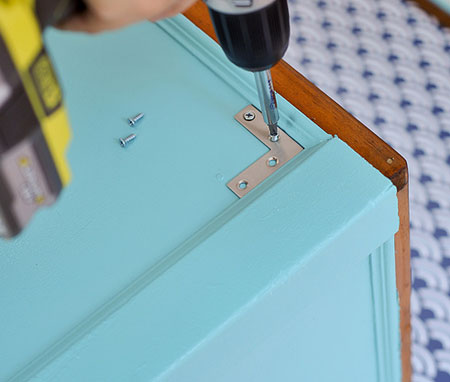
7. Completely transform with new hardware. For this project, simple metal brackets were added to the inset detail on the front of the chest and new handles were fitted.
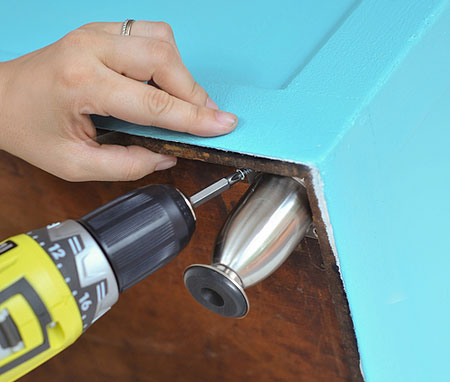
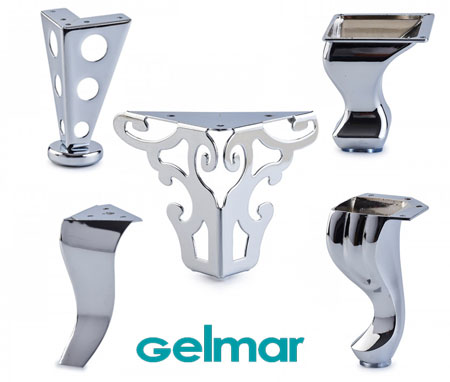
8. To finish off the project, stylish legs were fitted to the bottom of the wooden chest.
home depot