
Mosaic Garden Art
Turn bits and pieces of broken china and tile into unique garden ornaments
YOU WILL NEED:
China and tile
Sandpaper
Wire brush
Utility knife
Safety glasses
Hammer
Old bath towel
Disposable containers
Old wooden spoons
Ready-mixed tile adhesive
Grout mix - silica sand optional to mix with the grout
Old butter knives
Handheld tile cutter or nippers
CONTINUES BELOW
HERE'S HOW:
Select the materials:
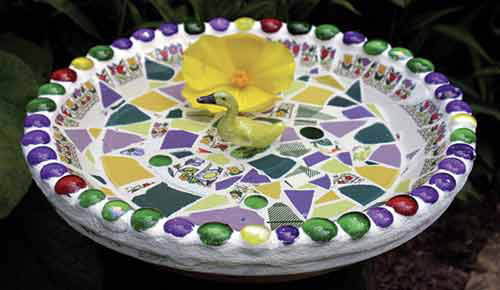
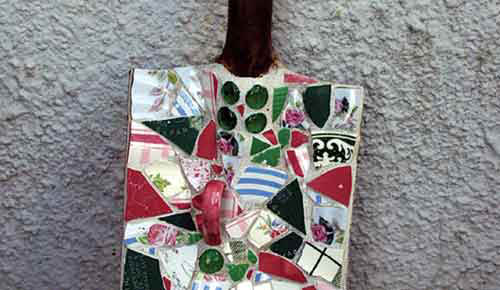
Sturdy, well-built objects made of metal, wood, terra cotta, or concrete work well as base objects for a mosaic. The decorative mosaic pieces will adhere to just about any surface except items made from flimsy plastics that bend and bow.
Prepare the object:
All materials must be cleaned before the bits and pieces of china and tile are applied. Some require special preparations. For metal use sandpaper and a wire brush to remove rust and dirt from aged metal surfaces, like shovels, for better adhesion. On new metal objects, use sandpaper to rough up the surface.
Sand and coat wood surfaces with a waterproof sealer; otherwise, the wood will absorb moisture and expand and contract, causing the mosaic work to crack.
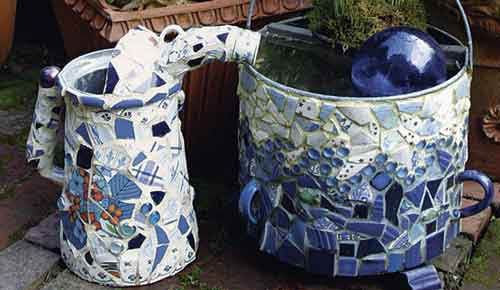
1. Break the china and tile
It’s best to work on top of a solid, flat surface; always wear safety glasses to protect against flying debris. Wrap china or tile in a bath towel, and hit it with a hammer several times. Some pieces will be harder to break than others and may require several strikes to achieve pieces of the desired size.
2. Mortar
Spread tile adhesive on the back of a mosaic piece using a butter knife. If the mosaic piece is thin, apply additional adhesive to create a level surface. Now position the mosaic piece, applying gentle pressure to ensure good adhesion. Use the butter knife to clear away any excess adhesive that has oozed out around the piece.
Place the remaining mosaic pieces according to your design, making sure the pieces are close together but not touching and leaving enough space for the grout. To fit pieces into small spaces, carefully trim them down to size with handheld tile cutters or nippers. Set the object aside, allowing the mortar to dry for 48 hours before grouting.
3. Grout
Use sanded grout, with its attractive, coarse texture, to fill in the cracks around the mosaic pieces. To make sanded grout, add a small amount of silica sand to the grout mix.
Spread the grout over the surface into all the crevices wearing heavy-duty rubber gloves to protect your hands from sharp edges. Then scrape away any excess grout and work additional grout into any low spots with your fingers.
Remove any leftover grout with a soft, damp rag, gently polishing each mosaic shard as you go until the entire surface is level and clean. Use a bucket of warm water to rinse the rag as you go, but don’t pour this water down the drain when finished, unless you want to grout your plumbing, too. Instead, let the water sit and the grout will sink to the bottom of the container. Then pour off most of the water and dump the grout in the trash. Set the grouted object aside for 48 hours before applying sealer.
4. Sealer
To protect objects from outdoor elements, apply two coats of sealer to the surface of the mosaic garden ornament.
Apply the sealer with a small paintbrush; do this outdoors for better ventilation. Let the first coat soak in for 10 to 15 minutes before brushing on the second coat. Buff the object with a soft towel after the sealer has dried. For added protection, reapply sealer every couple of years.