Dress up your drawers
Wallpaper is experiencing a radical resurgence - and its application is not limited to walls alone; give tired pieces of furniture new life with a contemporary facelift.

Project Notes:
Before you decide on the wallpaper, first take the measurements of the intended furniture piece and work out the amount of wallpaper necessary to cover the piece. Consider that you will need more when dealing with patterned paper, as much may be lost in order to have the pattern flowing across various panels.
Shopping List:
wallpaper, in the style of your choice (we used Black & White from Wall Coverings Inc)
decorative doorknobs (we found cut glass doorknobs which suit the wallpaper perfectly)
new legs for the unit (we used a tapered stainless steel leg that raises the unit off the floor – making it appear less heavy)
Other Items:
medium grit sandpaper (120 grit)
wallpaper adhesive
16mm screws (for fixing the legs)
Tools:
paintbrush
sponge roller
craft knife or scissors
tape measure
cordless drill (optional) – to fix handles and legs
CONTINUES BELOW
HERE'S HOW:
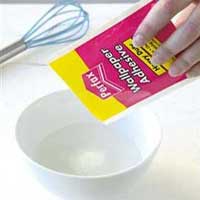
1. Mix the wallpaper adhesive according to the instructions on the packaging and leave to stand for a few minutes. Work out the sizes of all the structure's panels that need to be covered. Cut these from the roll, ensuring that the pattern matches adjacent panels. Lay out the wallpaper panels alongside each other, in the order in which they will be applied.
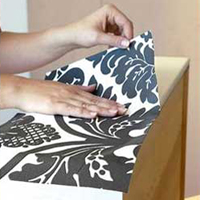
2. After lightly sanding the entire cupboard, using a medium grit sandpaper to roughen up the surface slightly, you are ready to begin applying the wallpaper panels. Start at the top and work downwards. Remember to centralise the pattern from the start.
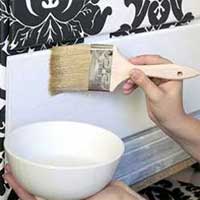
3. Use the brush to apply wallpaper adhesive to each new section and to the back of each panel before applying. Use a soft cloth to smooth the paper onto the surface.
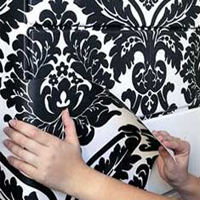
4. Make sure to match the pattern as you work. Use a craft knife to cut out sections at all the corners, so that they meet seamlessly at 45º, including the insides of the drawers and underneath.

5. Drill holes for the new handles and then fix these in place.
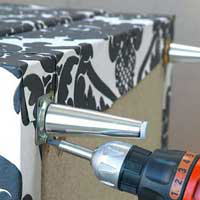
6. Fit the new legs underneath the chest of drawers using the screwdriver and screws.