DIY wooden Christmas tree
This project was designed and created by Crafty Sisters and the first time I spotted it on Pininterest, I knew this was a fantastic project for our DIY Divas Christmas Craft workshop.
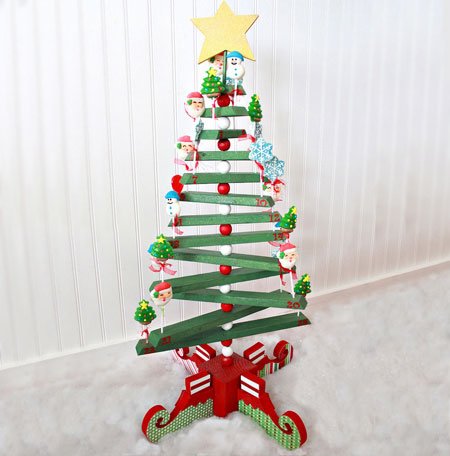
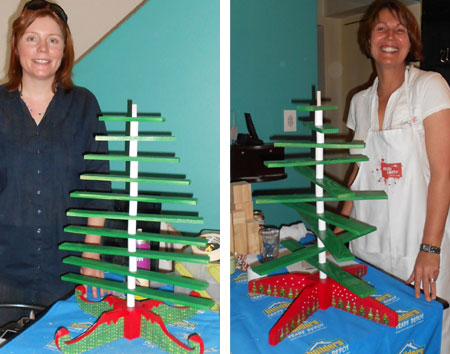
Two crafty DIY Divas, Karlien and Elizabeth show you how easy it was to make this beautiful wooden Christmas tree. Although they made the same tree design, you will notice that they each made different feet for their Christmas trees.
YOU WILL NEED:
76 x 76mm PAR pine offcut for the base
20mm PAR pine offcuts for the feet
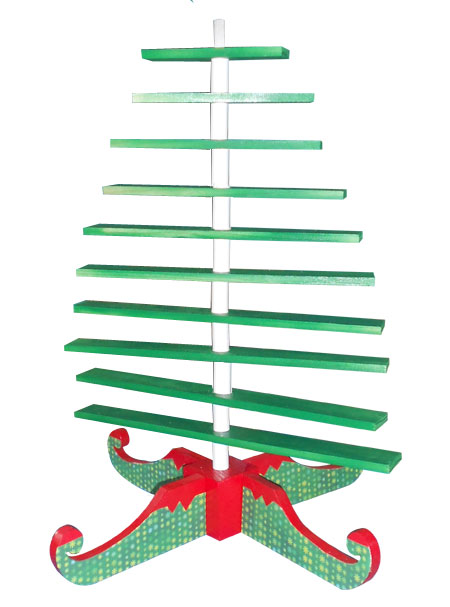
12mm x 1800mm length of PAR pine for the branches
12mm dowel for the support
25mm PVC pipe for the spacers
Rust-Oleum 2X spray paint - Apple Red - Meadow Green - Blossom White
Wrapping paper
Alcolin spray adhesive
TOOLS
Drill/Driver and assorted bits
Jigsaw and clean-cut blade
Tape measure and pencil
Scissors
Craft knife
CONTINUES BELOW
HERE'S HOW:
I am repeating the project entirely, as quite a few materials shown in the original project are not available locally.
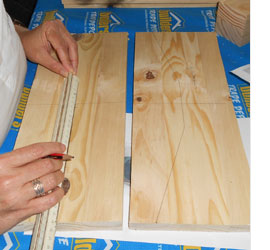
Mark out the design you want for the feet. Use the height of the 76 x 76mm PAR pine for the base as a guide. A height of around 10cm is perfect. Draw your design and then use a jigsaw and fretsaw blade (thin one) to cut out the design. Sand with 180-grit sandpaper so that each foot is nice and smooth - with slightly rounded edges.
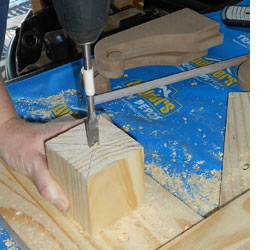
Draw diagonal lines across the top of the base and drill to a depth of 8cm. A strip of masking tape wrapped around the bit will tell you when to stop drilling. If you have a 10mm diameter dowel or smaller, you can use a wood bit. A larger diameter dowel will require a spade bit to drill the hole.
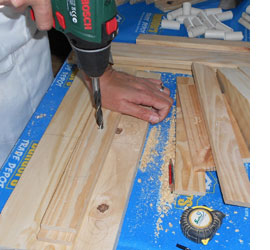
Cut the 12mm PAR pine to varied lengths for the branches. Place these on a piece of board to protect your work surface and then drill a hole in the centre of each board. Hold the pine firmly as you will, as it may spin if not held firm. Alternatively, clamp down in place while you drill.
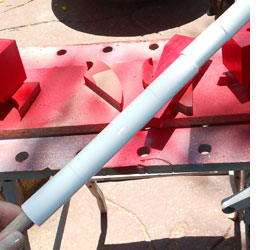
Cut the PVC pipe into 10 x 4cm wide sections for the spacers. Place these onto the dowel and take outdoors to spray lightly with Rust-Oleum 2X blossom white.
TIP: Use mineral turps, acetone or lacquer thinners to wipe off any marking on the pipe before spraying.

Take the feet and base outdoors to spray with Rust-Oleum 2X apple red. Placing the items on a small scrap of wood helps prevent the pieces from sticking to the surface and makes spraying easier. Only spray on light coats and allow to dry between each coat.
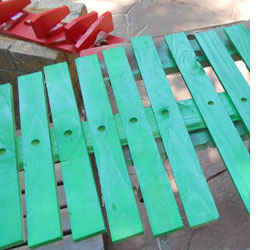
Repeat this process for the branches using Rust-Oleum 2X meadow green. After spraying and letting dry, turn the pieces over to do the other side.
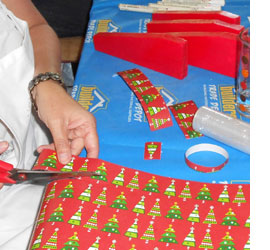
Cut strips of wrapping or scrapbooking paper to fit onto the feet. You could also use fabric.
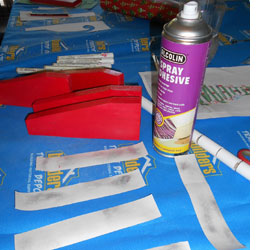
Put down a sheet of newspaper and spray the back of your cut strips with Alcolin spray adhesive. You also need to lightly spray the bottom of each foot where the wrapping paper will be adhered. Only spray lightly and leave both the cut strips and the feet until dry to touch. Now you can place the wrapping paper onto the feet and press into place. Be sure to position carefully as once it's stuck it cannot be removed.