
Stylish storage ideas
Here's a clever storage ideas for the nursery or children's bedroom. They're not only cute and handy, they're also a secret recycling project. The sides and bottoms of each basket are stiffened with recycled cardboard! But wait ... they have another hidden talent: they collapse and fold flat to store.
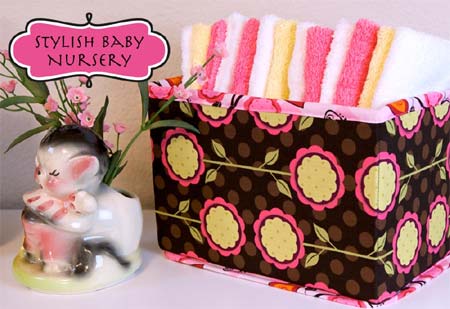
In a nursery use them for creams, nappies, wash cloths and other changing accessories. You could fill a whole shelf set with bright and beautiful baskets. Recycle cardboard boxes to make storage boxes for a children's bedroom, bathroom - in fact any room in a home!
YOU WILL NEED:
Fabric for outer covering (Fabric A) - 50cm of 150cm wide.
Fabric for inside lining (Fabric B) - 30cm of 150cm wide.
Scraps for binding
Cardboard for box sides
See-through ruler
Chalk
Scissors or rotary cutter and cutting mat
Straight pins
Sewing machine and accessories plus heavy-duty sewing needle
CONTINUES BELOW
HERE'S HOW:
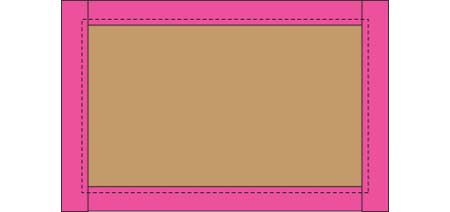
Using your see-through ruler and chalk , cut a 190mm x 240mm piece of fabric from Fabric A. Then, cut a strip from Fabric A that measures 166mm x 840mm. These pieces will form the bottom and outside walls of the box.
Cut two strips from Fabric B that each measure 45mm x WOF (width of fabric). We'll use this fabric for the binding of the box – the fabric around the top and bottom edges of the box.
From Fabric B, cut one 190mm x 240mm piece and one 166mm x 840mm strip. These will cover bottom cardboard insert and the inside walls.
From the cardboard, cut pieces as follows:
[4] 150mm x 80mm
[2] 150mm x 220mm
[1] 160mm x 210mm
Creating the sides:
Fold the 166mm x 840mm piece of Fabric A (outer fabric) in half, with right sides together, and stitch up the short side, using a 12mm seam allowance. Turn right side out and press seam open. Using the 166mm x 840mm piece of Fabric B (inner fabric), repeat step one. Place the sewn Fabric B piece inside the sewn Fabric A piece, placing them wrong sides together and matching up the seam lines.
Pin the bottoms of the two pieces together, and stitch around the bottom, using a 12mm seam. Stitch down the existing vertical seam line created by the inner and outer fabrics. (This is the seam that was created when you sewed the fabrics into the 'box' - you should have lined these seam lines up in step 3).
This vertical seam will create a starting point to measure the other vertical seams around the box. With your chalk mark additional seam lines at the following intervals: 228mm, 90mm, 90mm, 228mm and 390mm - In other words, you mark 228mm from the first seam line, then 90mm from that newly drawn mark, then 90mm from that new one, etc, until you end up back at the starting line). Stitch a vertical seam along each drawn mark.
You should now have a total of six sewn vertical seam lines that join the outer fabric and the inner fabric with the wrong sides together. These vertical seam lines have created 'capsules' where we will insert the cardboard to make the box stand up.
Make and attach bottom of box
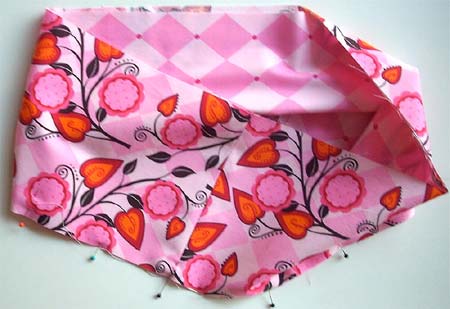
With the wrong side facing up and the edges of the fabric inside the box, pin the 190mm x 240mm piece of Fabric A to the sides you just made. This creates the box bottom. Align the corners of this bottom piece with the vertical seams on the wall, line up your raw edges, and match long sides to long sides and short sides to short sides. The raw edges of the fabric should extend to the outside of the box, and when you look into the box you should see the wrong side of the bottom fabric.
Stitch all around, using a 12mm seam. After attaching, carefully trim the seam allowance to 6mm – we will be absorbing this raw edge into the binding in the steps below, so we want to reduce the bulk as much as possible.
Creating binding and attaching to bottom
Next we will create the binding for the bottom of the box. Trim one of the 45mm x WOF strips and trim to 45mm x 860mm (this is the perimeter of the box plus 20mm for a tail we'll use to finish our binding neatly). Fold the strip in half lengthwise and press. Now fold the raw edges in toward the middle lengthwise seam line, and fold together.
Press. Your raw edges are now inside the binding strip. Repeat to create your second binding strip for the top. Set this top piece aside. Remember, you can choose to use either matching or contrasting fabric for the binding; you could even make the top and bottom bindings out of different fabrics. Pin bottom binding strip to the bottom of the box, encasing the raw seam allowance inside the fold of your bias tape.
Carefully pin. Stitch binding in place, keeping your seam line 6mm in from the bottom folded edges, but still being sure to catch both sides of the bias tape in the seam. Stitch all the way around the perimeter of the bottom, but stop 20mm from the end for finishing. Fold under the end of the tail to create a clean edge and wrap around the start of the binding. Overlap about 12mm and stitch in place, matching your seam line. Be sure to backstitch at the end of the binding to secure it in place.
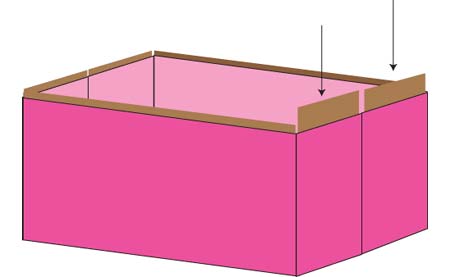
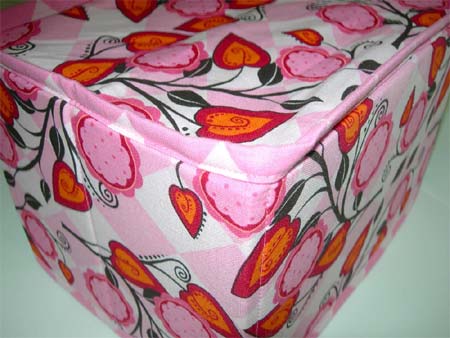
Stiffening the walls with cardboard and attaching top binding
Insert the cardboard pieces between the vertical seam lines to stiffen the walls of the box. Switch the regular sewing needle currently in the machine to the heavy-duty needle. Pin the other binding strip to the top of the box, encasing the raw edges and the top of the cardboard inside the binding. Stitch 6mm in from the edge of the
binding. We are using the heavy duty needle for this step because it is extra sharp for sewing through the cardboard.
Attach the binding, following steps 4 and 5 above. Stitch slowly - your machine is working very hard to get through the thick cardboard - sort of like running uphill. You may find it helpful to lengthen your stitch length a bit at this point, so your machine can get the job done in less stitches.
Making the bottom insert
Lay the 160mm x 210mm cardboard piece on the wrong side of the 190mm x 240mm piece of fabric B. Fold the edges of the fabric over the cardboard, being careful to keep the fabric tight on the corners. Press in place and stitch (you're stitching through fabric and cardboard again so you should still be using the
heavy duty needle in your machine) around all sides to secure the fabric to the cardboard. Stitch close to the raw edge of the fabric so it will lay nice and flat. Press again after stitching. Insert the fabric covered cardboard into the bottom of the box, with the fabric side facing up. To collapse the box, simply remove this bottom insert; the short sides will fold in between the cardboard panels, and the whole thing will fold flat for storage.

sew4home.com