How to restore a steamer trunk
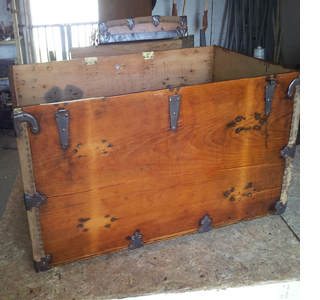
If you are lucky enough to discover a vintage steamer trunk you have the choice of revamping or restoring the piece. Restoring a steamer trunk involves a bit of woodworking, metal and leather work and is extremely rewarding once you see the finished result.


A complete restoration would include refurnishing and refitting the trunk with new materials, which would also devalue the piece. So, before you tackle a restoration it's important to decide whether you are doing it for aesthetic reasons as you want to have the trunk on display in your home - or whether you want to hang onto the piece as a collectible. Where possible, it's always advisable to try and retain much of the original hardware and fittings, or try to source replacements from the same period. But this isn't always possible and replacement fittings are hard to come by.
YOU WILL NEED:
60-, 120-, 220-, and 300-grit sandpaper
Needle-nose pliers
Craft knife
Paint scraper
Leather belts or scraps for straps, patches and leather handles
Buckles, rivets, Fiebings leather dye - hardware for leatherwork.
Wood stain
Polyurethane varnish
Masking tape
Beeswax Polish
CONTINUES BELOW
HERE'S HOW:
Start disassembling the trunk by removing the lid and leather hardware. You'll find that most of it should be held together by tacks and nails that punch through the wood and have their points bent down on the inside to hold them in place, and this is where needle-nose pliers come in handy.
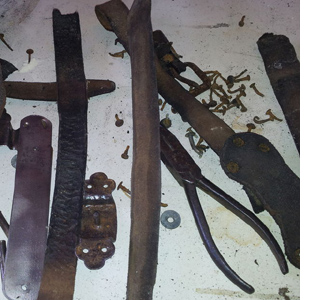
Use the pliers to get under the points on the inside of the box and, as carefully as possible, straighten the tips as best as you can so that the pins can be pulled out without causing damage. The rest of the hardware, such as, the metal trim and hinges can be removed in the same way, but as you'll see later, it can be better to leave them on.
GOOD TO KNOW
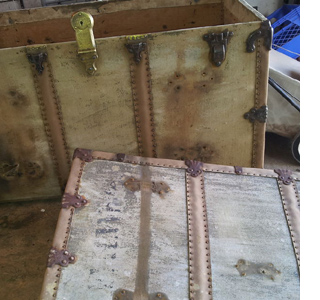
It's better to leave the canvas cover on the trunk at this stage, as you will be removing the rust and the cover offers some protection.
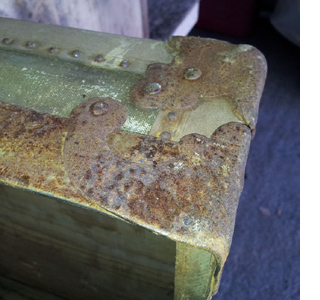
To maintain the vintage look it's a good idea to leave as much patina on the metal as possible. The best way I found was using a wire brush on the end of a drill to buff off the layer of rust, leaving the pitting behind. I tried a brass brush, which is less abrasive, but it left marks on the metal, so I ended up using a steel one. The wire brush also gets into all of the nooks and crannies around the hardware.
GOOD TO KNOW
Don't press too hard - you don't want to polish the metal, only remove the outer layer of rust to expose the darkened aged metal underneath.

The inside liner of the trunk should come out easily, since in the original construction they used a paste of flour and water as a glue. For tricky spots simply soak them with a damp sponge, and scrape them off. Removing any canvas is a bit trickier and you may need to use a craft knife to cut the cloth as close to the seams as possible, cutting around some of the metal work.
For sanding down the trunk, start with 60-grit sandpaper and work your way up to 300-grit, until the piece is nice and smooth. Work carefully over the paper edging with 220- and then 300-grit sandpaper, unless it is badly damaged, in which case you will need to remove completely and replace with comparable paper. Only lightly sand the tacks holding the paper in place, so as to keep the same patina as the rest of the hardware.
GOOD TO KNOW
Wash the inside of the trunk with a mixture of vinegar and water to kill any mould and then let to dry before sanding.
Once sanded and wiped clean you can apply a wood stain. I used a polyurethane varnish tinted in walnut, however you can apply them separately. Apply three coats, allowing drying time between each coat. There's no need to stain the inside of the trunk and in fact, the raw wood look made a nice contrast. Apply beeswax polish to all the hardware. The polish prevents the metal work from rusting again.
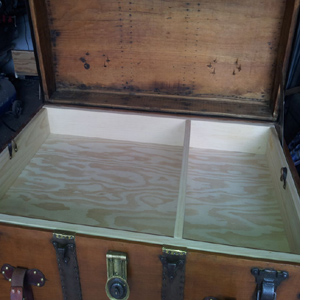
Although it may not always be the case, you may be able to restore the trays in the same way as the rest of the trunk. Unfortunately, the tray in my trunk had completely deteriorated and so I had to build a new one. I used the old tray as a template and cut a piece of 9mm plywood for the bottom, and some pine for the sides. The new tray was stained and varnished to match the trunk.
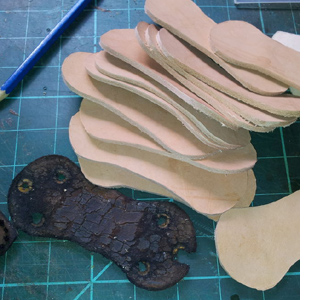
If you had to remove most of the leather detail you can replace it all. If you choose to replace it all, you'll need enough leather to cut your strap holders and handles from, and enough leather to create the straps. The original straps were actually made of several belts riveted together to make longer lengths. Unfortunately, the original leather was beyond repair, so I performed a bit of tooling on the strap holders. I used one of the original strap holders as a template for the new ones and was able to set the tacks through the existing holes from the old nails for a cleaner look. The tacks and nails had to be replaced with brass rivets long enough to push through the wood, and have the tips bent down like the original hardware.
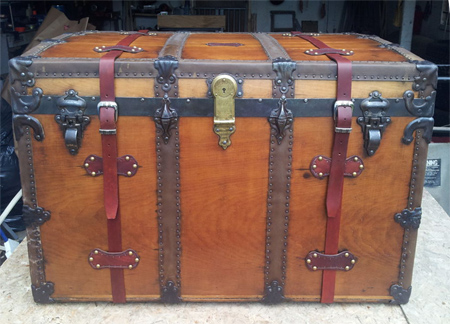
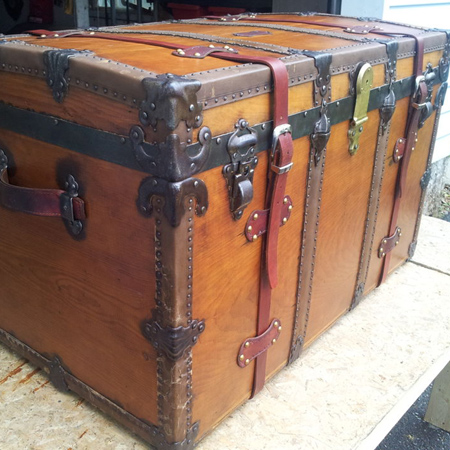
The finished steamer trunk is as original as was possible with my limited resources.