
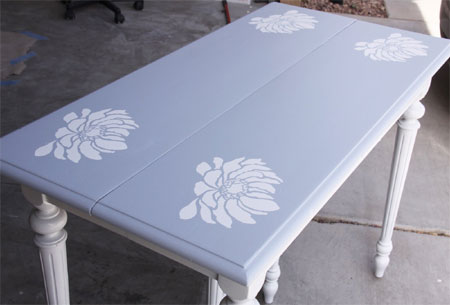
Painted table with stencil design
How to paint a table with a stencilled design. Follow these easy step-by step instructions.
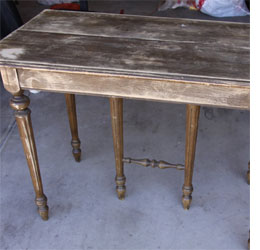
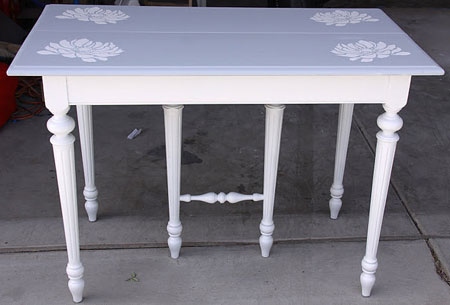
I am so excited to show you the latest addition. I've been wanting a table for my poor sewing machine that's been sitting on my floor for the past year or so. I knew someday I would find the right one. Patience is the key! Finally I got lucky!
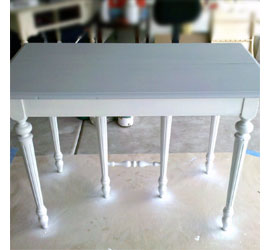
The entire piece was I sanded, first with 120- and then with 240-grit sandpaper, after which I applied universal primer. I let it dry for an hour and then rolled on a pale grey-blue - almost white - matt acrylic PVA paint. I applied three coats, and for the sides I got a paint brush and brushed the sides. They have a curvy edge so I really had no other choice. I let the paint dry for about 3 hours. Make sure it's completely dry if you plan on doing any stencil work. Once finished, it looked a little plain to me so I decided to add a stencil on the top.
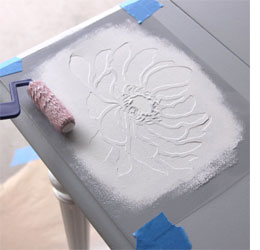
I used white paint for the stencilled design. Make sure the edges are lined up correctly and use masking tape to hold it in place. Don't use to much paint on the paint roller - you can always re-coat if you want it to stand out more. If you have too much paint on the roller it will bleed underneath the stencil. Lightly roll up and down until it's all fully covered and then let it dry for about ten minutes before repeating, if necessary.
Gently remove the stencil and let it dry. For the opposite side of the table I just flipped the stencil over. Make sure the paint on the stencil is also dry or it can leave marks on the table.
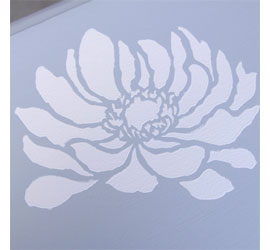
This is a close up of the finish design. The white flower really stands out against the blue-grey background. Of course, you can use any stencil design to create the same effect and to match your decor style. For added protection, apply two coats of water-based polyurethane to the top of the table.
ezprojects.blogspot.com