Table lamp from furniture legs
I was shopping for fabric the other day, and while waiting for my material to be cut, I stumbled upon some carved furniture legs in different shapes and sizes.
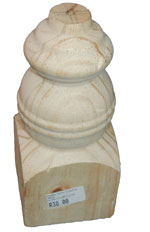
I've seen these before and often wondered what I could use them for, but this time I immediately thought to myself, "Now they would make perfect table lamp bases - and they only cost R38 each!
YOU WILL NEED:
Carved legs or feet
20mm spade bit
Drill/Driver
Small piece of 20mm PVC pipe
60- and 220-grit sandpaper
Light fitting
Pratleys white and a toothpick (or similar)
2 metres of 2-core rip cord
Screwdriver
Dremel Multitool and sanding ring OR 120-grit sandpaper
Wood filler
Woodoc gel stain - cherrywood
Woodoc 10 interior sealer
Cloths
Paintbrush
Gloves
Rust-Oleum 2X or Universal Metallic spray
HERE'S HOW:
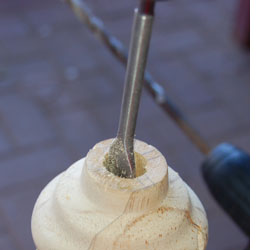
1. Use a drill/driver and 20mm spade bit to drill from the top down inside the leg. You need to keep the spade bit at a straight angle. Drill to the full length of the spade bit and then turn over to drill from the base up. If you've kept the bit straight you will eventually meet the drilled top section. Don't worry if it's not perfectly straight - it's inside and can't be seen.
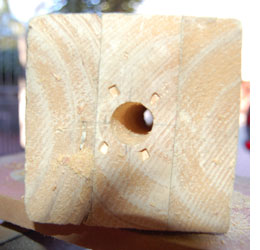
You now have a hole that goes from the top to the bottom of the leg. As you can almost see - even my attempt wasn't perfectly straight!
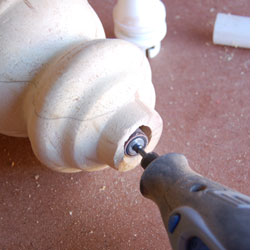
Divas make boo boos too! The top hole was ever so slightly off centre, so I got out my Dremel multitool and used a sanding ring to even out the hole.
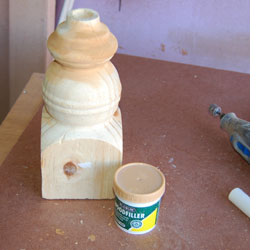
2. The finish on the leg was a tad bit rough and if you have the same problem, use a light layer of wood filler and your finger to fill in. Let this dry and then sand smooth with 220-grit sandpaper.
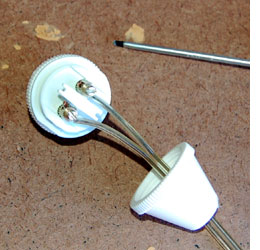
3. While you're waiting for the wood filler to dry, attach the electrical cable to the light fitting. You're using 2-core cable so it's common sense that one wire goes on either side of the connectors. Use a screwdriver to loosen, strip the wire 5mm from the edge and then insert into the connectors, making sure that you tighten. Pull on the cord to check that it's firmly in place and then screw the base back on.
DIY Tip:
Thread the electrical cord through the base before you attach the wires to the connectors.
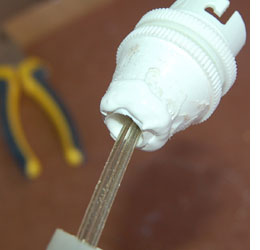
4. Thread the wires through the PVC pipe. This will be the top section of the lamp and you can lengthen or shorten this section depending on how you want the finished lamp to look. Use 60-grit sandpaper to roughen around the base of the fitting before mixing and applying Pratley White around the base and then fitting onto the top of the pipe. Let this cure overnight.
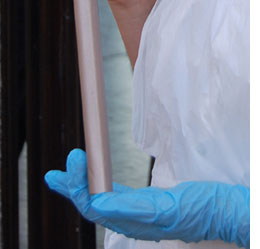
5. Take the lamp top outside and lightly spray on a coat of Rust-Oleum 2X or Universal Metallic spray. You only want to spray the pipe and bottom section of the fitting, so pop on a rubber glove, insert your finger into the pipe and spray - being careful not to spray inside the fitting.
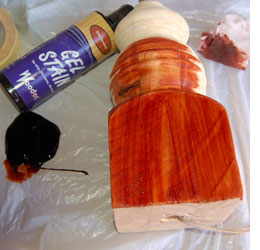
6. Sand the base for your lamp with 220-grit sandpaper for a smooth finish and then apply Woodoc gel stain in your choice of colour - we used cherrywood. DO wear gloves when doing this, as the gel stain can stain your fingers!
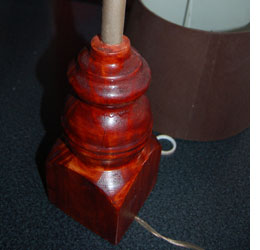
7. Finish off with Woodoc 10 interior sealer in matt or gloss to protect and enhance the wood grain effect. Apply according to the instructions on the tin.
8. Thread the electrical cable through the hole in the base and then pop the pipe into the top. If you don't have a tight fit when inserting the pipe, apply a small amount of Pratley white around the pipe before inserting into the top of the base.
9. To allow for the cable under the base, pop four rubber pads onto each corner of the base.
10. Fit the plug to the end of the cord.
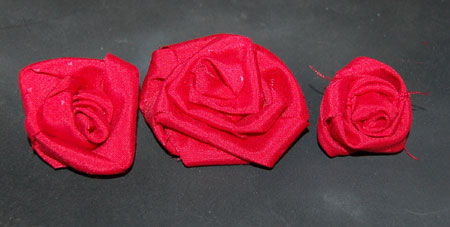
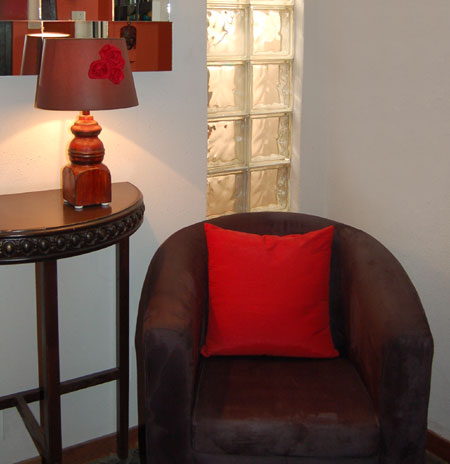
Now all that's left is to add your lamp shade [ Click here to make the fabric roses for the shade ] and insert the energy-saving bulb.