
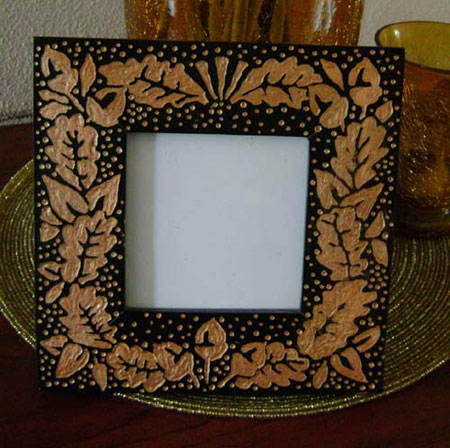
Craft a Carved Picture Frame with Dremel Multitool
You can use Dremel Tools for a wide variety of crafts and DIY projects. In this feature we show you how easy it is to use your Dremel Tool to carve a decorative picture frame.
09/2023
YOU WILL NEED:
Plain, painted picture frame
Dremel Stylus 1100-15
Carving tool 191 (included accessory)
Carving tool 7104 (smaller tip for intricate carving)
Clamp
Gold craft paint and small stencil brush
Clean cloth
Freehand design and carbon paper (or stencil)
HERE'S HOW:
Step 1 - Find your design and transfer onto frame
Outline the shape of your picture frame onto a piece of clean, white paper. Draw your freehand design within the frame area, or position your stencil within the border and outline the shape with a pencil. Put a piece of carbon paper between the paper and frame and transfer the design onto the frame.
Step 2 - Carve out the design
Clamp the frame to a flat, steady surface and start to carve out the design. Start by outlining the design to be carved out, removing the larger area once you have completely outlined the entire design.
GOOD TO KNOW
Don’t press too hard to start with. For the first pass apply a light stroking motion - the second stroke can be heavier for deeper carving. If you are unsure before you start, practice on a small area at the back of the frame.
Step 3 - Flow the design around the frame
As you move around the frame - move the frame to a more comfortable position, and clamp securely.
Step 4 - Colour in the carved design
Once all carving is complete, use a small stiff, stencil brush and apply gold craft paint to the carved area, wiping the top of the frame clean before the paint dries.